With my city boards completed and some extra parking-lot tiles in progress to stack on top of them, I was still missing an obvious feature of towns and cities: buildings.
I usually start off a project by looking around for existing examples for inspiration. On the many crafting sites and YouTube channels I browse regularly, it turns out there are very few examples of making modern buildings. Among the ones I did find, there were post-apocalyptic ruins, expensive MDF kits, and big (too big for my resin printer) 3d prints… but not much else.
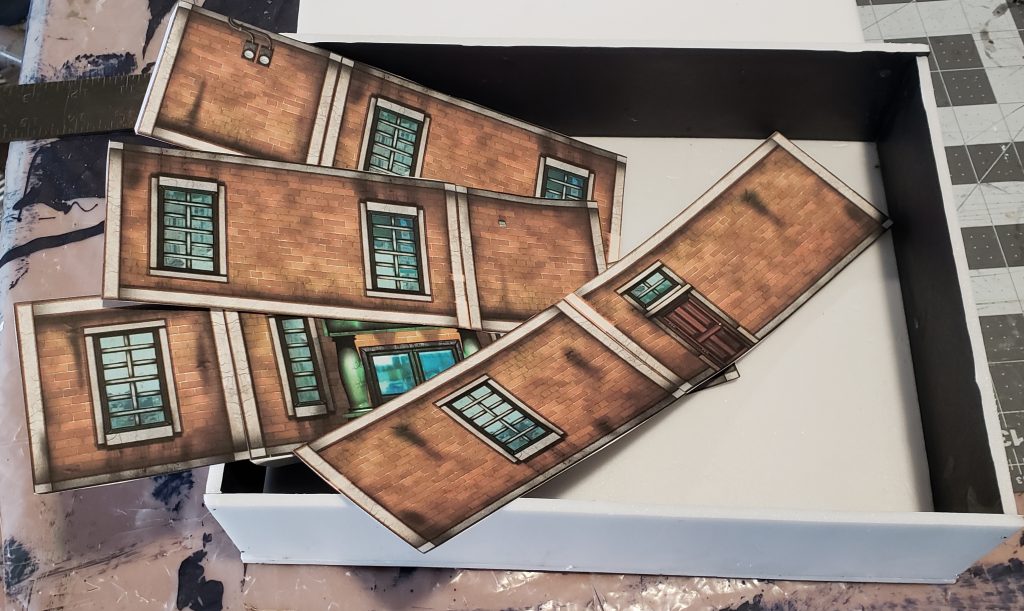
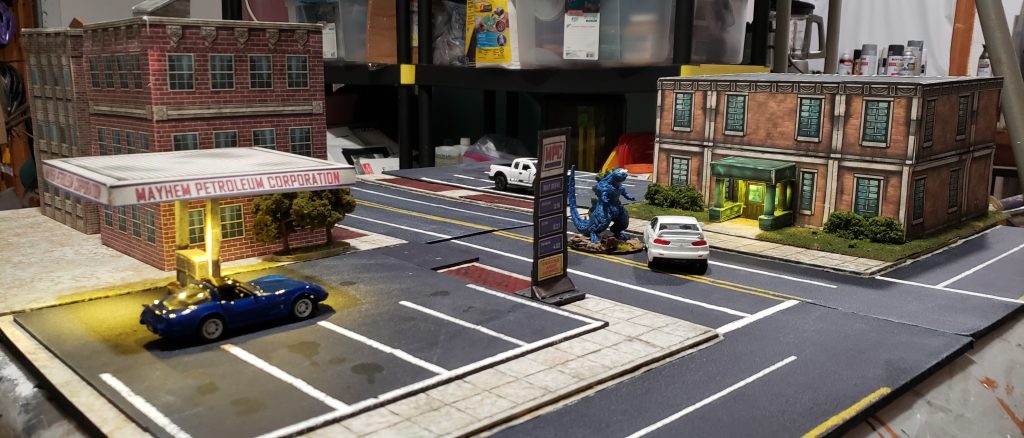
I did run across some papercraft options, though, and ultimately I decided to try out a few of those. Even if I did end up doing some custom builds later, these would hopefully allow me to quickly get an assortment of structures onto the table. I found references to a company called WorldWorksGames which had marketed some PDFs of printable structures a few years ago – but their website appeared to be defunct. It turned out, though, that their products were still for sale through the Paizo web site. UPDATE: Since my last attempt to visit the WWG site it appears to have come back online, with more products available at lower prices (including a “permanent sale”). I ended up getting the “Bits of Mayhem” pack (from the Paizo site, not sold under that name at the WWG site), which includes a building, a gas station, and lots of props and vehicles – though so far I’ve only built the gas station. I also later bought the Mayhem Police Department pack. These seemed a little pricey at 16.99 each, but they offered a fair amount of flexibility and once I owned the files I could print as many structures/vehicles/props as I wanted. I later ended up also picking up Fat Dragon Games’ Capital City Building Pack 1 for $5.99. I found a few sites with small number of free downloadable buildings for print as well.
Gassing up
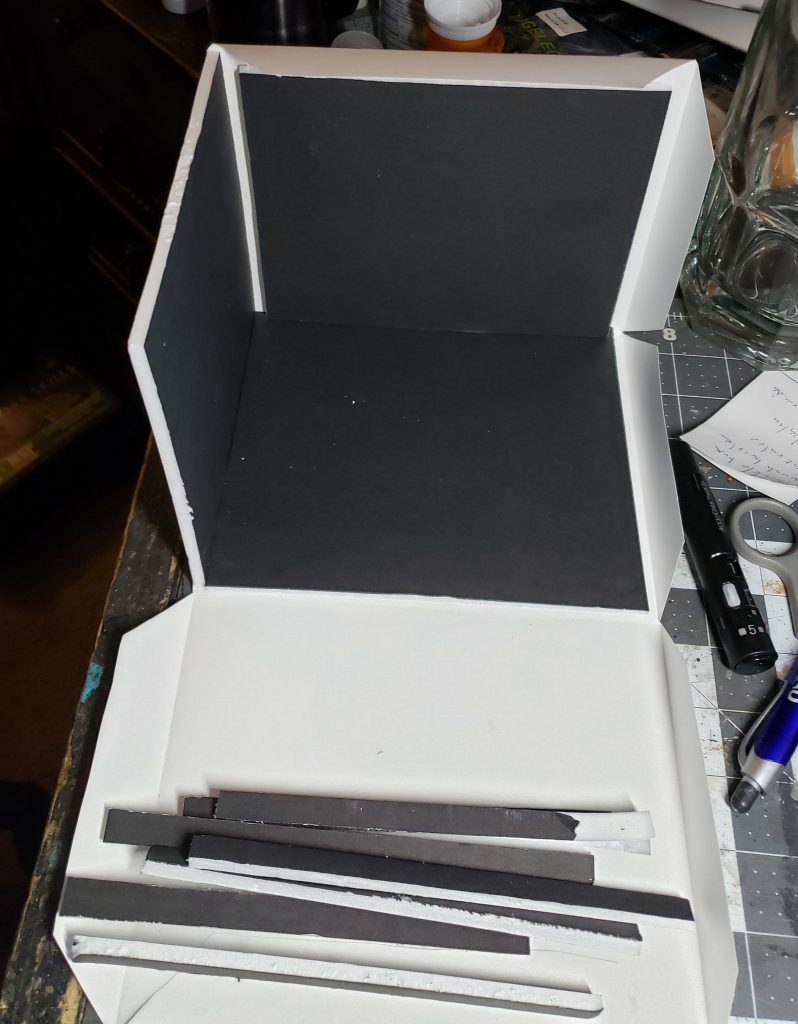
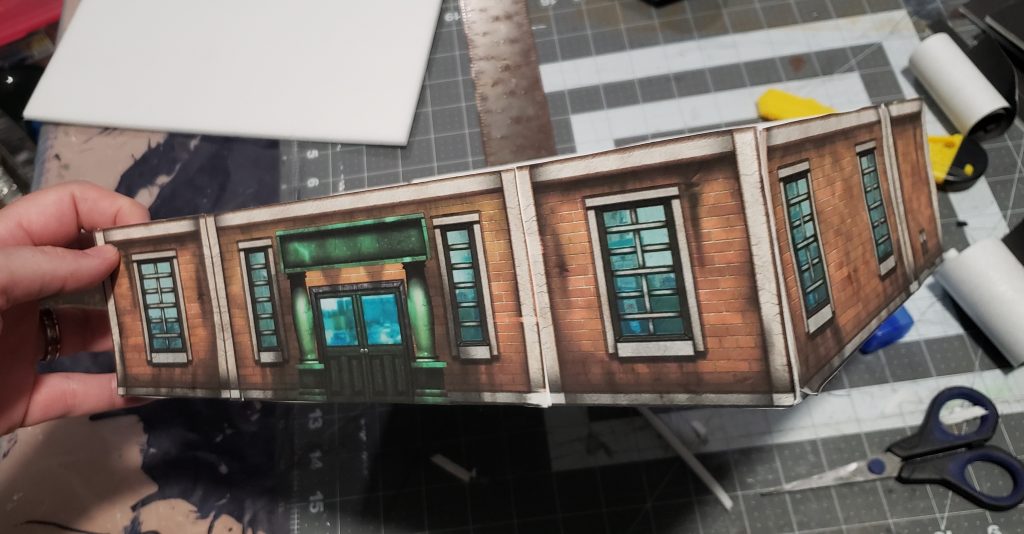
I picked out a number of structures to start with and printed the PDF pages out onto cardstock paper. As I started cutting out the parts I became convinced that I wasn’t going to be happy with the strength and durability of the paper by itself – and that meant lining everything with foam. (In retrospect, cardboard probably would have worked just as well and saved me a trip to the dollar store to restock.)
I also decided, looking at the little bag of LEDs and batteries I’d ordered a while back with the intention of playing with adding lighting to terrain, that this would be a good time to start experimenting with that. The little gas station from the Mayhem packs seemed like a good place for it, so that was what I built first.
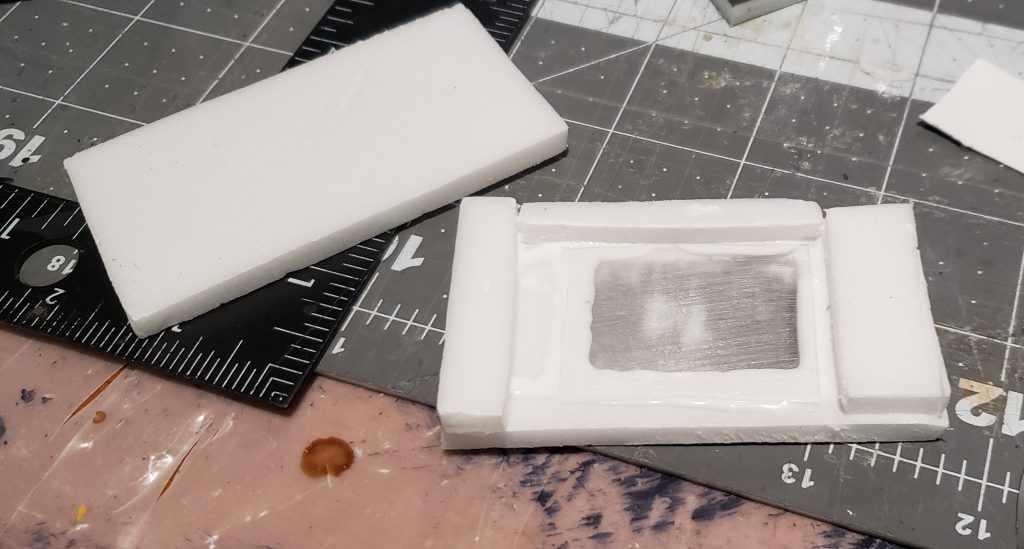
From the underside of the big flat canopy piece I cut out the holes where lights were located on the printout. I cut two squares of foamcore to fit inside the assembly. From one I cut two round holes around 1″ diameter, which would hold the light and battery assemblies. Under that, a 2nd piece had two rectangles cut out which would allow the light to reach the cutouts. I hoped that the indirect lighting would create a diffused look, not too harsh or bright.
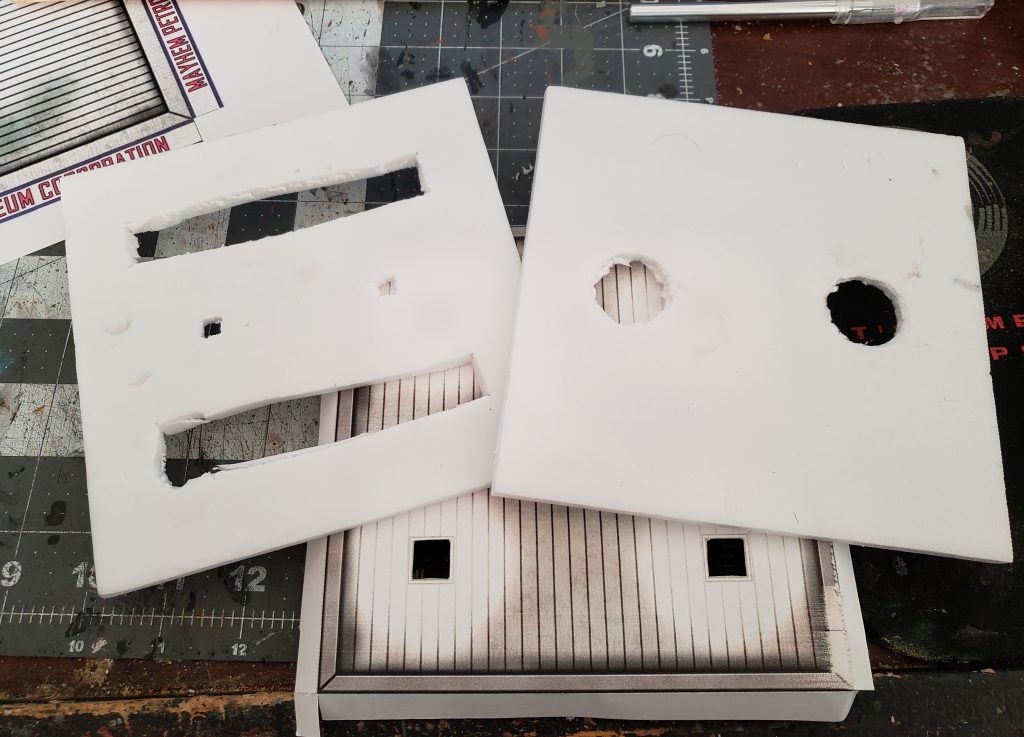
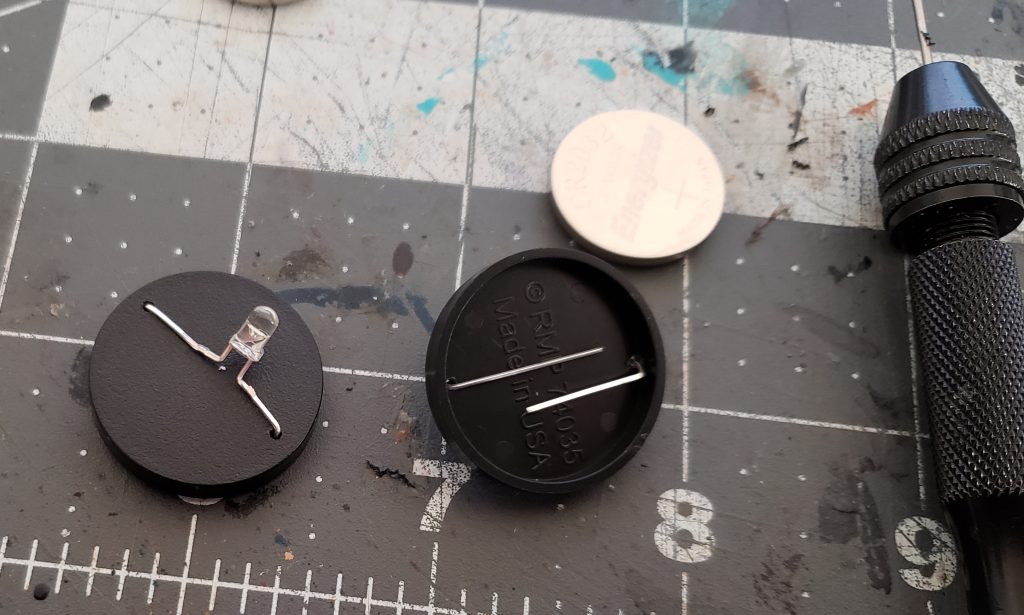
The light assemblies themselves were simple: drill two small holes into a hollow-bottomed 1″ mini base and run the leads of an LED through them. Then fold in the LEDs, clip them to length, and slide a battery between them when it was time to light the lights.
The top and bottom of the canopy would be kept separate so I could insert these into the holes in the foam at game time to light up the station as needed.
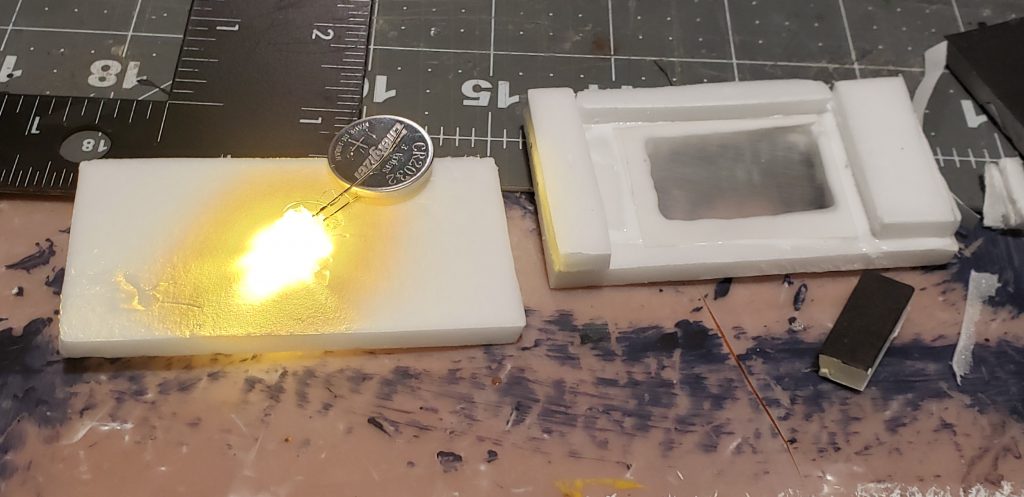
On testing out the whole assembly I discovered a couple of problems. First, the light was penetrating the foam and the cardstock, causing the top of the canopy to sort of glow. Secondly, my initial idea of illuminating four holes from two lights actually didn’t cast much light, and it was coming out angle slightly away from the structure because of the LEDs’ placement away from the actual openings.
To solve these issues I glued some scrap foam into the two existing holes for lights and carved four new ones directly above the cut-outs in the paper, then slathered black craft paint over the top and bottom of my foam insert.
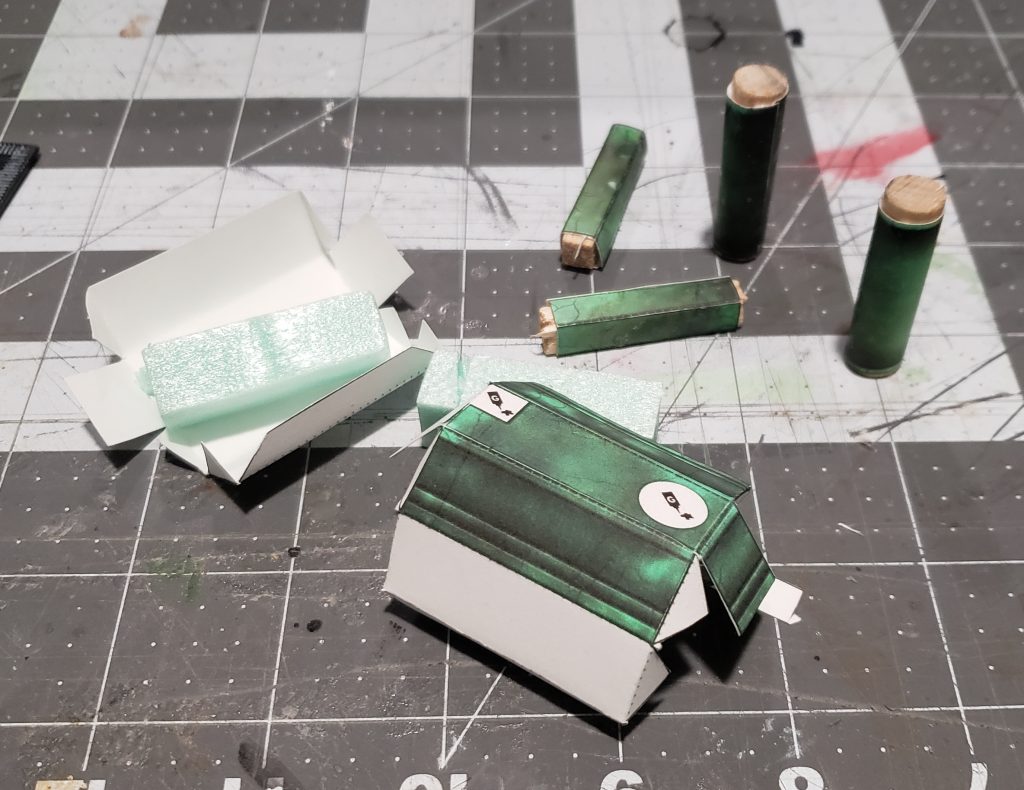
I didn’t tinker with the rest of the gas station parts so they were more straightforward to put together. XPS foam was cut to the shapes of the supports, base, and gas pumps, and the printed images were glued around it. All the parts were glued together except the top cover of the canopy, left removable for access to the lights. Some washers were added under the base to lower the center of gravity and keep the whole thing standing reliably.
I also built the little cashier booth that came with the gas station and lined it with foam, but I don’t know if I’ll be using it… it just feels tiny, even though it’s to scale with the other pieces.
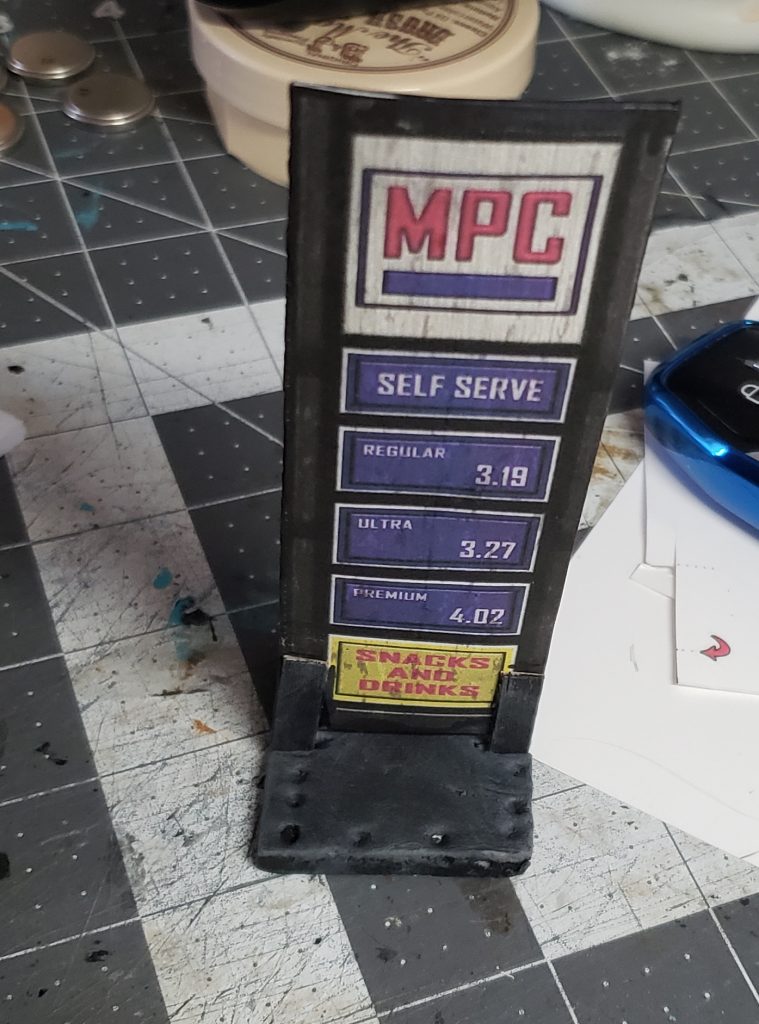
The one scatter bit I made from the gas station set was the sign showing gas prices. It was built without foam, but felt flimsy and was hard to keep standing. I ended up making a little foam base for it and adding some coffee stirrers (one of which I now notice managed to dry a little crooked…) to support the sign better.
Going to town
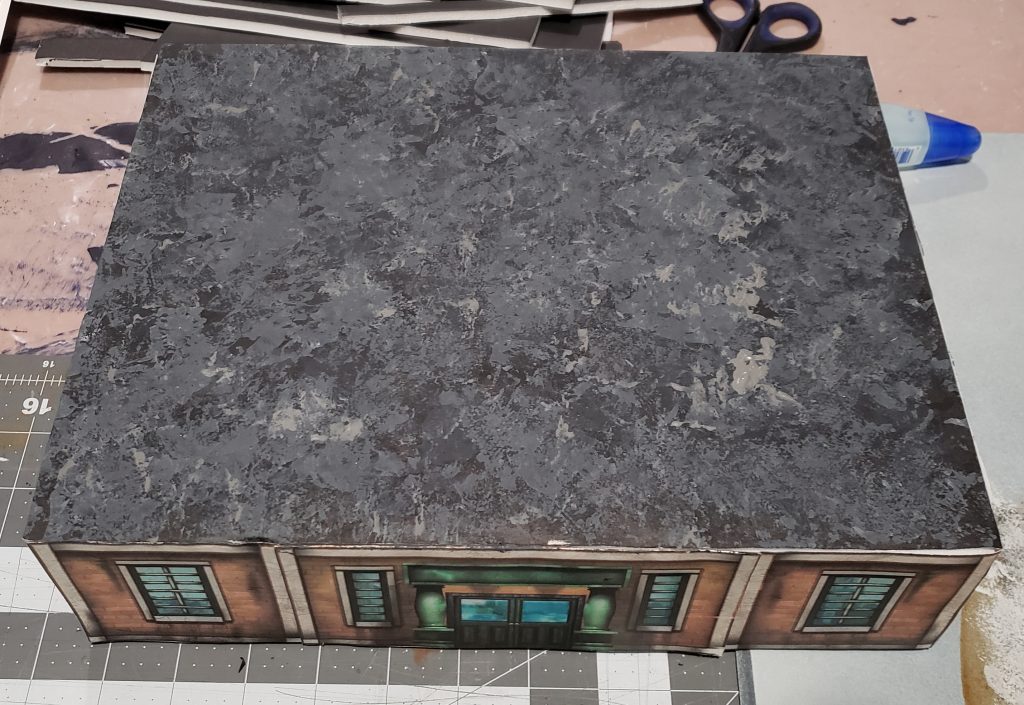
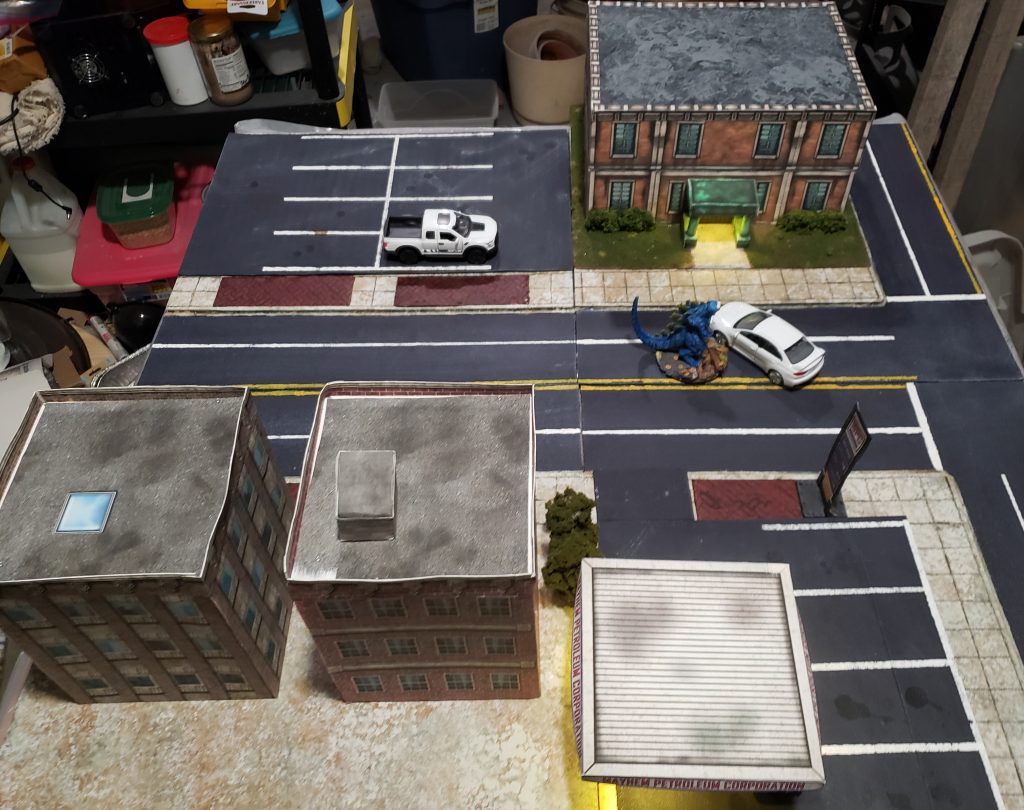
The “I almost completely forgot to take pictures” segment of this project involved the construction of two buildings from the Fat Dragon set and a little auto parts store from one of the collections of free objects. Fortunately there’s not much to tell; the buildings themselves were just rectangles, and to the extent that I deviated from the basic plans it was only to line them with cut-to-fit foamcore as I assembled them – one picture of which I did remember to take. As the picture shows, sometimes I didn’t get the sizes quite right and had to add little filler strips or re-cut pieces.
From these kits I also printed out a roof air conditioner unit and a rooftop exit, which were glued around cut-to-fit XPS.
(It occurred to me far too late in the process that I could have cut openings in the foam walls behind where the windows would be on the printouts. Tossing a light inside at game time would probably have created a diffuse glow through the windows.)
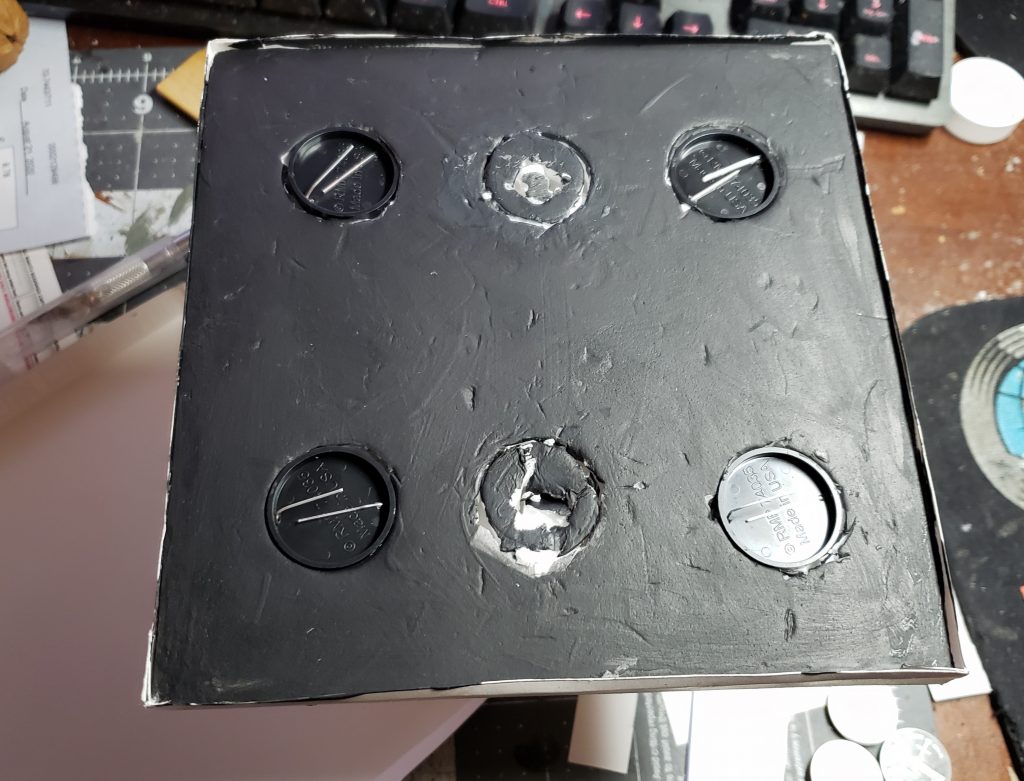
The Mayhem Police Station was a different beast. While the Fat Dragon items were basically just four three-story printed walls glued together, MPD was designed as a modular set of parts so you could create a custom layout and print what was needed for it. You build floor-by-floor and stack them together in whatever configuration you want. The PDF set included inside walls as well as the outside ones, but I wasn’t particularly interested in a playable interior.
I ended up going with a fairly simple rectangular two-story layout, lining it all with foam again. In the image below, each place where the double lines of vertical concrete are located corresponds to where a pair of modular wall segments were joined.
I printed the roof “textures” that came with the kit, but I wasn’t happy with them. They were illustrated to look like they had little… leaves? … sprinkled across them, but they looked to me like somebody had spilled a box of guitar picks instead. I ended up just sponge-stippling some blacks and grays onto foam for the roofs.
The kit also included a fancy front entrance add-on which I decided to build – wrapping the paper bits around foam for support, of course, or dowels in the case of the round pillars. I also decided to give this item some lighting similar to how I did the gas station, but this time with a single LED shining through a bit of clear plastic sanded lightly to help soften and diffuse the light.
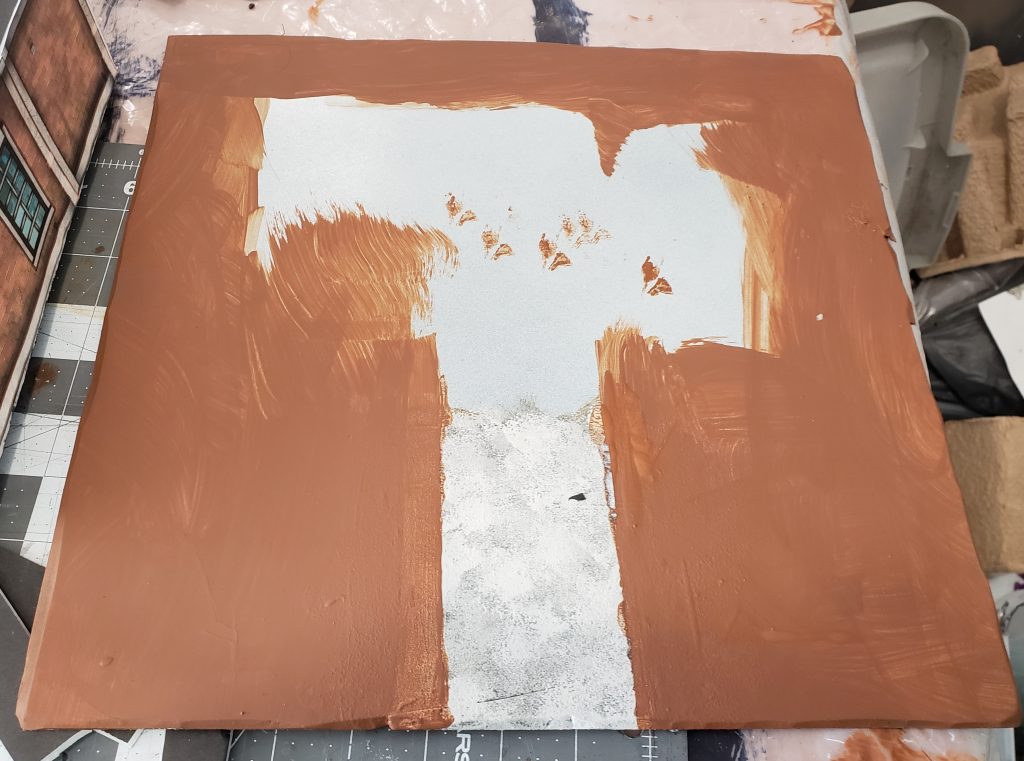
The local town police station is actually a nice and relatively new building, not the old worn-out structure from the Mayhem kit. I wanted to convey some sense that this place wasn’t a crumbling run-down edifice, but to do so without spending a huge amount of effort. The answer that occurred to me was to give it a lawn that would stand out among the vast swaths of concrete and asphalt on my city boards.
I cut out a piece of my still-not-used-for-river tiles ePVC sheet a bit larger than the footprint of my building. After a light sanding with coarse paper to promote better adhesion I gave it a coat with a spray primer. A path down the center was stippled with grays similar to the sidewalks from the city boards, and the rest was painted brown.
The bottom floor was glued down to this base, and next came the same process I’ve used on a number of other builds: Spread on some white glue with an old brush, then sprinkle on a mix of soil and tile grout. Use a dropper to dribble on watered-down isopropyl alcohol to break surface tension, followed by drops of watered-down glue. Let dry overnight, then apply grass flock with more glue.
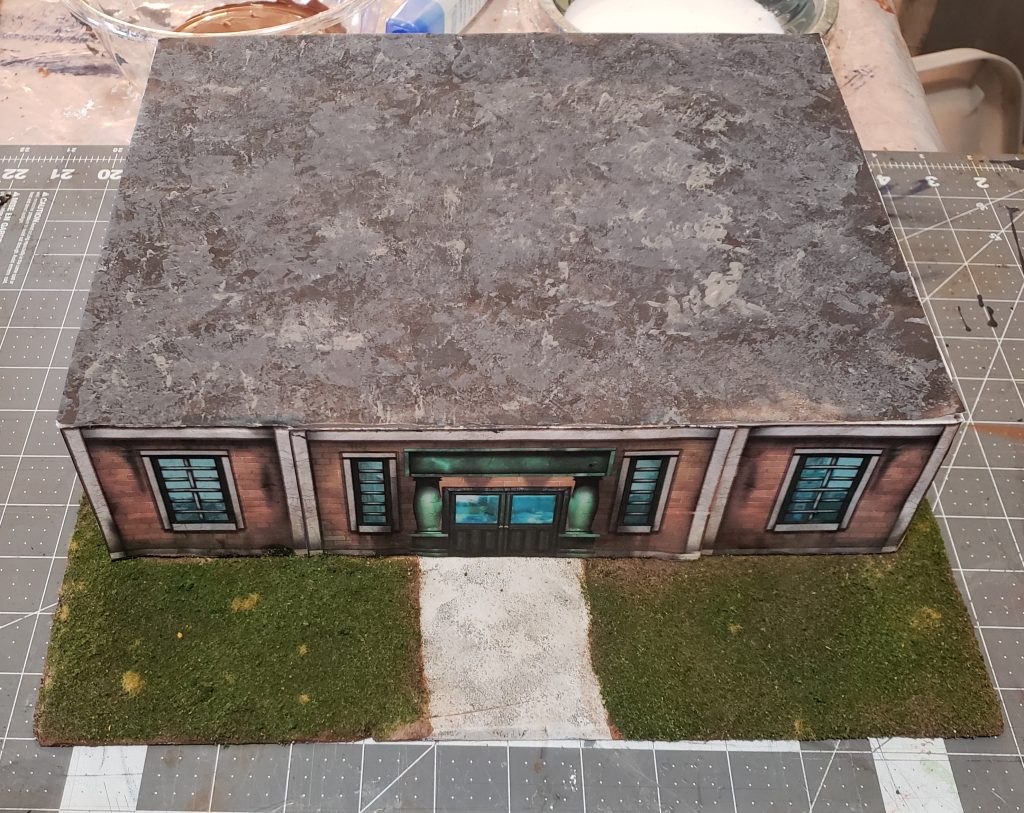
Even with the fancier front entrance in place, the building still felt a little plain. I ended up cutting some little strips of XPS, painting them brown, and gluing course flock around them to create bushes out in front.
My little town was growing fast!

Afterthoughts on papercraft
After assembling pieces of several different paper kits, my feelings on them are mixed – no doubt in part because this was my first time working with them and I’m terrible at gluing cleanly!
Speed: They’re without a doubt a quick way to get decent-looking buildings on your table. Any other method short of buying something fully assembled and pre-painted will take longer – potentially much longer. (Waiting around for many-hour 3d prints springs to mind.) My attempts to add foam and lighting slowed down the process but hopefully improved durability and visual interest.
Durability: To me, this is the big drawback of these products. Even printed on fairly heavy stock they seemed flimsy to without the extra foam layers underneath. The Fat Dragon ones are supposed to be able to be assembled for easy fold-down to be stored flat – obviously I didn’t go for that approach.
The up side is, of course, that when one building wears out, you’re a printout and a gluing session away from replacing it.
Looks: These buildings are really not bad looking. They won’t fool anyone into thinking they’re seeing real depth and textures, but the designs on them are decent and probably better and more detailed than I would come up with trying to do custom structures. They’re limiting, though, in that it’s not easy to deviate from the colors, patterns, etc. included in the PDFs.
The above photos show some issues with peeling corners, uneven joins, etc. – which are all most likely artifacts of my big clumsy hands trying to assemble them, rather than shortcomings of the kits themselves.
My other complaint about all of these it that they seem… just a little small. They’re probably perfectly scaled for traditional 28mm minis, but these days so many minis are “heroic” or 32mm scaled that the doors look small next to them. Likewise the building footprints themselves seem like they’d be bigger in the real world.
Price: While the $17 prices for several of the sets I bought may seem high, it’s actually quite good for the number of printable items you get as well as their re-usability. Both of the pricier kits I chose contain vehicles, scatter pieces, and printable ground tiles as well, none of which I’ve taken advantage of yet. The paper is pretty cheap (250 pages for under $10) and printer ink is… well… er… ahem… uh, not as bad as it used to be? In comparison to the outlay for other methods, the paper option is clearly the price leader, even if you add in a few sheets of dollar-store foam and some LEDs like I did.
I’m not sure if I’m going to go back and build more items from the sets I purchased or not. I have a few custom buildings in mind I want to work on first, but I may come back afterwards to add another structure or two and maybe a couple of police vehicles. I don’t think I’ll be buying any more sets though – what I already have access to is plenty. The one exception I’m considering making is that I’m tempted to pick up Fat Dragon’s “McDoom’s” printable fast-food restaurant.