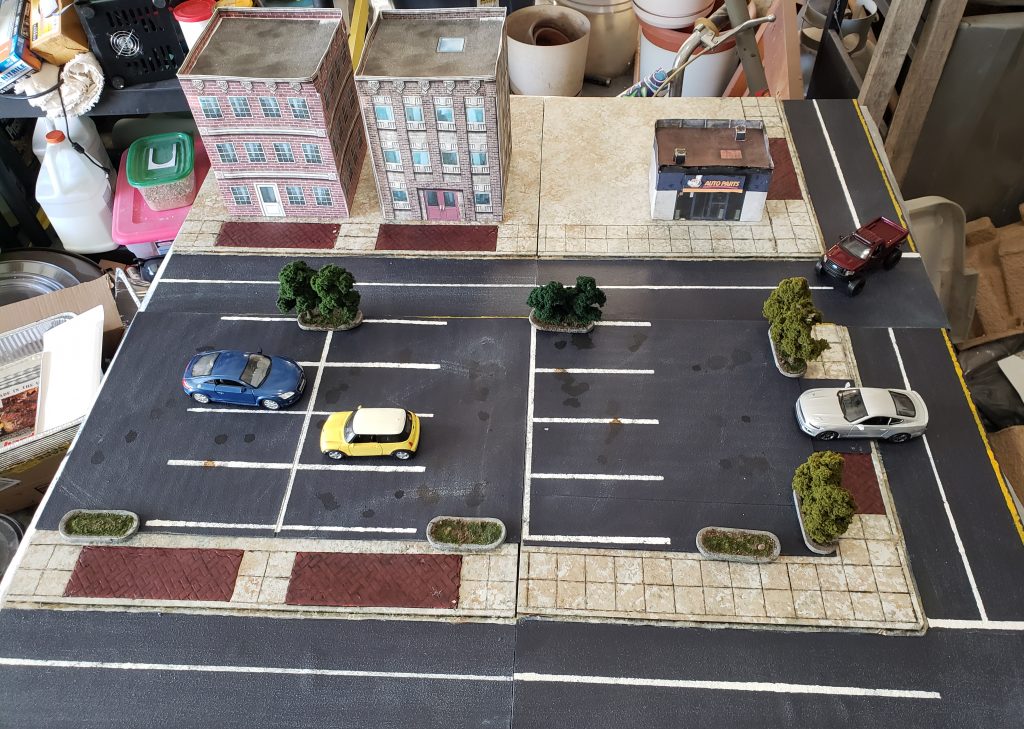
With my modular city boards finally built (more on that saga here and here), it was time to start coming up with some stuff to put on them. An upcoming scene in my Mighty Protectors campaign will feature a mutated and temporarily paranoid-delusional person angrily lobbing cars around a parking lot, so some parking “tiles” to sit on top of those boards seemed a logical and simple next step.
These would have to rest on top of the concrete-paved areas so they wouldn’t blend in seamlessly, but if I made them out of thin enough material their height shouldn’t be too distracting. I still had a bunch of the 1/8″ thick ePVC sheets I’d picked up a while back for the modular river tiles I still haven’t made, so I cut some pieces of that to fit on my boards, along with a few smaller rectangles the same width as my sidewalks to provide entries and exits for the parking areas.
Over the last year or so I’ve picked up a handful of toy cars of about the right scale (I’ve used cheap Matchbox cars previously, but seen against 28-32mm minis they look like something between a small car and a large skateboard.) At first I was thinking about doing several different parking layouts – perhaps even making some of the tiles double-sided with different patterns on each – but as I started arranging cars on the tiles and thinking about how to make sure there was space for both driving and parking, it became clear that there weren’t really too many realistic arrangements possible given the constraints of my table size and the sizes of my city board segments.
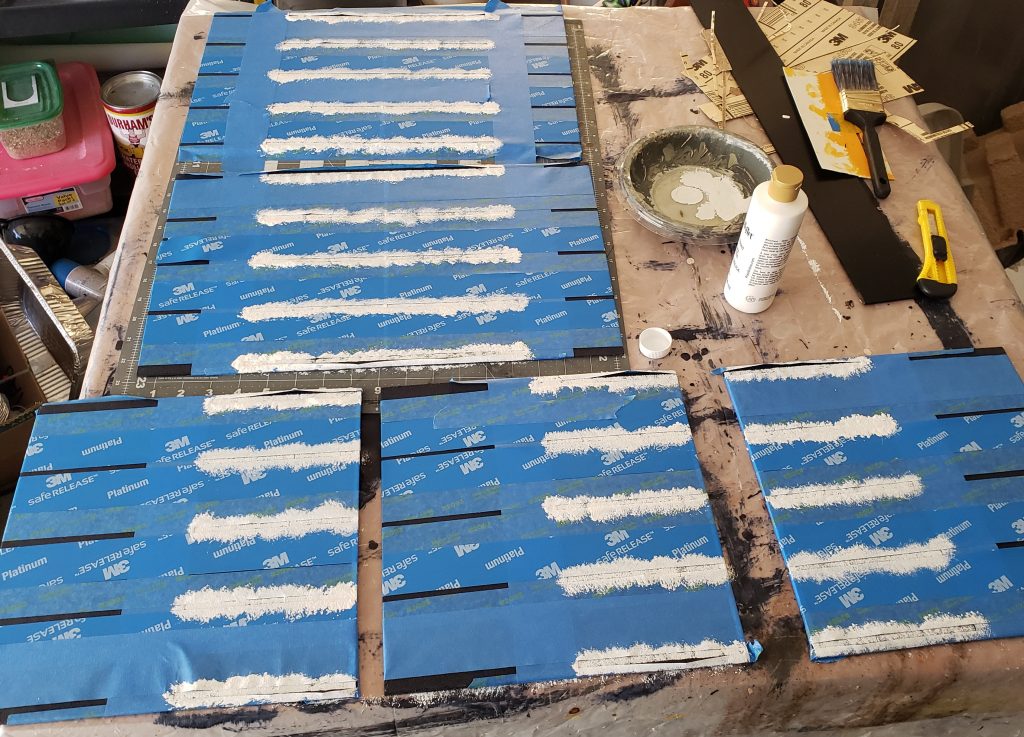
To create the surfaces I used the same method I’d used on my roads: glue down 80 grit sandpaper and paint it from the quart of pavement-colored interior flat I’d had mixed at the local hardware megastore. For laying down the lines I skipped the cardboard guides I’d made before and just laid down a whole lot of tape before stippling on some white craft paint.
I didn’t really do any weathering on my city boards’ roads beyond a light dry-brushing to add some color variety and punch up the texture a bit, but I decided to do a little more here. This came in the form of black and brown washes randomly dribbled on from a dropper to simulate the assortment of oils, spilled drinks, and whatever else that tend to accumulate on parking surfaces over time.
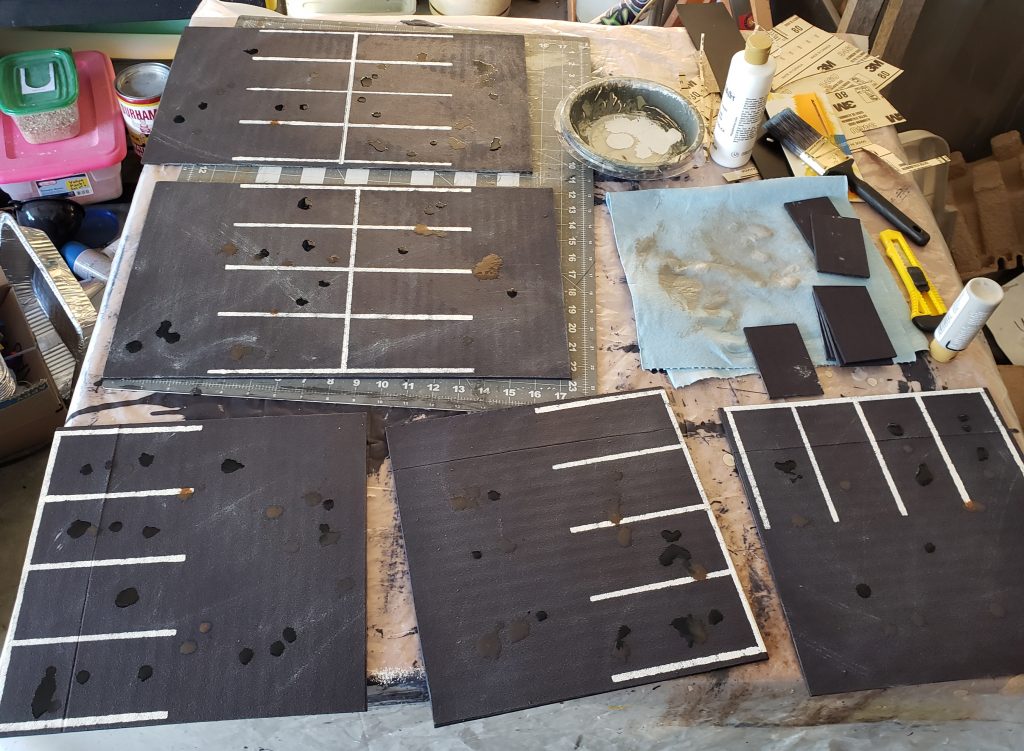
I wasn’t entirely thrilled with the results of this, though. The washes were made using a matte medium which still appeared to have a bit of a sheen in comparison to the actual flat of the paint it was sprinkled on, so the marks stood out a little more than I expected. I sprayed a few layers of DullCote over them but the overall look is still less subtle than I’d hoped for. I think if I tried this again I might do just a few small dots of wash for the oily look but would also use some pigment powders to keep the flat finish on most surfaces.
In which I resist the lure of making more trees
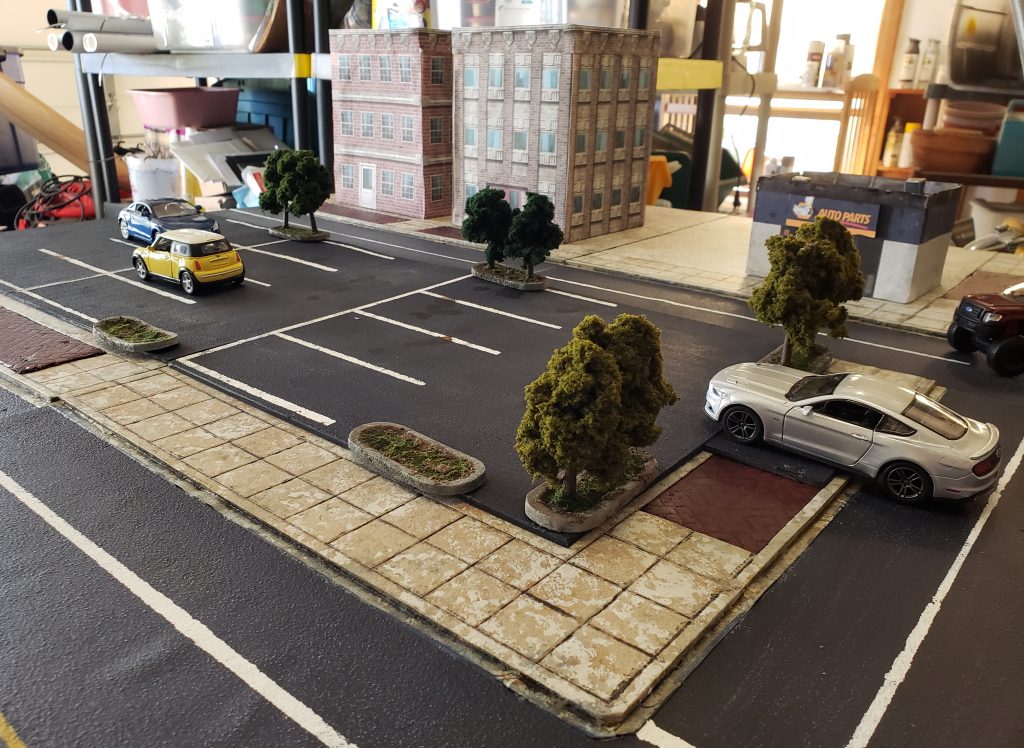
I’m calling them “parking lot dividers” because I don’t know if there’s a more correct terminology for them, but I wanted to make some of them. Those concrete barrier things, usually with some grass in the middle and maybe a small tree or two, that are used to break up sections of some lots.
I started by cutting a few thin 1″x3″ foam rectangles from some scrap. I debated free-handing the rounded edges or drawing something in a paint program to print and glue to carboard to make a guide. But I remembered I had a set of little wooden punch-out window guide things that came as a freebie with one of the Shifting Lands tools for my Proxxon; it turned out these were just the right size both for the outer ends of my dividers and also to trace the inner lines where the concrete would give way to soil and grass!
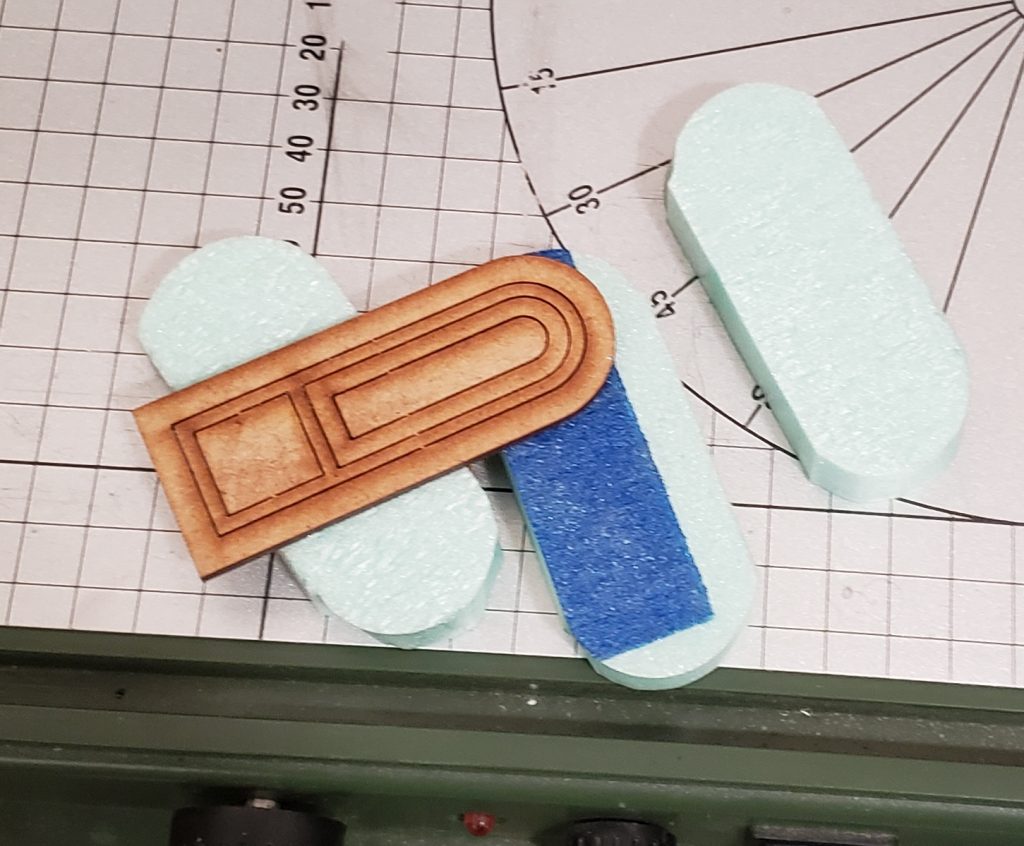
Curving the edges was as simple as holding the wood piece against the slice of foam and using the hot wire to carve away the corners. Similarly, the inner dividers were marked by tracing around the next-smallest window piece with a pen.

I started making shallow cuts through the middle areas of each piece and scraping foam away to carve a slightly recessed area to texture and flock, realizing early on that I could actually leave the centers alone and just rip a little away around the inner rims. This would also leave enough meat in the middle that I could go in later and cut some foam away from the underside to add washers to help weigh down & stabilize the ones that would be adorned with trees.
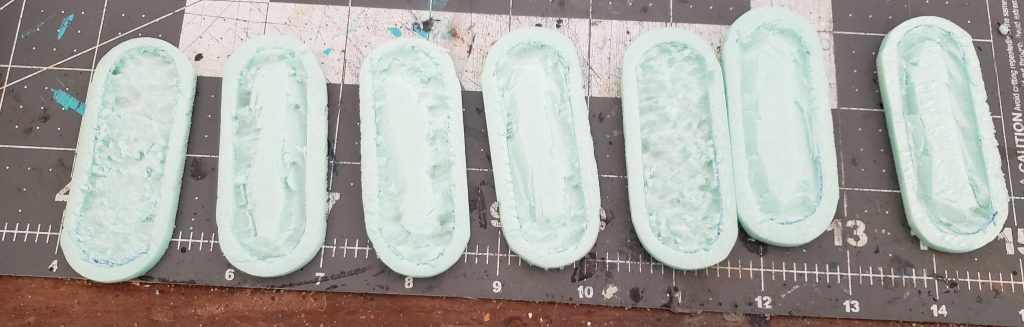
From there the pieces were coated with the usual black-and-Mod-Podge mix, and the rims around them were painted in gradually brighter shades of gray using a stippling technique similar to how I did the sidewalks on the city boards, but with a brush instead.
I have a history of tree builds and projects going completely bonkers, and that wasn’t a rabbit-hole I wanted to dive back down into for this one. So though it pained me to do so, I grabbed my monthly discount coupon and drove to Michael’s to grab a pair of their little miniature tree sets. The trees were sized well for this project and not bad looking, but I couldn’t completely leave them alone – they had to be pulled off their bases to be used in my dividers, a process which drew my attention to their shiny brown plastic limbs and trunks. Where I could do so without messing up the greenery, I scuffed the plastic a little with some light sanding, then applied a brush-on primer. When that dried I painted it a darker brown and then did a heavy gray dry-brush over the surfaces I could reach.
Trees were glued into several of the dividers, then I applied a soil-and-grout mixture with PVA glue to the inner surface area on all of them. A dropper was used to drip on a little isopropal-and-water (with a drop of dish soap) solution, followed up with a few drops of watered-down PVA. After drying overnight, the soil area was hardened and tough. More PVA glue was dabbed on with a paint brush, and green flocking was applied.
The results, filmed in glorious Messy-Garage-O-Vision and featuring my early attempts at papercraft(-ish) buildings (more on them later):
Pingback: We built this city! We built this city on... foam... and... er... paper. - (Re)Turning (to) the Tables