So my first go at making city tiles went badly, but I was determined to adjust my methods and try again. I was also, I decided, not going to compromise the size I’d originally intended to make the boards – they were going to fit on my table in a 4×4 configuration without poking anyone!
I was able to remove the foam and sandpaper from my first attempt from the 24″ MDF they were mounted to through a lot of pulling and a little scraping. I once again began to weigh the merits of finally shelling out the cash for a table saw and began to research them more seriously. I ran across a device called the Rockwell Bladerunner X2 (paid link) – less expensive than a full table saw, portable and small/light enough to fit on a shelf when not in use, and able to make the kind of cuts I needed. The reviews of it on Youtube were generally positive and there was one in stock at the local Lowes… so in the end I couldn’t resist.
I made some test cuts first on some scrap wood, which turned out to be a good idea because it took some practice and a bit of tinkering to reach a point where I could consistently make straight cuts. One issue was that on the table surfaces where I tried it, the device tended to move as it vibrated. There’s a little fold-out wire catch on the bottom that’s designed to hook around the lip of the table to keep it from moving around, but that kept popping up during cutting. I ended up sitting it on my front steps where the texture of the concrete helped to minimize its tendency to wander. I could kneel at the base of the steps and feed the MDF from there. I also found that removing the top arm and making the cuts with just the bare blade was easier than cutting with the arm in place on these thin boards.
So more than a month since the start of the build, and at considerably more expense than I’d planned for, I was finally able to get the set of 18″x18″ boards I’d wanted at the start. And I had a new toy to play with.
Revising the plan
While researching and learning to use the saw I had time to rethink other aspects of the build, and I made a few choices about what would be done differently this time around.
- Magnetization was out. I hadn’t found better options for doing the whole board, and hiding individual magnets under the foam in just a few places didn’t seem worth the effort.
- I wasn’t going to use the mis-tint paint I’d used last time – instead, I wanted to stick with craft paints whose colors I could easily duplicate later if needed for repairs, matching items, or new boards.
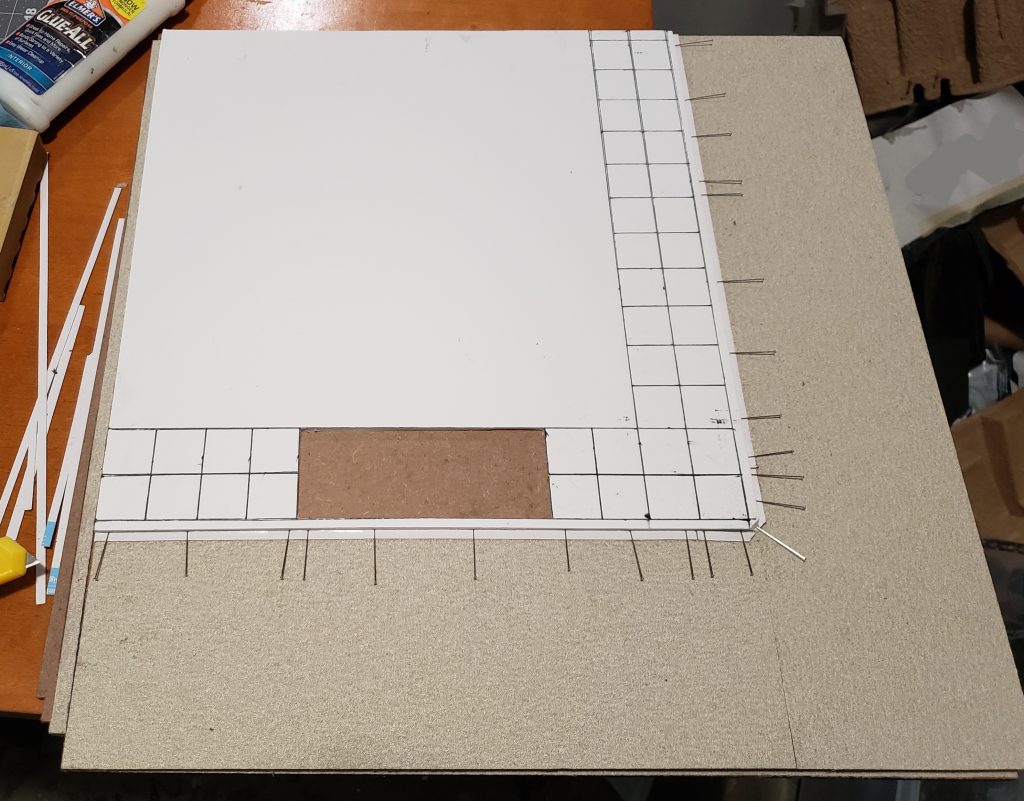
- This time I was going to follow the recommendations from Mel’s video about using pins to hold down the gutter pieces while the glue dried
- I was going to do fewer brick sections, but they’d be scaled a little better. This time I would cut them out and paint them separately, then glue them back in.
With these in mind, I glued down the sandpaper roads, wide enough for a travel lane and street-side parking. Next came the foamcore – sidewalks were marked, brick areas were cut out for separate treatment, and the foam was glued into place.
Thin cardboard gutter pieces were glued on and pinned in place. The pins didn’t fully alleviate the curling, as can be seen in some of the later photos, but they helped.
I was running low on the Pavement paint color I’d used previously, so I went out in search of more at local craft and department stores… finding only one small container of it in all my searching. It was out of stock on Amazon and other online outlets as well.
During the first build attempt I’d used quite a lot of it, and definitely didn’t have enough to do multiple coats across six (albeit smaller than before) boards. I ended up making yet another trip out to the local Lowe’s Depot (they’re so close together here that the parking lots are connected) with a Pavement sample in hand. I found a Glidden color called Napolean that matched well so I had a quart of it made up in their cheapest interior flat paint. It looked like more of a deep blue when wet, but dried down to the color I wanted. (I also tested a drop of Pavement over Napolean and vice-versa just to see if either could be used to patch the other in the future – no luck there, though, as the more matte finish of the craft paint was visibly different from the house paint despite their color similarity.)
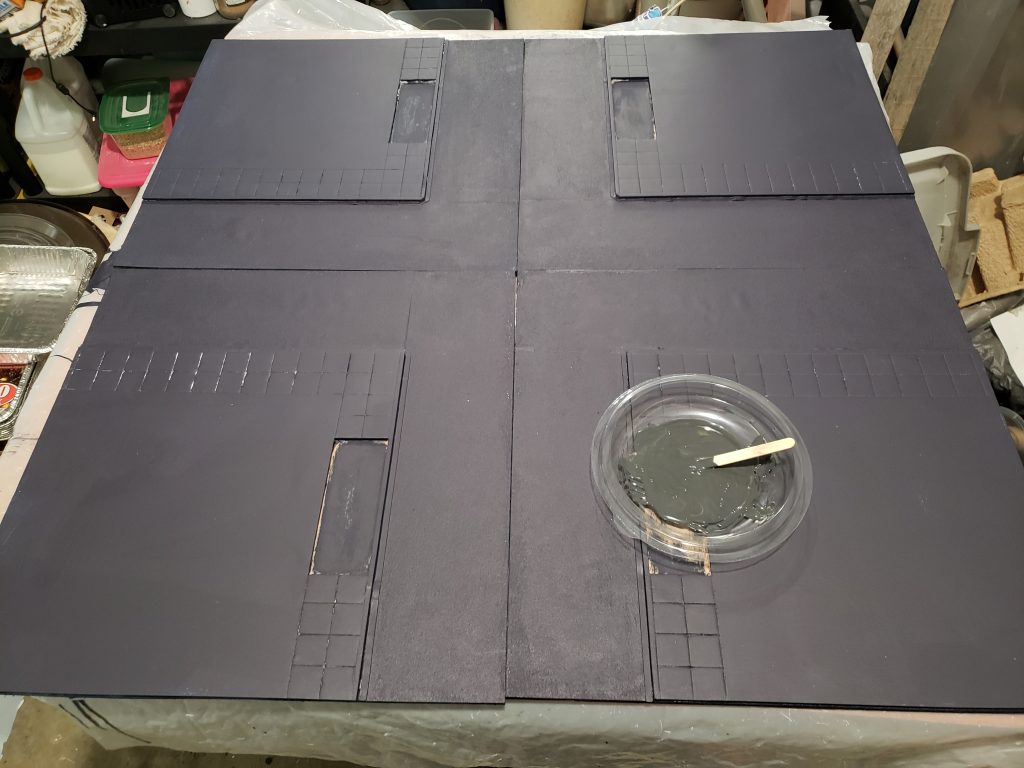
All six boards got two coats of the new paint, which would serve as the road color and the base on which the other areas would be built into lighter shades.
It’s the stipple things in life
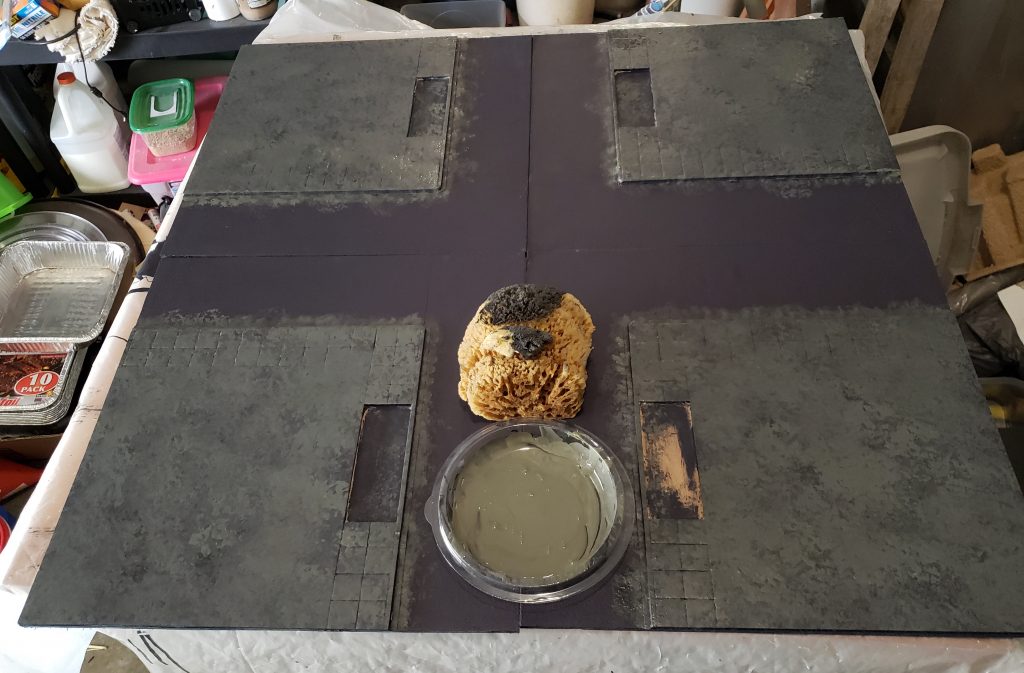
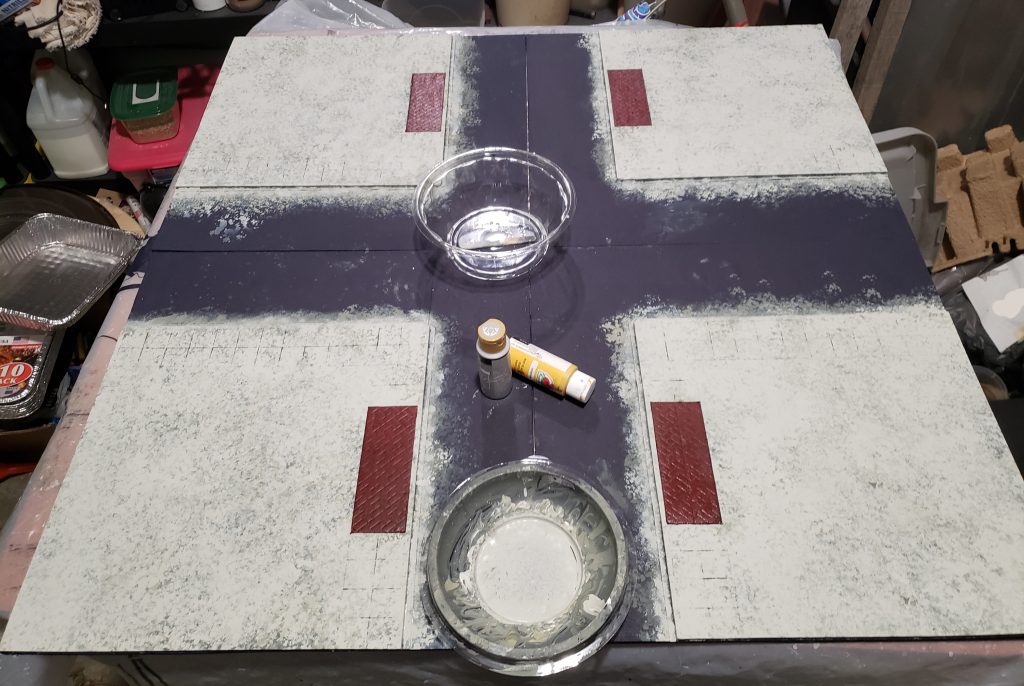
Next came the stippling process. Pouring paint onto a Wawa salad container lid to provide a wide area to dip sponges on, I began patting increasingly lighter shades of gray craft paint – with a touch of yellow added – onto all the raised surfaces. A large sponge covered the big areas quickly, and a small artist sponge did a better job of getting into the right-angled gutter sections.
In between waiting for these layers to dry, I poured some Windex into a flat plastic container and started laying the brick cut-outs into it one at a time. Briefly soaking one side of the Elmer’s foamcore in this solution breaks down the adhesive to allow the paper to be peeled more easily.
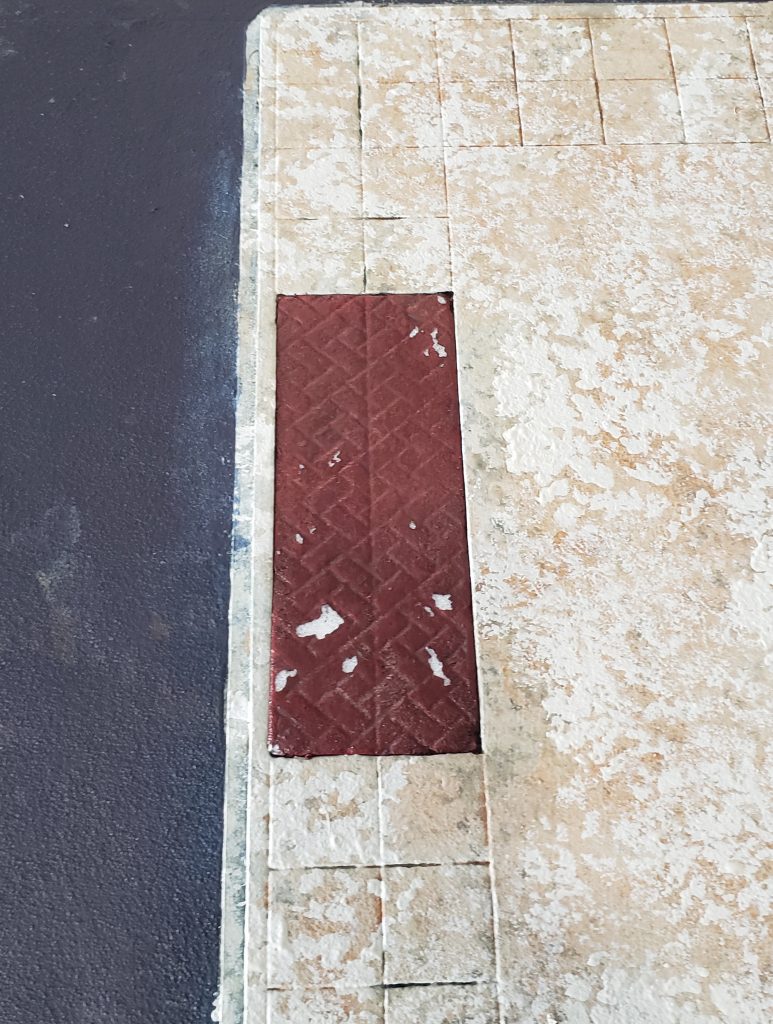
Once the top side of each piece was exposed, I used a 3d printed texture roller to apply a criss-crossing brick pattern to them, which was more interesting to look at and better scaled than my previous hand-drawn ones. Working on this project had made me more observant of details as I sat at the traffic lights in town, and one of the things I’d noticed was that the sidewalk brick colors were pretty uniform in most areas. So this time when I applied the base Tuscan Red, I didn’t single out individual bricks to re-color as before.
I’d planned to apply a wash to the bricks before gluing them back into the main boards, but I also knew I was going to be doing what’s sometimes referred to as “pin wash” – using a thin brush to apply color directly into recesses rather than just slopping it across a whole surface – to bring out the lines of the stippled sidewalks. I decided to just glue the bricks into place pre-wash and take the extra few minutes to trace the lines directly while I was working on the sidewalks also.
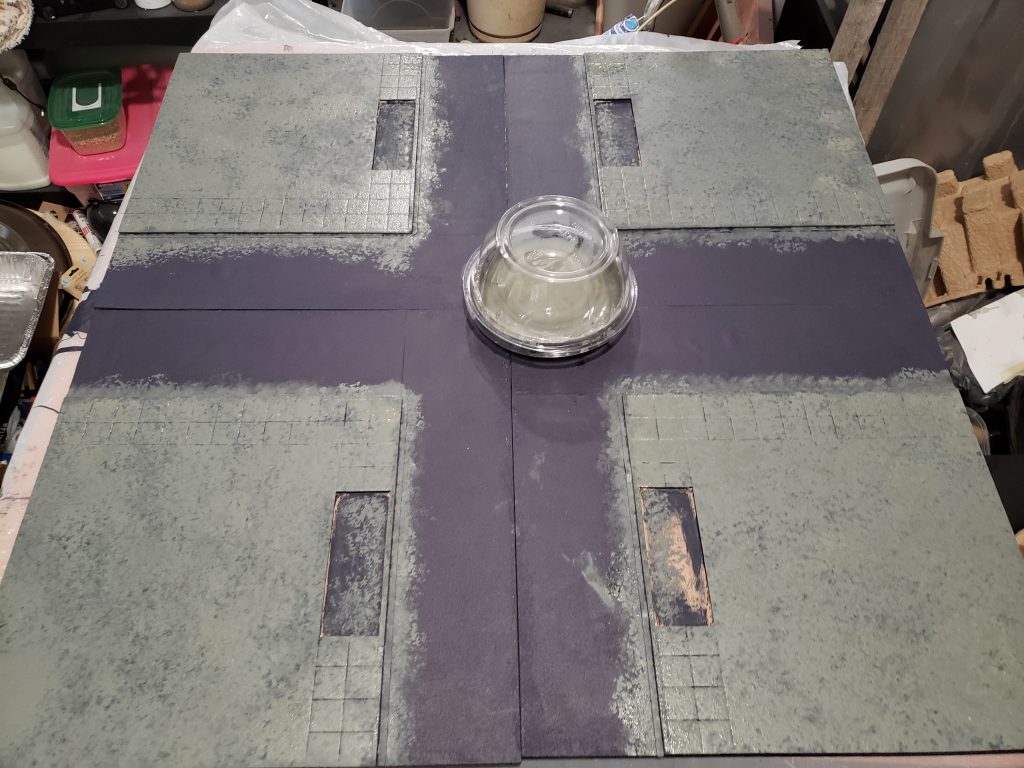
There was one more step to go before tracing those lines, however. In the Terrain Tutor video, Mel dabbed on some spots of brown paint and swirled them around with a wet brush to introduce just a touch of color into the concrete; I liked the results he got and did the same with some brown craft paint.
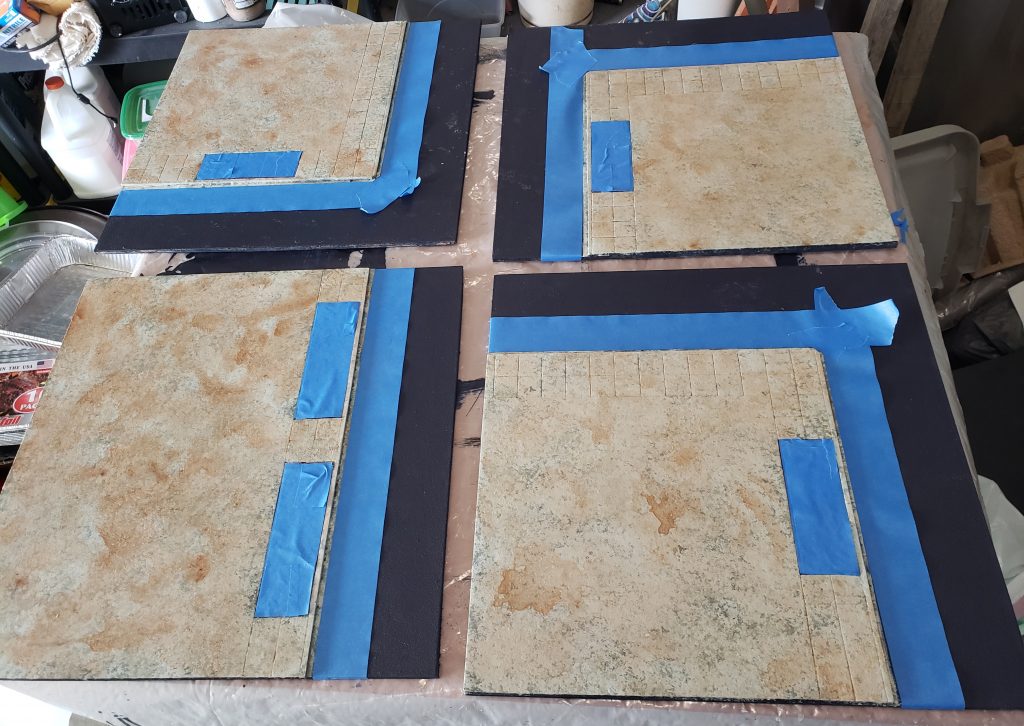
While that very wet surface dried, I cleaned up the stipple overflow from the roads and left everything to dry for a while. When I returned, I found the brown areas had dried somewhat blotchy – I think the amount of water mixed in might have allowed it to continue gradually pooling for much longer than I’m used to with a normal wash. I wanted to try to fix it with another light stippling of the brightest gray over the brown, but there was a problem: I would have to mask off the bricks to avoid having to repaint them, and… well… the first part of this article explains my recent experience with masking tape.
Still, with everything fully dry now and no washes to be applied over taped areas, my bricks should survive, I reasoned. So with some trepidation I masked them off and began my final round of stippling.
When I peeled the tape back off I did see a few little torn spots across the brick surfaces – perhaps because in this case the paint had been applied directly to the foam rather than to a paper layer on top. They were shallow, though, and easy enough to repaint.
Next was the pin wash method mentioned above. I ended up spreading the wash a little more liberally across the brick surfaces than originally planned, to add a little variation in shading here and there.
Reading between the lines
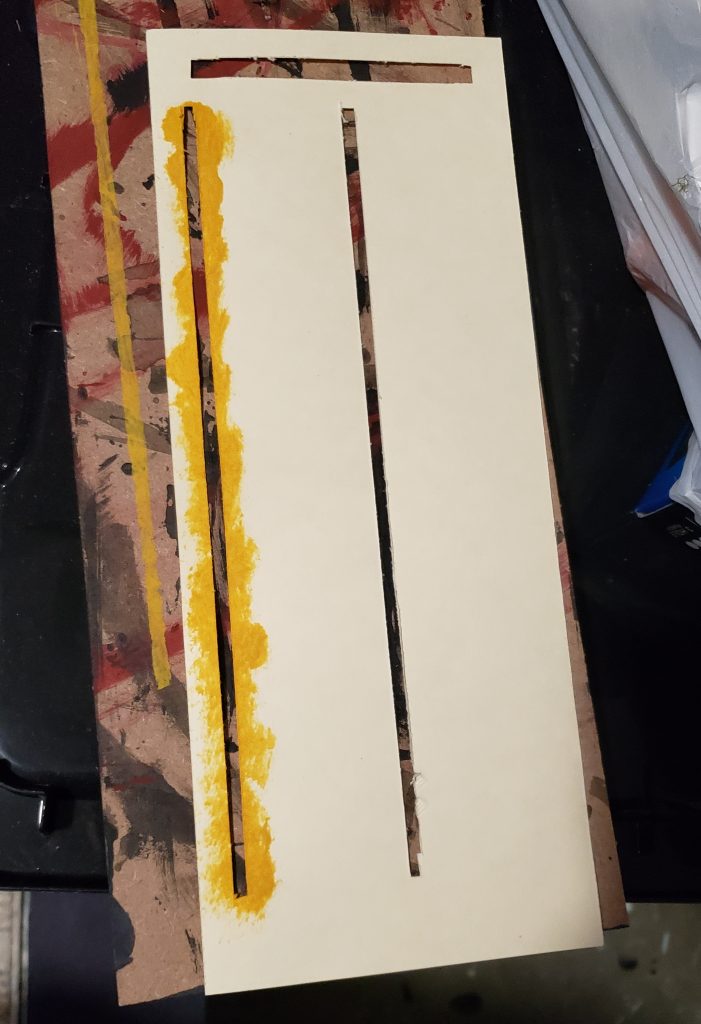
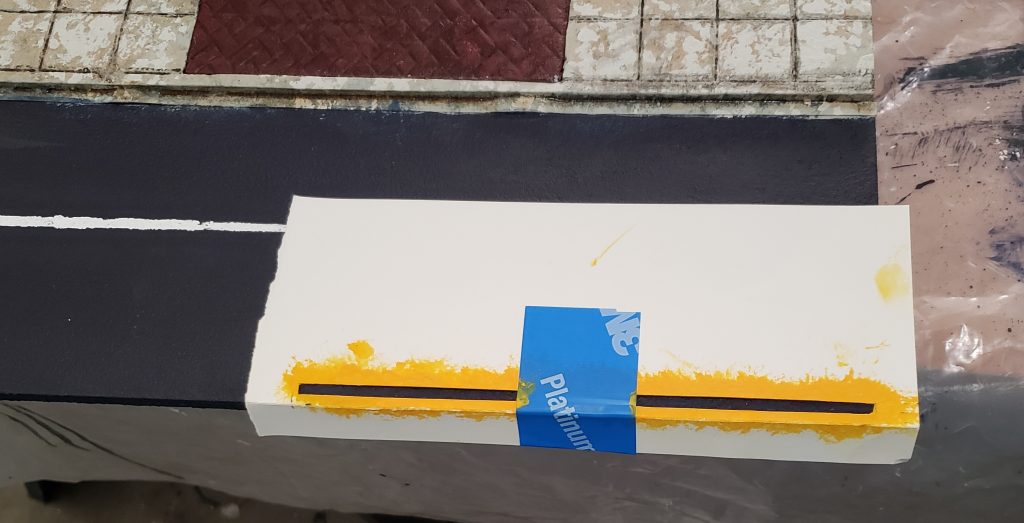
All that remained was to put some lines on the roads. I knew from an early attempt at road-making that there aren’t many ways to do this cleanly on a textured surface. The favored method seems to be masking and stippling, so that’s the one I went with. Rather than trying to precisely place a lot of masking tape on a sandpaper surface it had trouble adhering to, I cut a a pair of templates from card stock. The first let me press it up against the rise of the foamcore section so I could slide it into position and easily make lines parallel to the curbside at the right position. The outermost opening on this one had a lot of problems with buckling during painting, so I made another for those lines. This one had a fold I could use to guide it into place along the board edge.
After a very slight gray dry-brushing on all the road surfaces to punch up the texture just a little bit, everything got a coat of gloss spray varnish for protection followed by a coat of matte to dull the shine back down.
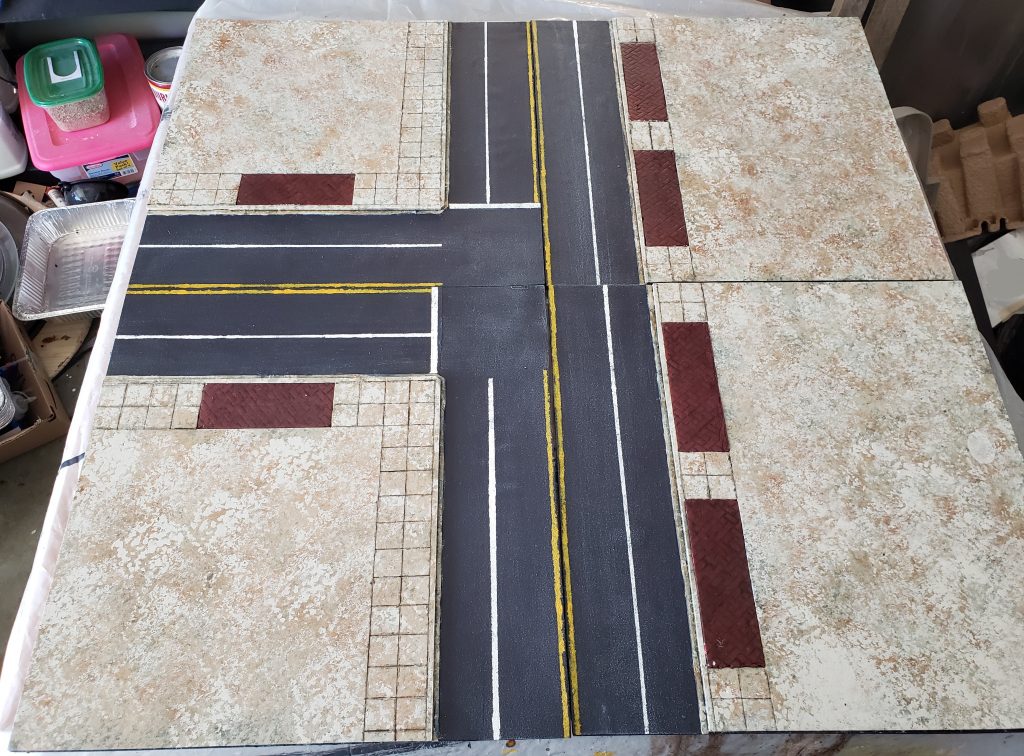
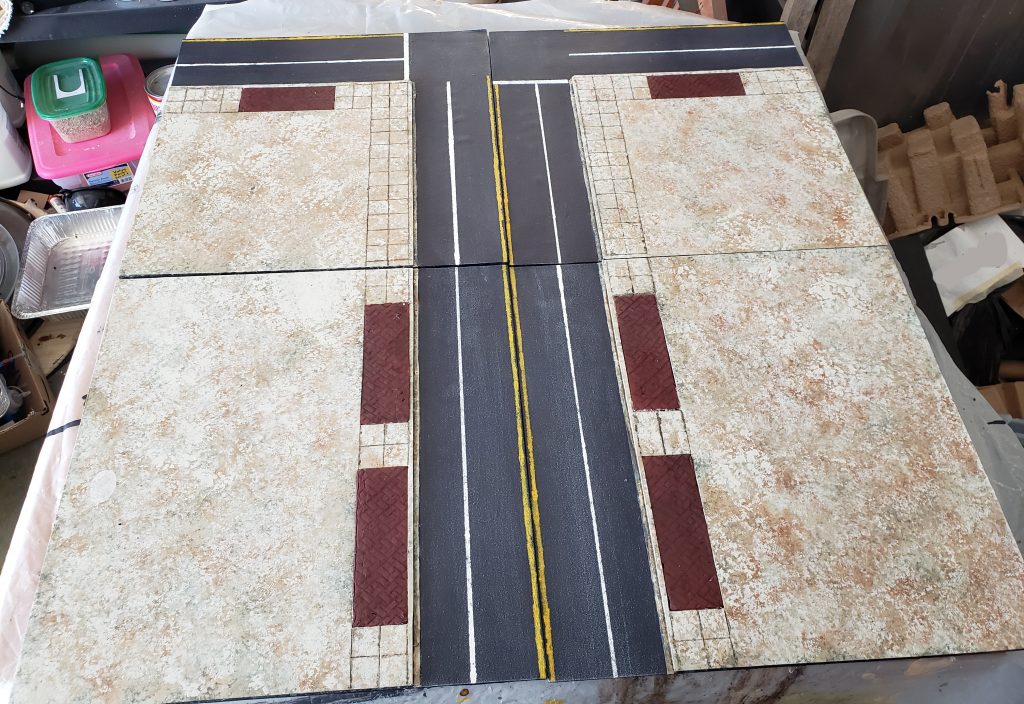
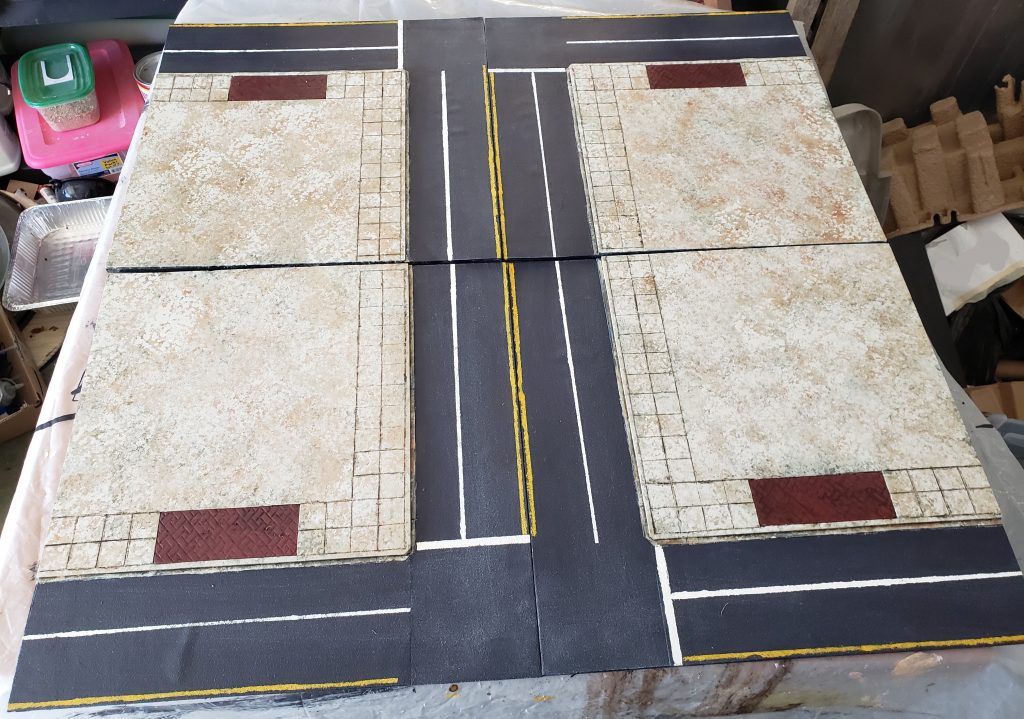
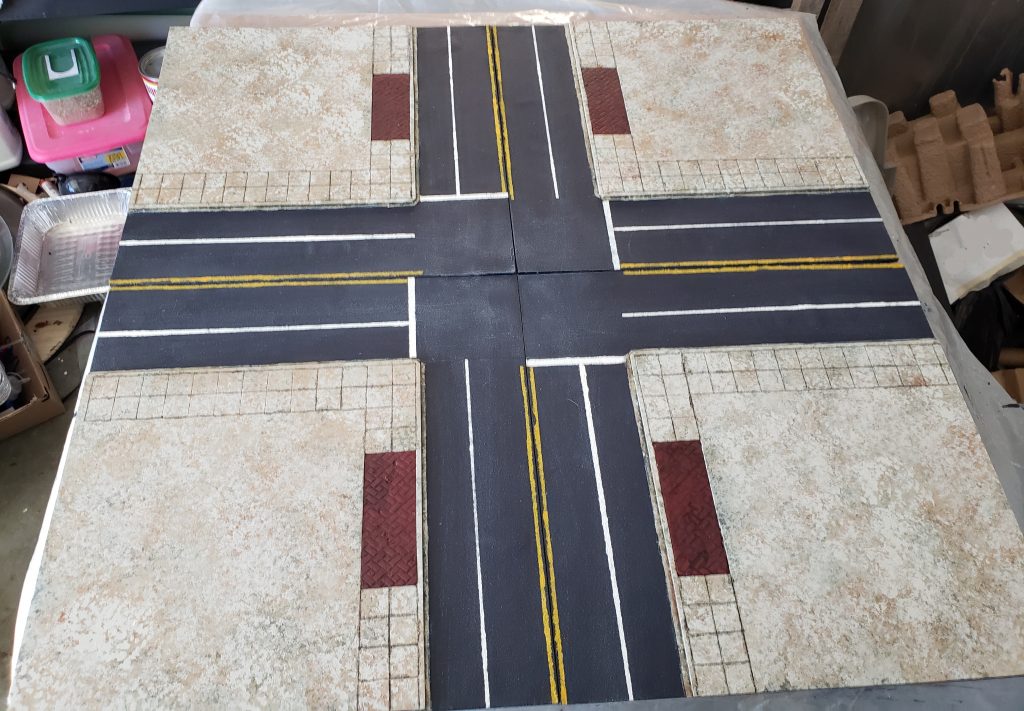
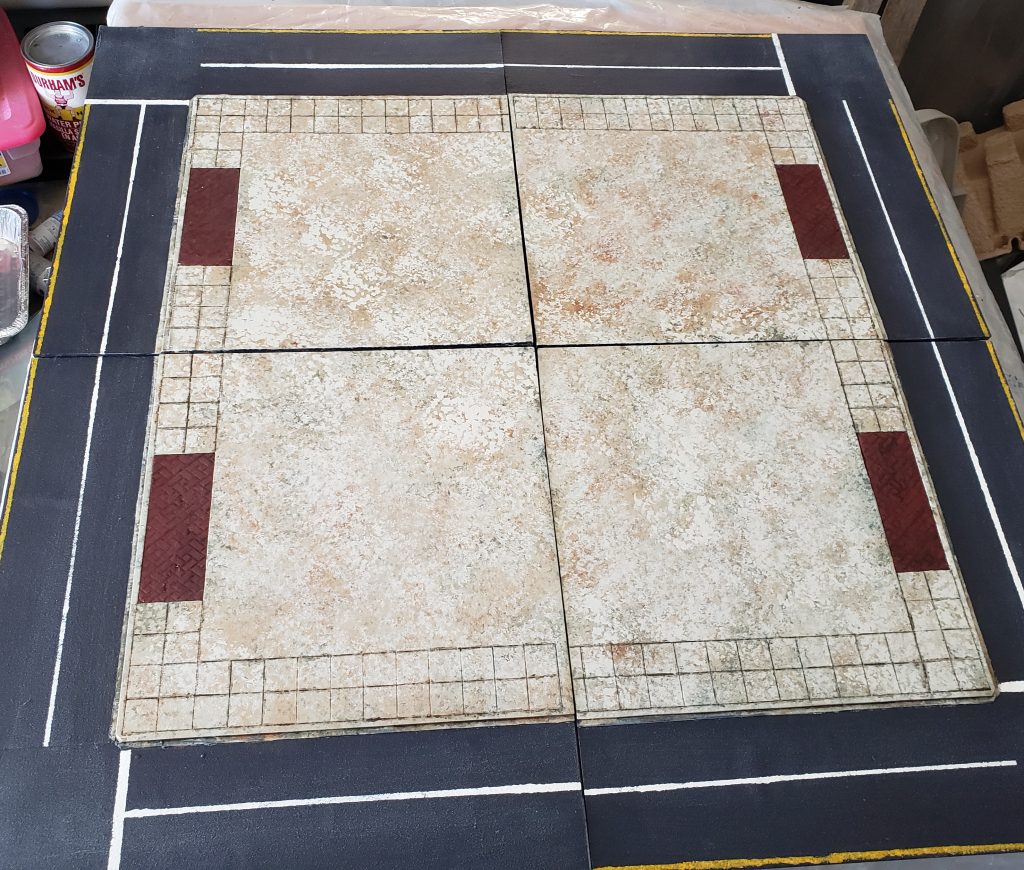
Finished at last, and all that was left was to photograph some example layouts!
Well, that and… uh… figuring out what I was going to actually put on my city streets now that they were ready.
Pingback: Paving the way to adventure? - (Re)Turning (to) the Tables
Pingback: Me want ALL the cookies! - (Re)Turning (to) the Tables
Pingback: We built this city! We built this city on... foam... and... er... paper. - (Re)Turning (to) the Tables