Update: There are multiple better ways to do this now, including the Floating Combat Toolbox module which allows a combat tracker to be viewed from multiple scenes, and Scene Phaser, a Patreon-only module which manages transitions between scenes.
My current online D&D campaign takes place on a world that is experiencing massive ecological disruptions, and I’ve been dropping floods, corrupted natural creatures, and wildly varying weather into an area that should be experiencing a mild, pleasant spring. The characters are making their way toward a coastal city where they’re hoping to find a ship’s captain willing to brave the (currently very) stormy seas to carry them off in search of the next in a series of MacGuffins.
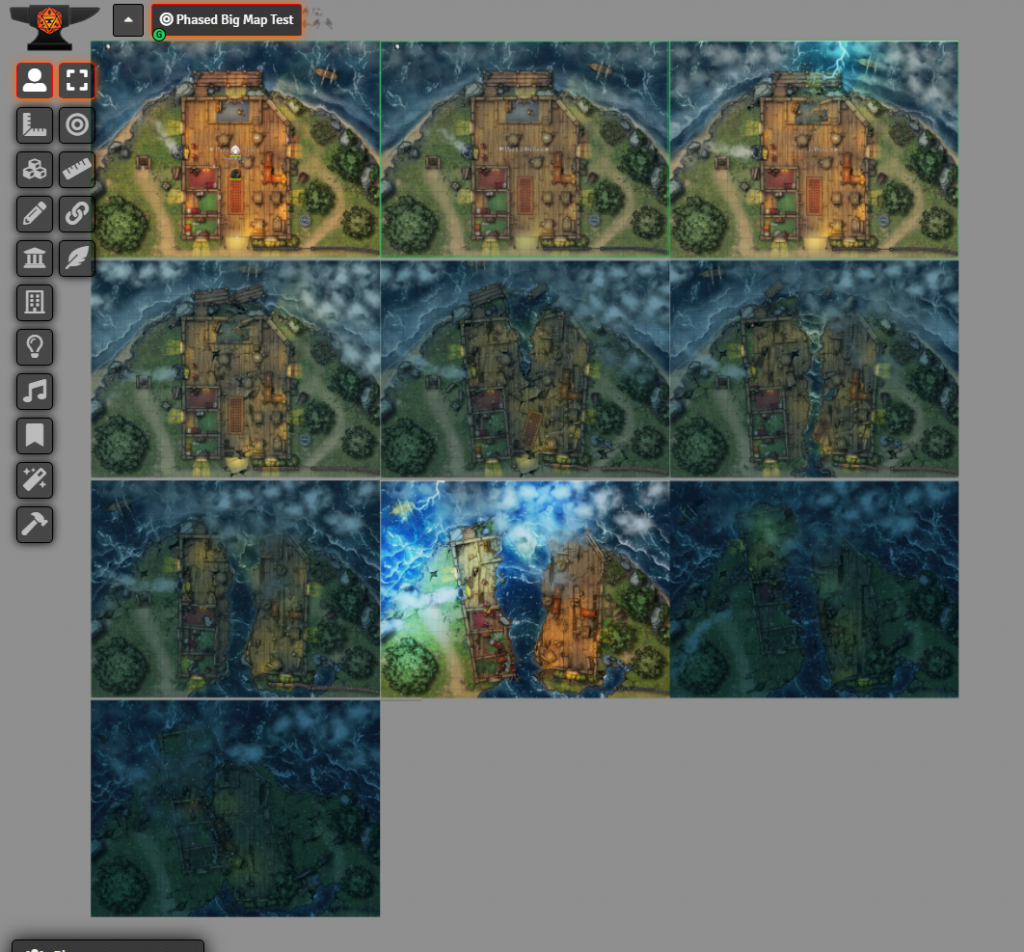
A phased battle map I found on a Reddit post seemed like a good place for them to meet up with the captain. It starts with a daytime view of a tavern built along a seaside cliff; subsequent images show the sky becoming overcast and the sea turning rough, until a massive lighting bolt strikes the cliff – which starts to break apart, along with the inn on top of it!
But Foundry isn’t specifically built to handle this sort of phased battle map, so I had to figure out how to set it up. My first thought was to simply open up the scene configuration window and manually change the map background image as needed – or, failing that, create a series of tiles to overlay the map and set up some next/previous macros to cycle through the tiles to show only the currently needed one.
The problem with this was that the walls of the shift as the scene changes, as do the positions (or existence) of light sources. Without a mechanism to change the wall and lighting definitions, neither of these solutions was viable short of telling my players, “just pretend there are working walls”. Which is a perfectly viable option, but not ideal.
My next thought was to set up a series of separate scenes to step through, each with its own wall setup. It turns out, though, that combats in Foundry are attached to individual scenes. Even if I could find a quick, clean way to copy all the tokens to each new scene in their current positions (copy and paste would move them but positioning could be tricky), I would still have to create a new combat instance for each scene swap and duplicate the initiative order.
A functional (ish) solution
I decided to try an all-in-one scene with the individual maps side-by-side, divided by walls to keep each phase hidden from the others. I used Paint.net to paste all the maps into a single large image… and I did it the stupid way, spacing everything by trial-and-error until I got all the grid lines to roughly line up with the generated 100-point grid size from the scene configuration. It probably would have been easier to trim off the little bit of partial-grid-square excess at the bottom of each image, size them to multiples of of 100, and then assemble them together in fixed positions that were also multiples of 100 pixels.
Maybe next time.
I saved out the final map as a .webp file at something like 90% quality, shrinking the overall map file size down to a little under 7 MB from the 15 or so MB total of the individual .jpg files. A new scene was created with this file as the background, and my next task was to draw walls between and around the scenes to block each one off from the others.
The next thing to work out was how to move tokens seamlessly between map sections without dragging them across the map or losing their positions relative to the current map phase. For this, I turned to the Multilevel Tokens module, which conveniently includes a mechanism to create source and destination teleporter areas.
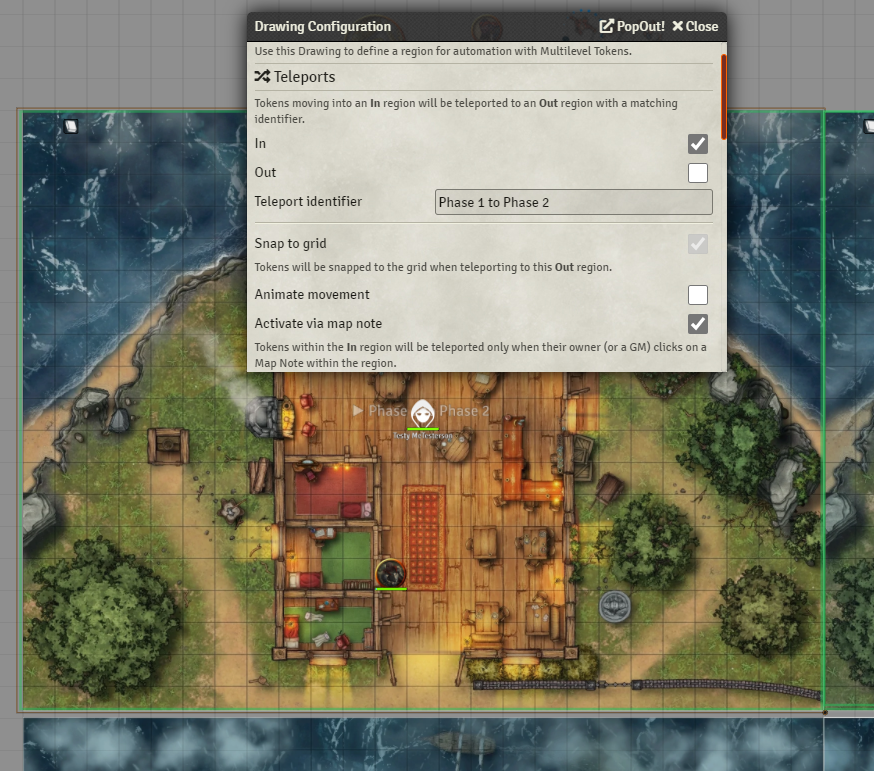
Using the drawing tool I drew a square around the first map, then double-clicked on the little selection marker on its bottom right corner to bring up the configuration window. I set this as the “In” side of a teleporter, named it “Phase 1 to Phase 2”, and enabled the “Activate via map note” checkbox.
I then created a blank journal called “Phased map test” – though the name doesn’t matter, nor do its contents. The same journal entry can be used throughout this process – no need to create a separate one for each phase. The journal entry was dragged and dropped as a map note (the little book icon) into the upper left corner of the “in” area I’d defined. The players lack access to the journal so the map note won’t show for them.
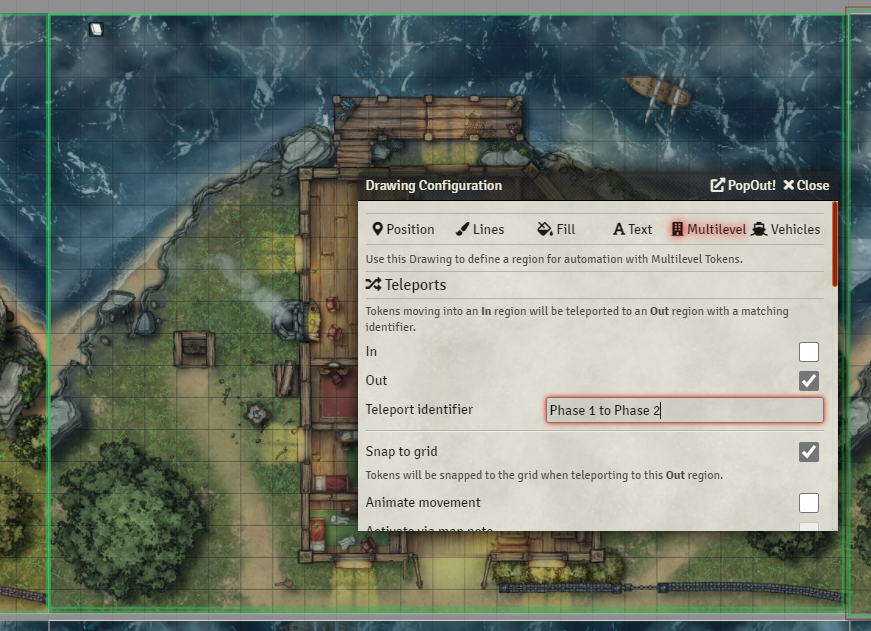
For the “Out” side of the teleporter, I drew a box around the next phase, opened the config, set the box to “Out”, and set the teleport identifier to match the one from the “In” side.
At this point I dragged a few icons onto the first scene, started a combat just to be sure, and clicked the map note!
Poof!
All the tokens popped over to the correct location on the next phase! Hurray!
There was a problem, however: Foundry doesn’t have a way to know I now want to black out the map section they’ve jumped away from, so it’s still visible to the players as an area they’ve explored. It’s okay if the players never zoom out from the currently highlighted area, but as soon as they do, they’ll see the regions they left. While this doesn’t break the whole concept, it does limit player immersion so I’d prefer to avoid it if possible.
My first thought to address this was to create a series of macros to turn each successive teleporter square solid black to hide everything under it. But first I’d need to find an event to attach a macro to for each time a group of icons gets teleported… and there didn’t seem to be such a thing. Multilevel Tokens provides a mechanism to fire at the time of teleport but it happens for every token, meaning for each scene change the relevant macro would be running 15-20 times, once for each actor in the scene. Not only could this potentially bog down the players’ browsers on slower machines by forcing them to repeatedly refresh sections of the display, but as a programmer I find this kind of unnecessary repetition just plain old distasteful as a concept.
I looked into the Trigger Happy module as well, but it didn’t seem to have an obvious attachment point that was useful in this case either.
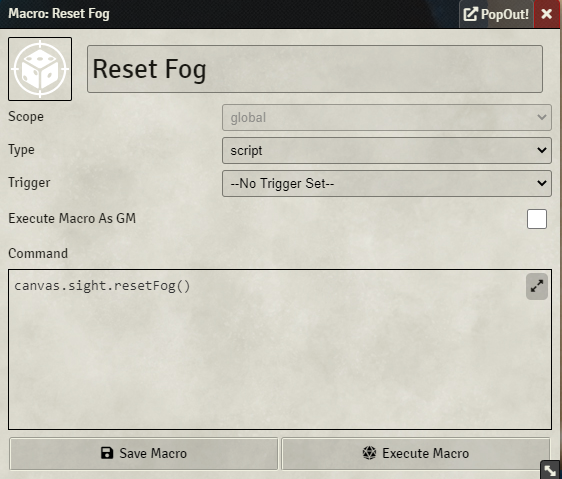
In a Reddit discussion it was suggested to simply reset fog of war after each jump. Though I felt it would be a less-than-seamless transition from scene to scene – caused in part by the redraw itself, and in part by the delay between the teleport and the process of manually triggering the fog reset. I decided to try to limit this a little by making a reset macro I could drop right onto the toolbar rather than having to navigate through the icons on the left to do it. This macro turned out to be really simple:
Time to test it all together! The final results look something like this, with player perspective on the left and GM on the right.