I’m still hoping to get back into some in-person gaming before the year ends, and part of that process will be living up to my long-time threats to run some one-shots at a local gaming store. At least one of these will likely be the Wild Sheep Chase adventure for which I built a big custom layout a while back that I’d like to get some more use out of. Others might involve an oil refinery or even a shopping center featuring (kind of) the store we’re playing in! But these kinds of big, complex layouts take time to set up, and having the players see them immediately when they enter the room before the game starts leads to less impact than a big reveal during gameplay.
So I wanted to put together a contraption that would cover my terrain on game night with a shapeless blob I could easily lift away at the proper moment to show the players the site of their characters’ impending doom in the climactic encounter. What follows is the result of that effort.
Most of my terrain was conceived to fit onto the square 38″ by 38″ or so table my family used for our home games when we were playing frequently, so my target size was “fit on that table”. Nothing was really measured in the construction of this project – I just built test pieces in stages, test fit things until I was satisfied, and cut the rest of the necessary parts to match the successful test ones.
The Ingredients
I wanted the assembly to be lightweight, strong-ish, easy to build, and easy to break down for transportation. The obvious answer was PVC pipe, with the permanent pieces glued together with PVC adhesive and the rest able to slide into place as needed. There are of course lots of different configurations that would work here – longer sections with extra supports along the length, shorter or taller ones, etc. I’ll describe what I used for my square structure and the sizes my pieces ended up being, but the list will of course vary depending on one’s needs. I also apologize in advance for my complete ignorance of piping terminology, probably leading to descriptive terms such as “corner thingy”.
Everything listed here is in 1″ size pipe. For a square build like mine, small enough to not warrant extra center supports, you’ll need the following:
- Enough straight pipe for your layout. There are two long pieces on each side, multiplied by 4, plus smaller amounts for the corner pieces you’ll assemble. Assume there will be some waste. Buy extra and keep the receipt for anything that doesn’t get cut up.
- A cutting tool. I had a hand-held PVC cutter around already, and that worked fine. Saws will work but wear something to keep from inhaling PVC dust.
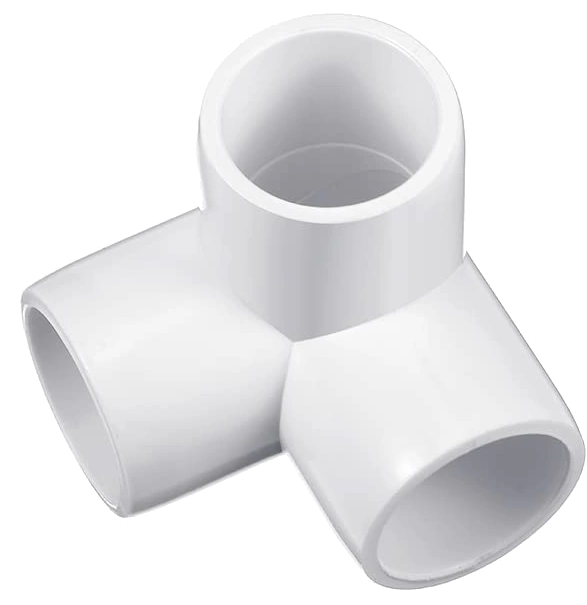
- 8 of the elbows I’ve labeled “3 Hole Corner” below, for the tops and bottoms of the corner supports.
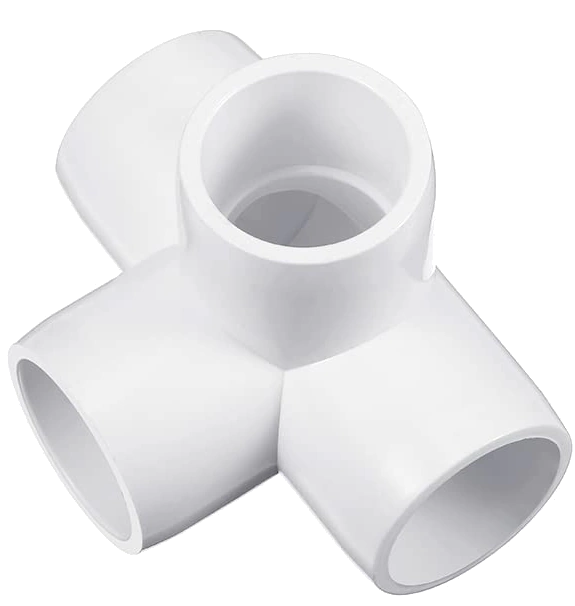
- 4 of the ones labeled “4 Hole Pass-Through”, for the middle of the side supports
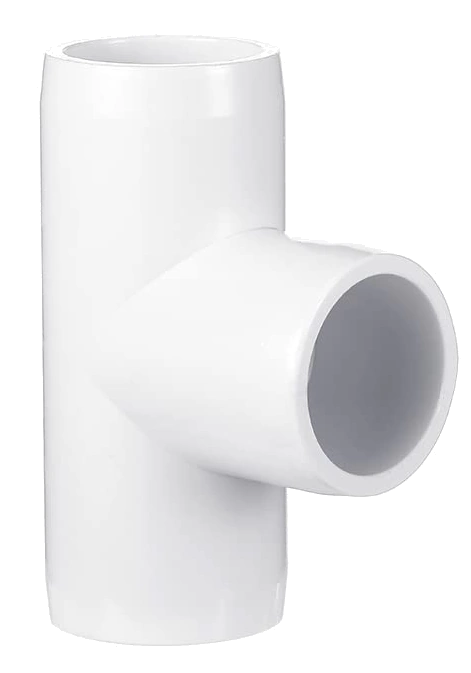
- 2 of the “T Junction” pieces, which will go on two of the long side supports
Laying Pipe
Assuming you’ve decided on a length and width for the frame, it’s time to decide on a height. I did this using the highly scientific method of hand-assembling some elbows and short bits of pipe to build an initial corner support piece that stood just slightly taller than the top of one of my two-story papercraft buildings. (I do have taller items that will go inside the cover, but the build will include support… strut… riser… things that will accommodate those.)
The corner pieces themselves start with a 3 Hole Corner piece as the base, with a short length of pipe to keep the long sides from lying directly on the table. On top of this goes a 4 Hole Pass-Through, followed by another length of pipe reaching almost to the desired height; next is another 3 Hole Corner which will serve as the top. When you’re satisfied with the height of this assembly, take it apart and use the two short pipe pieces to measure and cut three more of each. At this point you should have enough to make four identical corner pieces. Assemble these so that the open holes on the elbows are all lined up with each other if you’re looking down from above, and glue them together – the corners themselves are small enough to be portable, and you don’t want to be assembling all the parts on-the-fly before a game session.
If you’re making a bigger cover and want to add center supports on the longer sides, you can make them similarly but with T Junction pieces on the top and bottom and a 4-holed “+” shaped piece in the middle.
I also recommend gluing rubber feet or bits of felt to the bottom (short pipe side) of each, to limit potential damage to surfaces the cover is placed on.
Next it’s time to cut the side pipes. This is a matter of plugging a piece of pipe into an opening on one of the corners (NOT gluing it in place!), then laying it out to decide how long you want each side to be and cutting the other end of the pipe to length. Remember that a bit of the end will slide into the corner opening when it’s assembled and plan the length accordingly. When you’re happy with the size of your first cut, use it to make seven more of the same length. (Of course, if you’re making a rectangular frame or something long enough to warrant center supports on the sides, your pipe lengths will have to vary to accommodate.)
For two of the side pieces, cut them at about 1/3 of their length and glue one of the T junction pieces between the two lengths of pipe. Then cut the resulting piece to match the length of the unmodified side pieces. Lastly, to plug into the remaining hole in the T junction, you’ll cut a couple of support pipes to whatever length seems appropriate. These can be angled however you want each time you assemble the frame, and will allow for taller terrain underneath and help keep any covering from sagging in the middle. For longer sides, it might be worth adding another T junction for another support pipe to cover a larger area.
For the record, my corner pieces ended up being 13.5″ tall; side pipes were 33″ in length, and the center support rods were each 14″ long.
Putting It All Together
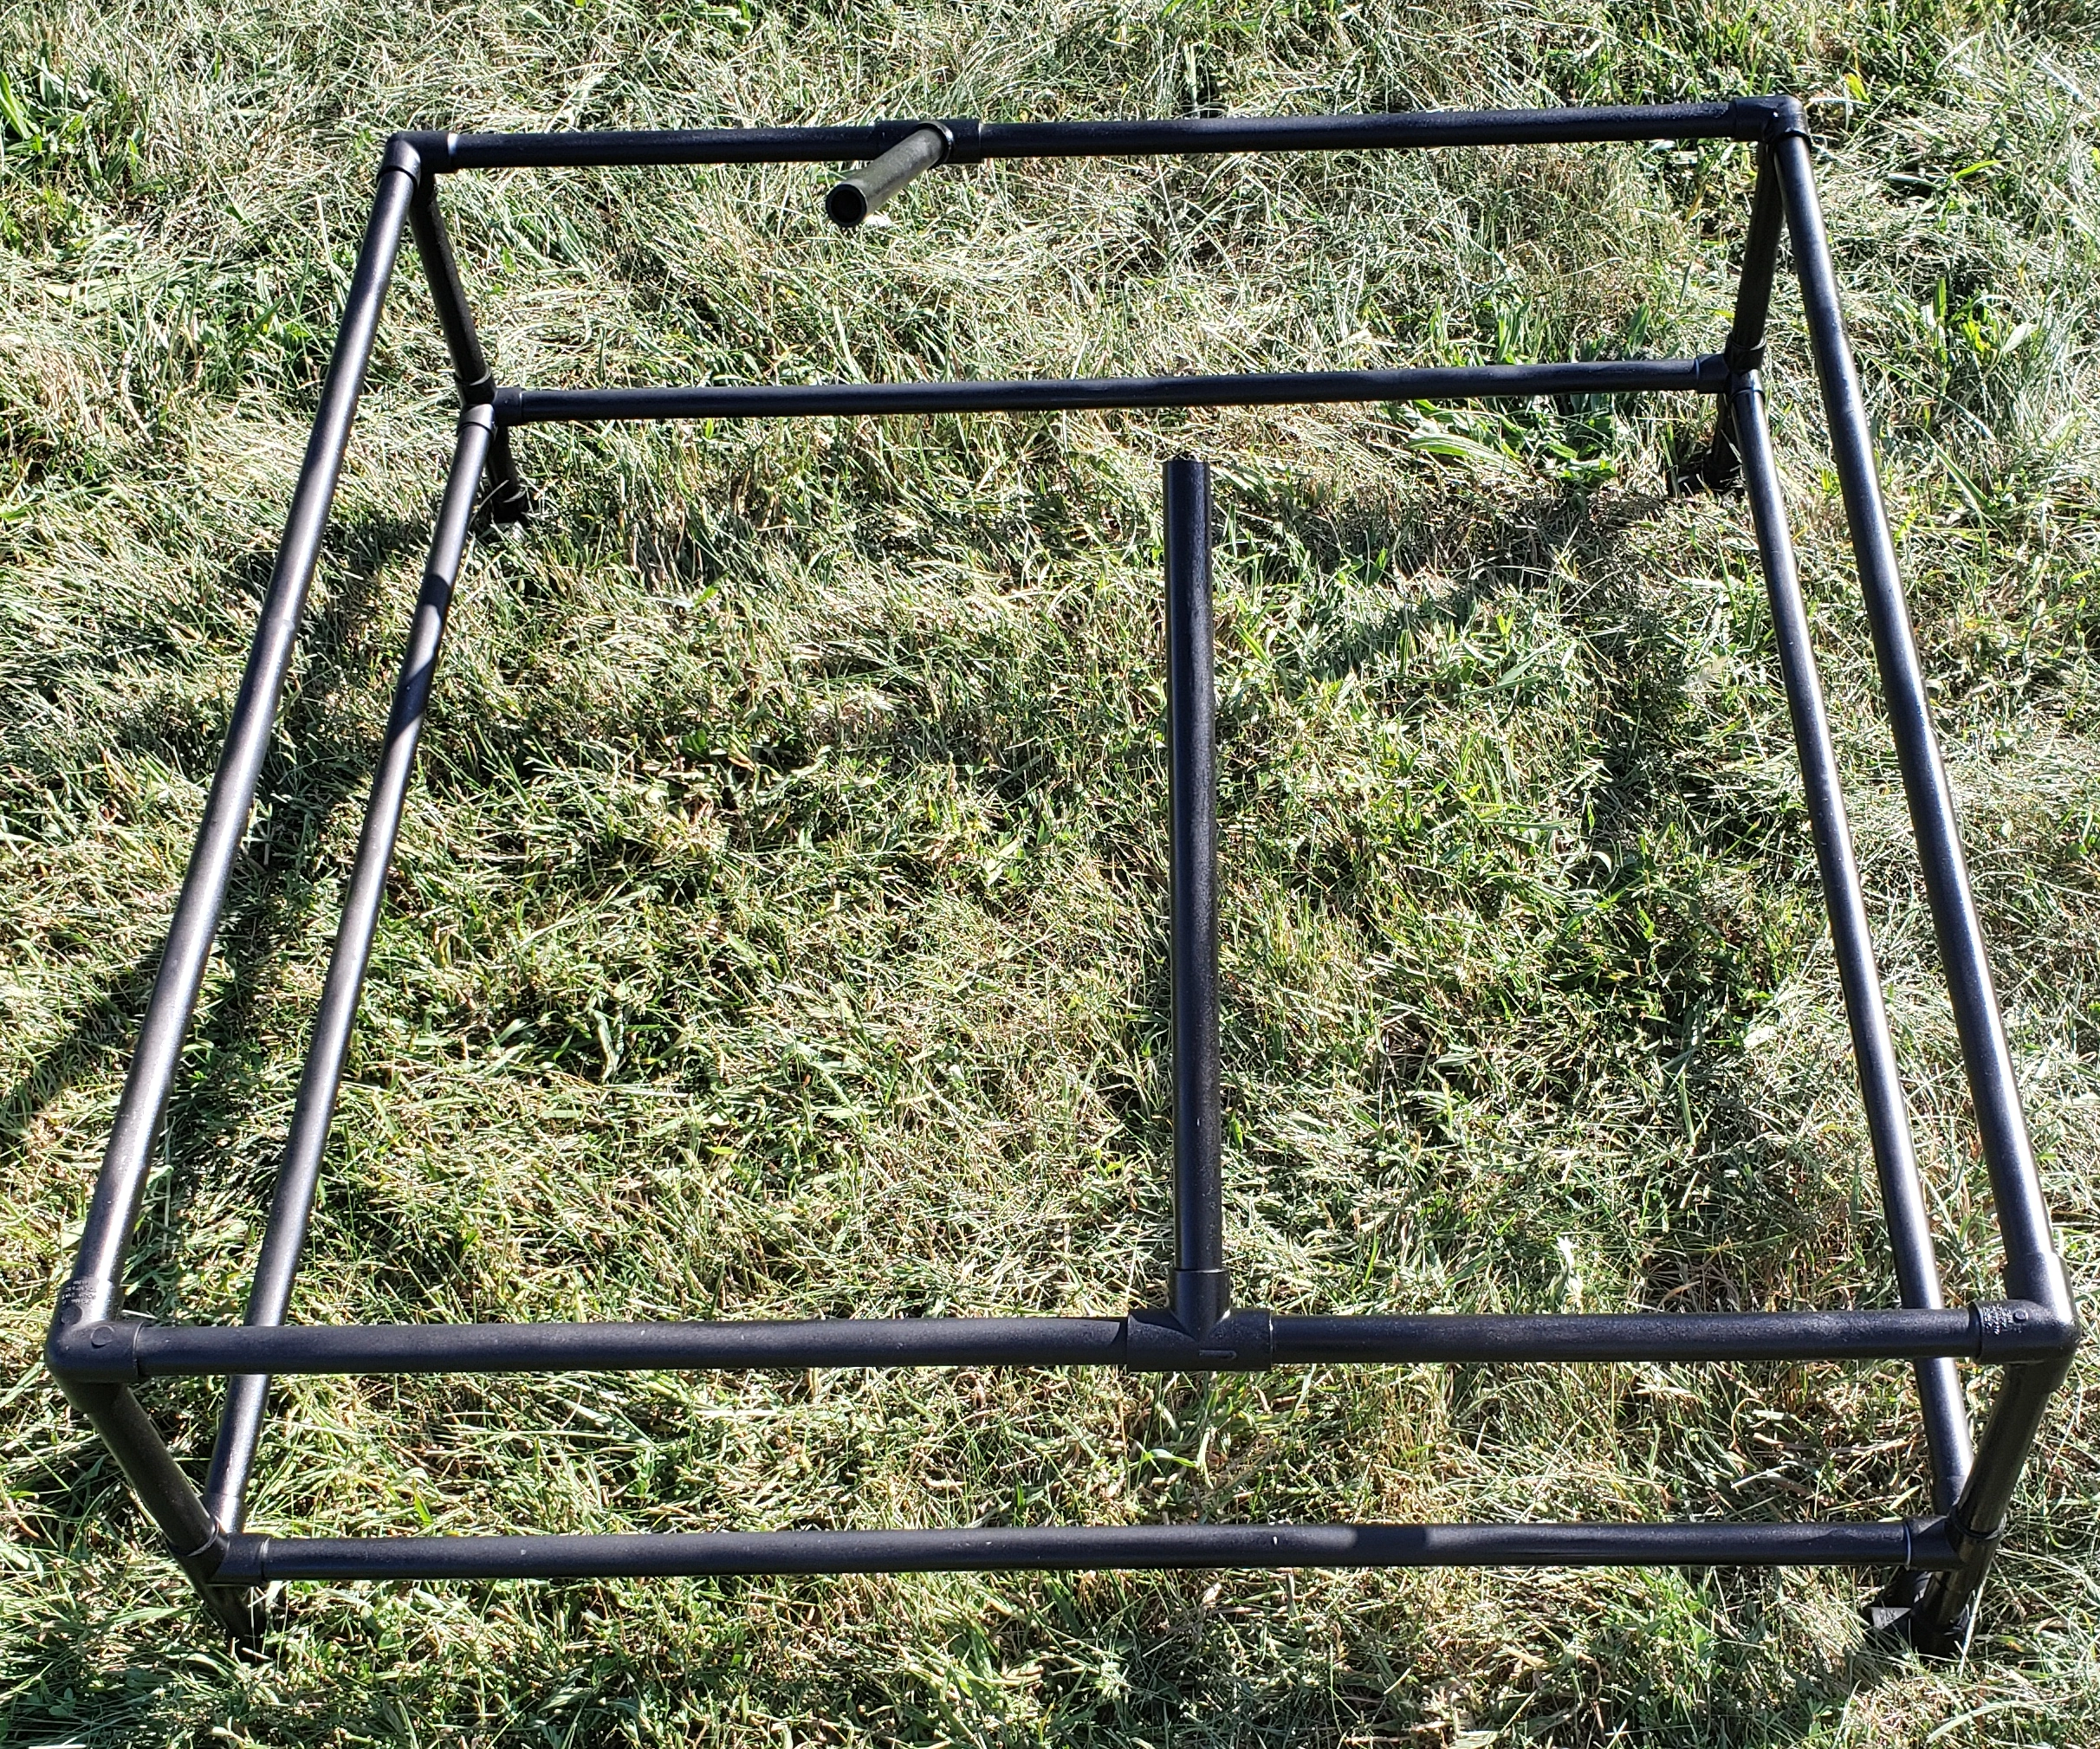
Assembly is pretty straightforward. Start with one corner, plug in a pair of side pipes, and work your way around. Be sure to put the T junction equipped sides opposite one another and offset, and angle the open position of the junction to suit your needs during assembly. Then plug in the supports on top.
If you plan to be able to easily store or transport your frame, don’t glue anything else together!
Though it wasn’t strictly necessary, I decided to spray paint the whole thing black while it was assembled – this way paint wouldn’t get into any of the connections and interfere with future assembly. Apparently PVC doesn’t hold paint very well, though, as there are already some scratches in it just from banging pipes together during assembly and disassembly. If I decided to try it again I’d probably put on a mask to keep the particles out of my lungs and do some sanding along the pipes to scuff the surface in hopes they’d hold paint better. Or I might skip the painting entirely.
The original plan was to buy a big sheet of black fabric to use as a cover. I still may do that at some point because it will make the final assembly look like a big trash bag; but for the moment I’ve resorted to a sheet of black plastic painter’s tarp from a roll I already had lying around the garage. I set the side support bars on the frame up to a high enough angle to provide clearance enough for the tallest of my existing terrain pieces, plus maybe a little more. Then I unrolled the tarp over it, clamped it down in a few places to keep it from sliding around, and cut out a square of tarp around the bottom of the frame, allowing a little extra.
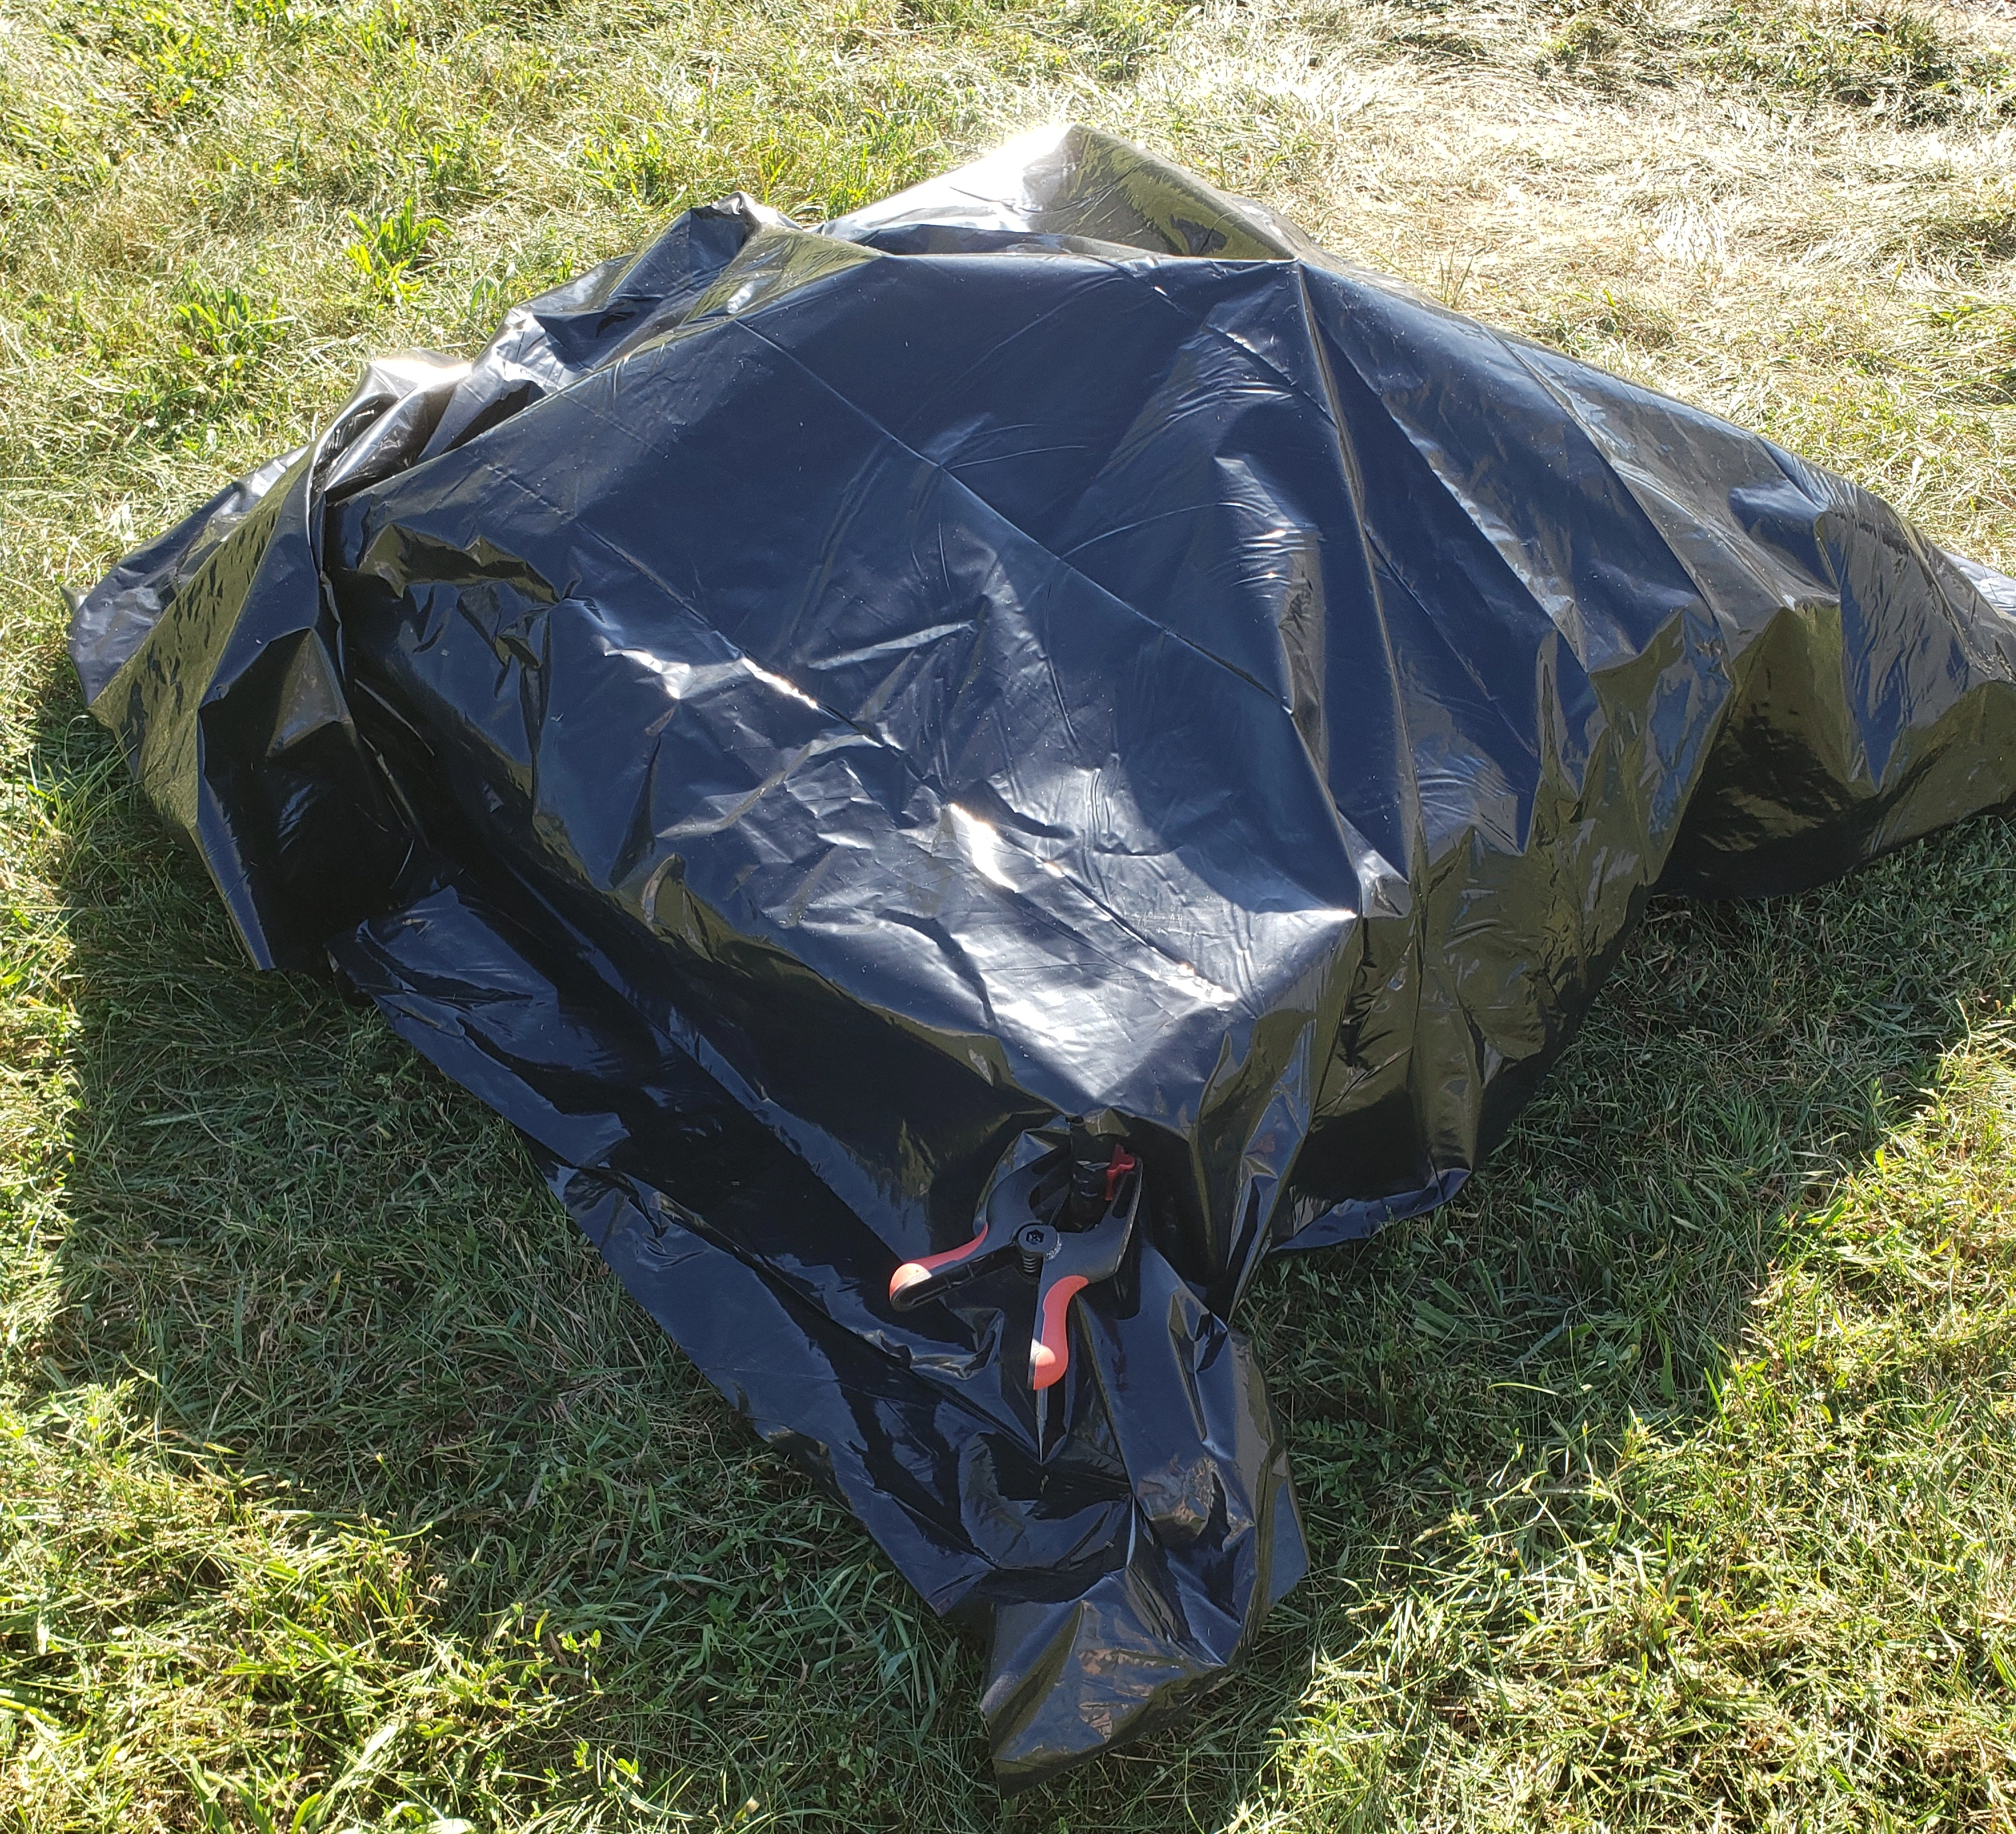
The wind picked up as I assembled everything to take pictures, so I added some clamps to keep the tarp from blowing away. I’ll probably keep them with the kit to combat potential drafts or discourage overly curious onlookers as needed.
It’s definitely not pretty, but it’s functional. The aforementioned fabric cover would probably look a lot nicer, especially with the corners sewn up to hold to the shape of the frame better. Maybe a logo or something in the middle?
Packing It Away
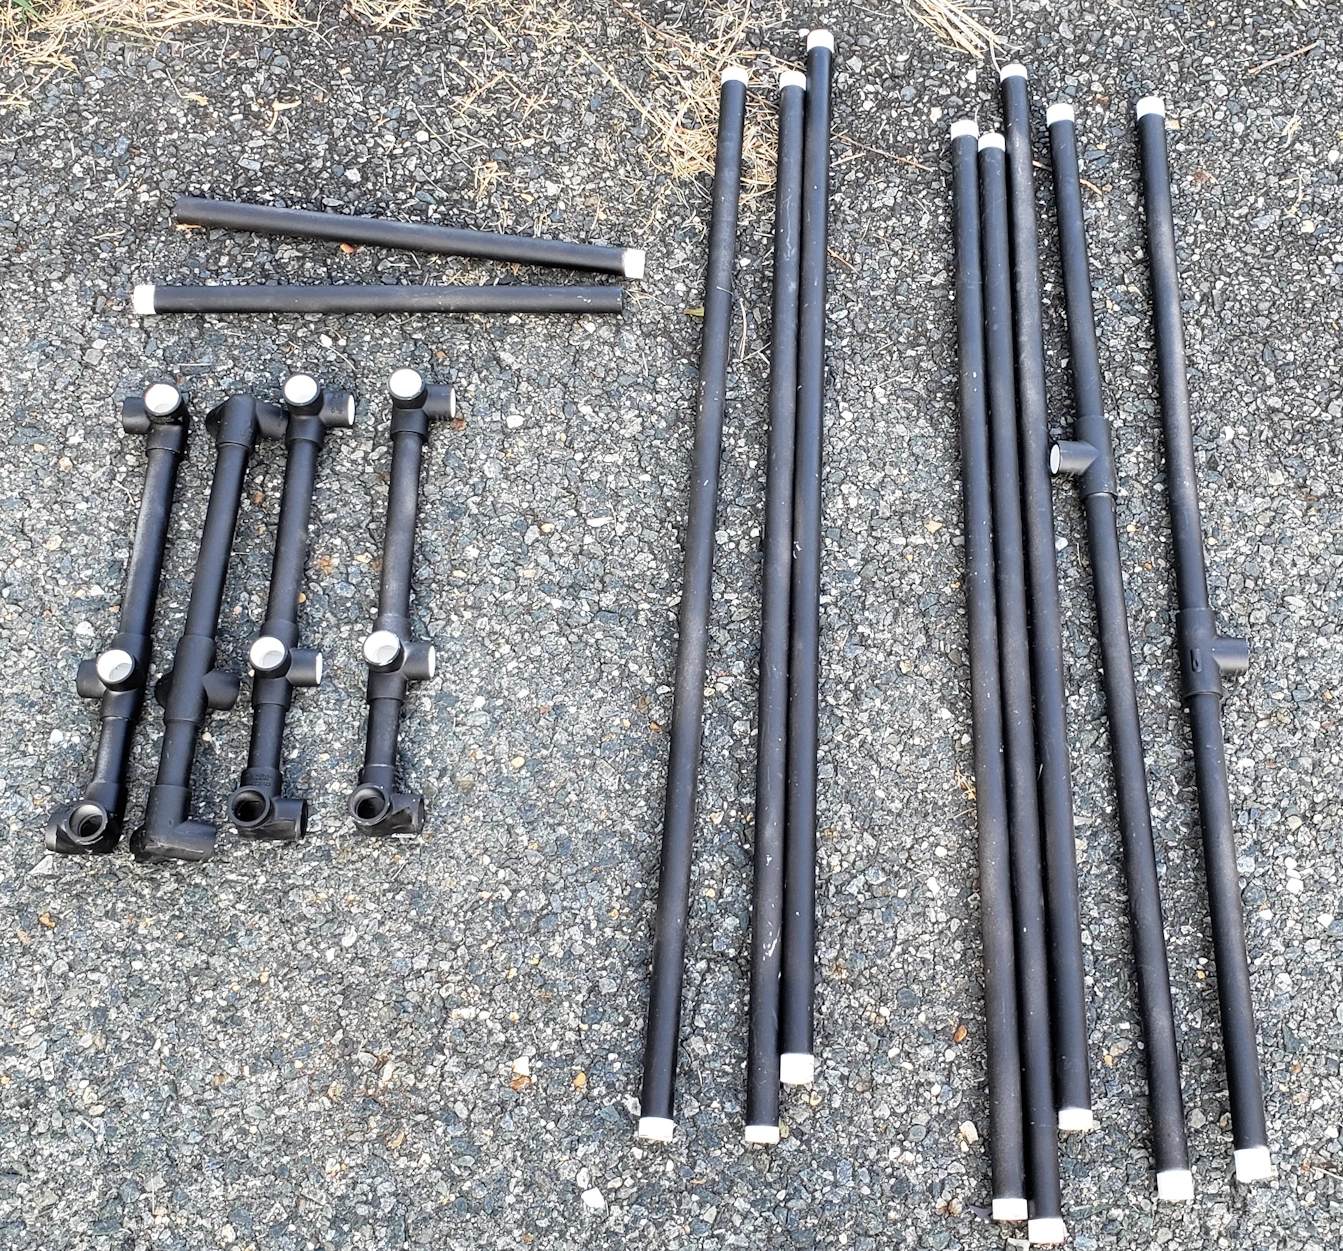
Everything disassembles into the collection of PVC pieces shown above, and the cover can be folded and rolled up into a small size. I went looking online for a duffel bag these would all fit into for easy transport. An ideal size would be 40″ or so depth, but I couldn’t find anything big enough that was less than 50″, so that’s what I settled for.
Everything fits easily (if loosely) in the bag. Since there’s plenty of room left I’m hoping to find a cardboard tube or two to protect rolled-up battle mats that could also go in there with the cover.
Pingback: Blog Updates and Too Many Projects Syndrome – (Re) Turning (to) the Tables