After putting together some papercraft buildings to jump-start a small collection of modern terrain pieces, I wanted to try my hand at some custom ones to add more variety.
My Mighty Protectors Campaign takes place in and around the likely mecca of super-heroic activity that is northern Delaware. This part of the state is basically just one big suburb wrapped around an almost empty city… so we have lots of little strip malls all over the place. A few storefront pieces seemed like something that could be used often. Further, if I put a little thought into how I built them, I could make something modular that could be set up to achieve a variety of different looks and layouts.
I had to reconcile with the fact that in terms of square footage at the 1 inch = 5 feet scale, these just weren’t going to be accurate. Built to match the real-world dimensions of, say, the local farmers’ market, the resulting building would fill up most of my table; and considering most strip mall stores are a lot deeper than they are wide, even the small ones would be hanging off the edge unless they were centered in the scene.
Given this, I flirted with the idea of simply making a series of facades as suggested by DM Scotty in some of his videos about building D&D town terrain. Had I been building for D&D – or even for some modern setting that’s more, er, grounded than a supers game, I may well have gone that way. But this terrain will be populated by characters who can swing, climb walls, leap great distances, and fly, so the rooftops will often be every bit as important to the scene as are the streets below.
Windows are a pane
My plan was to start with a few different sizes of simple square structures that could stand on their own or be lined up side by side for the strip mall look. Then I would make some optional add-on roof parts that could be used to customize things for different scenarios.
I wanted to have a few different door and window configurations as well. The traditional way to do these is to build the frames by gluing together bits of balsa or birch strips… but I find that process tedious and prone to ending with fingers super-glued together. Besides, there was a 3d printer sitting on the table behind where I was going to build these.
So I spent some time searching Thingiverse, etc., for free models of some suitable modern windows. I found a number of different varieties that were all more appropriate for residential buildings rather than commercial ones, but nothing that quite fit what I was looking for.
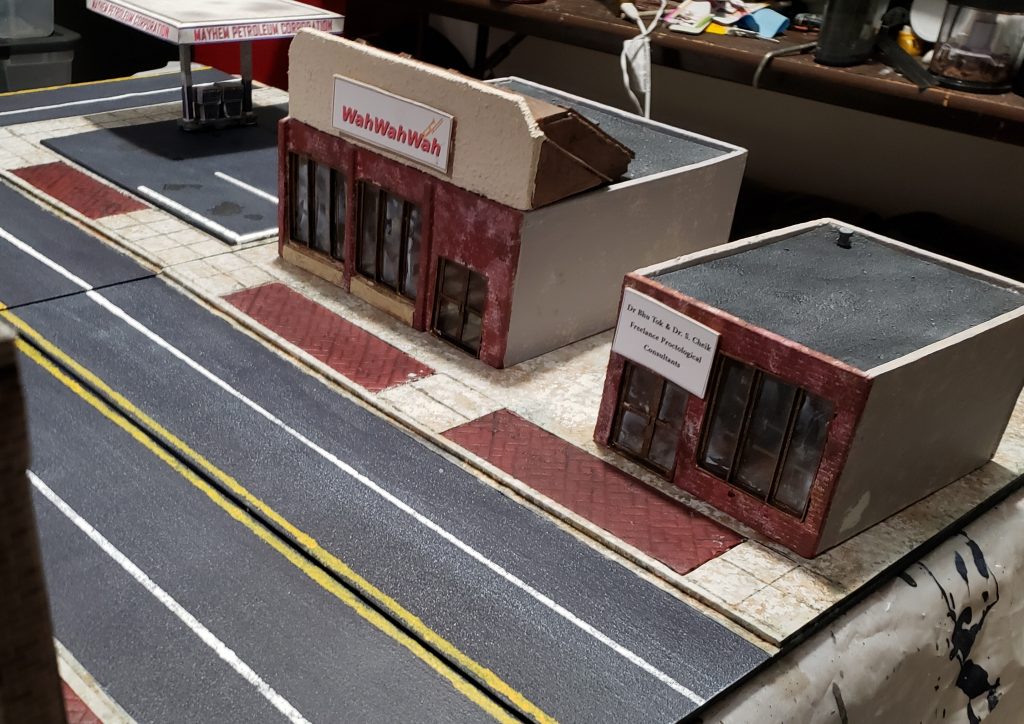
Fortunately, simple window frames and doors turned out to not be beyond my limited 3d modeling skills, so I ended up making some of my own in Tinkercad. I also made a little power meter to stick onto the backs of the buildings – appropriate for some crazed foe to rip off and swing at the players as a club.
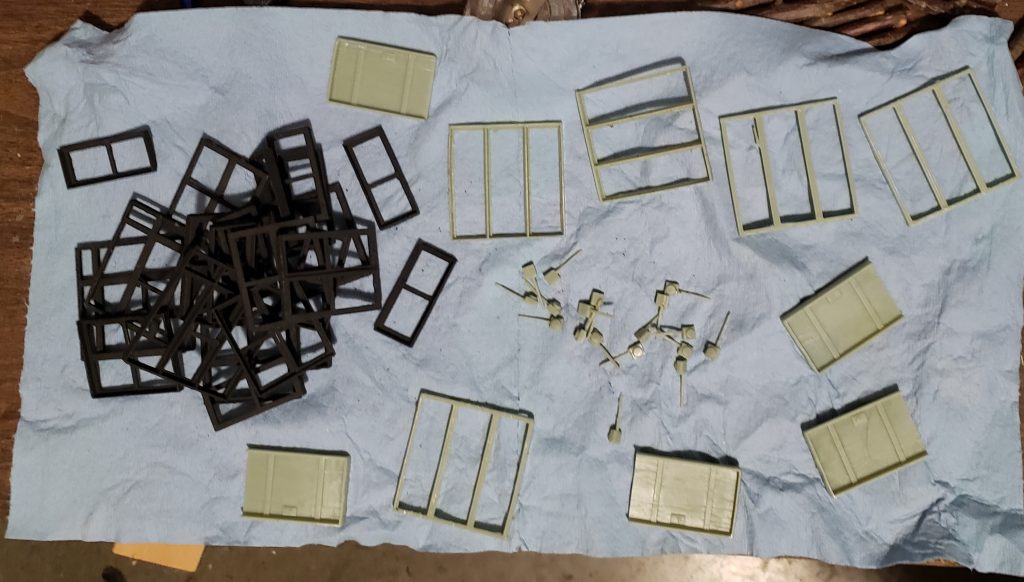
I’ve made the files available on Thingiverse in case anyone finds them useful.
Brick and Mortar
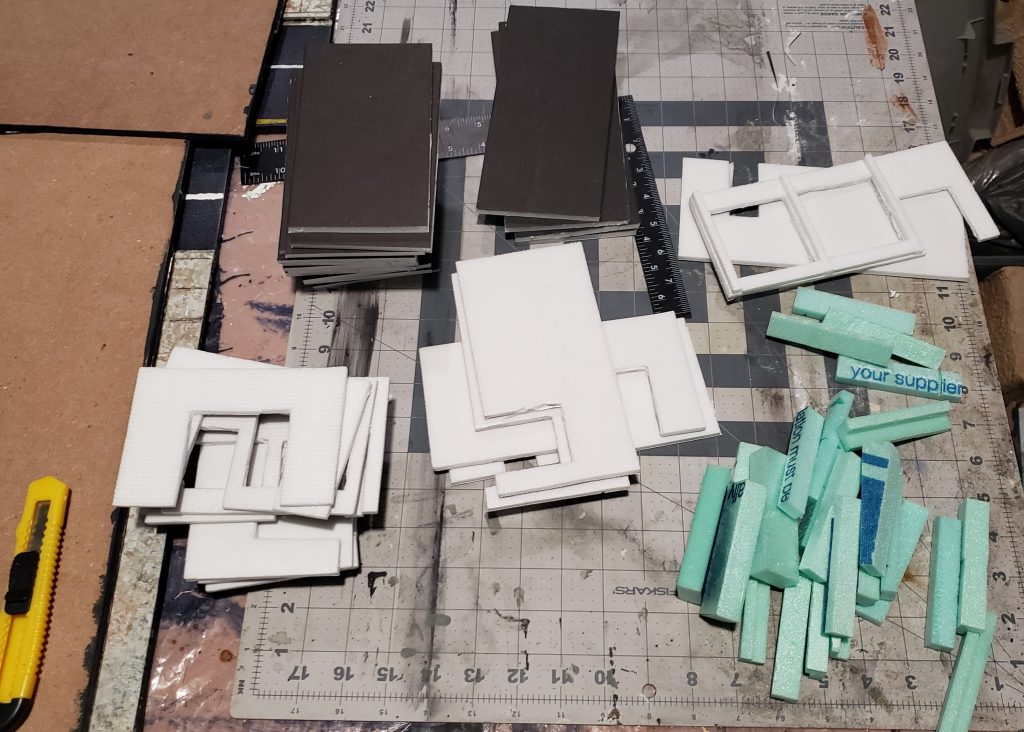
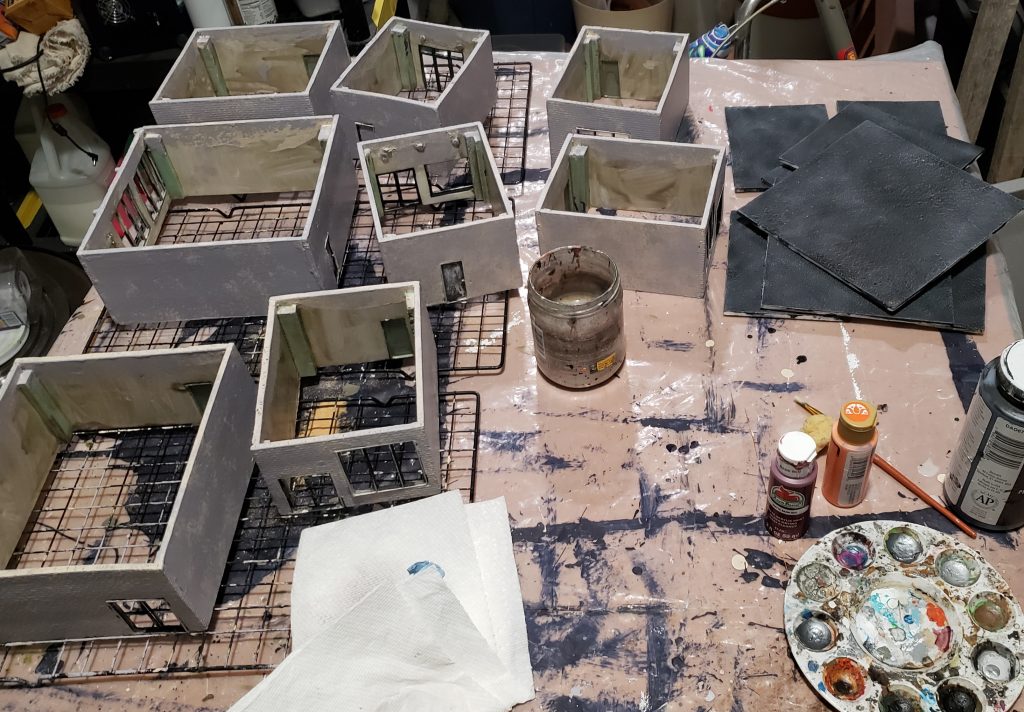
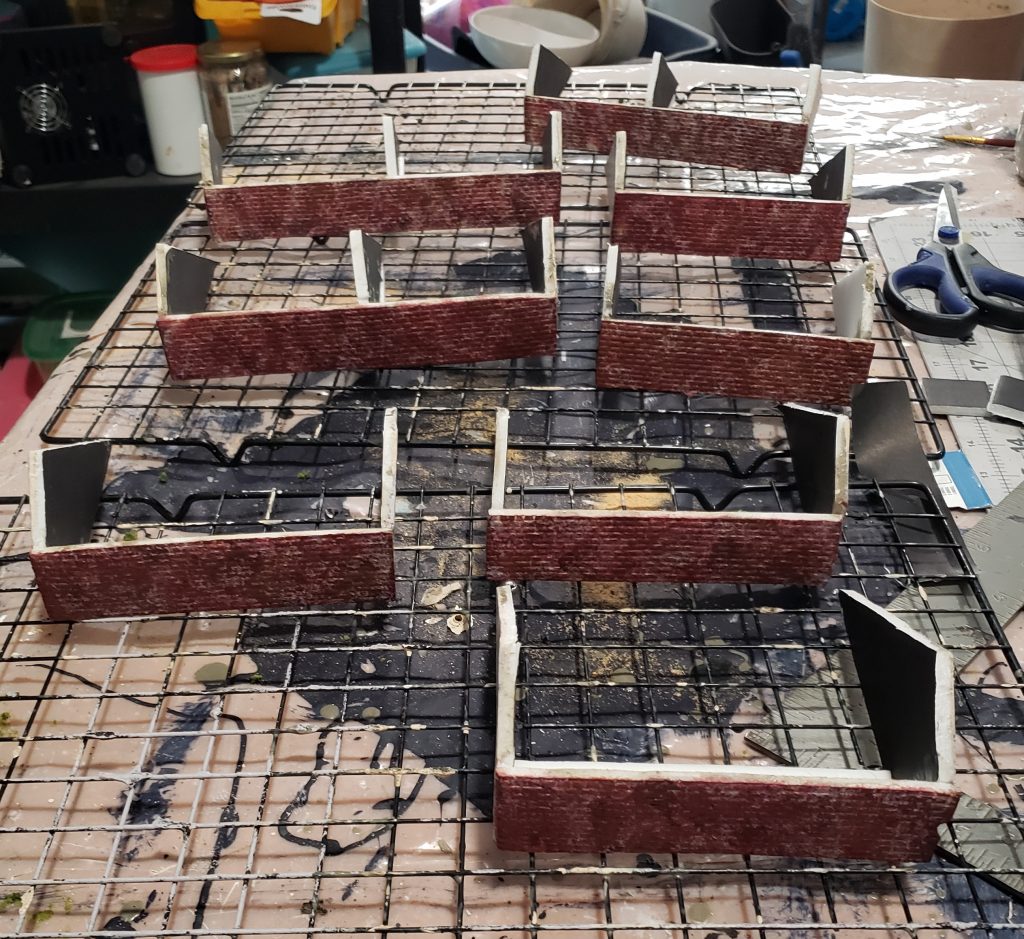
While these printed I cut up enough strips of dollar-store foamcore board to make a pretty much arbitrarily selected collection of five small (5″ wide by 6 1/2 deep) structures, a single medium (7×6 1/2), and two larges (8×8). I wanted to put brick faces on them, but I didn’t want to hand-carve the patterns and none of my 3d printed texture rollers had brick patterns small enough to look like modern ceramic bricks vs big castle-wall stone blocks. Fortunately I discovered that Green Stuff World makes a roller that would give me the right results, so I ended up ordering one of those. On XPS foam it probably would have left too shallow an impression to get good results, but fortunately the cheap foamcore with the paper peeled off was soft enough take a usable pattern.
I picked out what would be the front wall for each building and rolled on a brick texture. The rear and sides would be left with a basic concrete look for simplicity, though in retrospect I probably could have used one of my other rollers to achieve a cinder block wall texture.
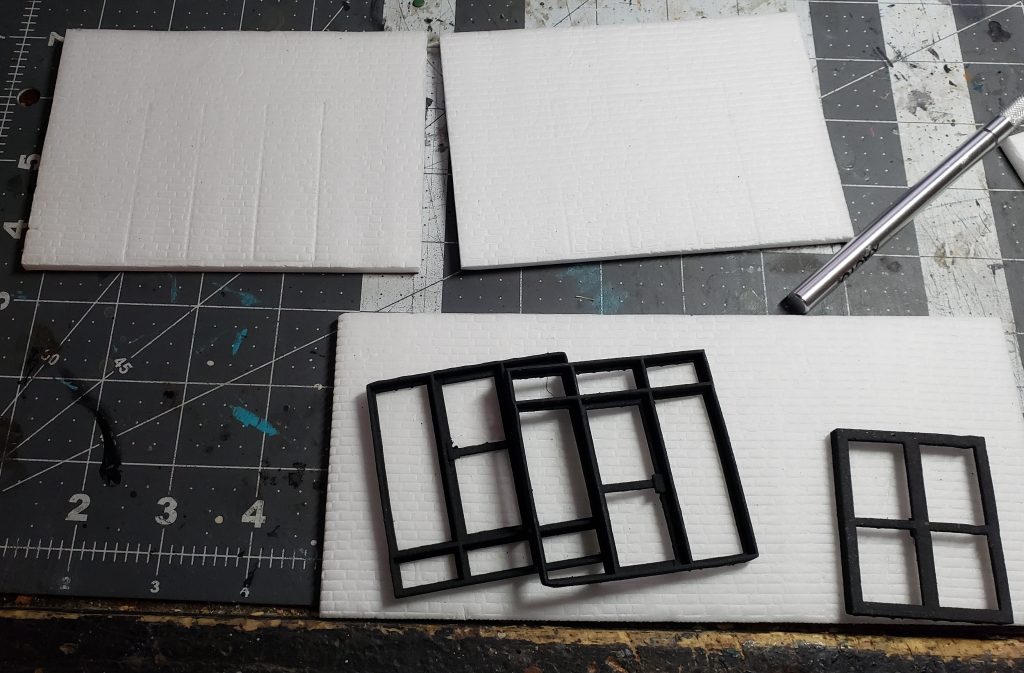
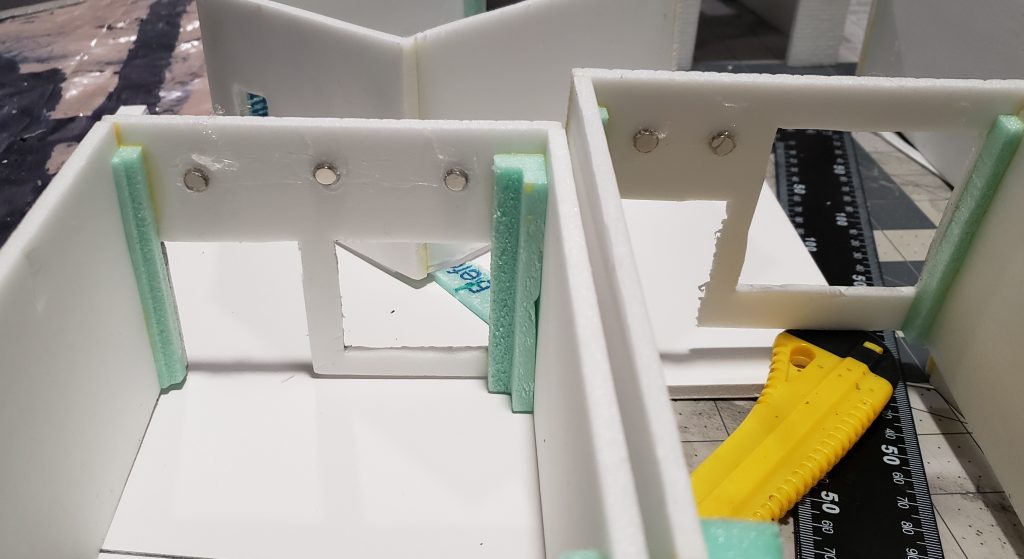
Once my doors and windows were printed and cured, I started laying them out on my front wall pieces and pressing down on them to leave an impression to mark where I’d need to cut the openings for them. After a few minutes’ work with a razor knife and a few more minutes spent cutting some corner-reinforcement bits from scrap XPS, I was ready to begin construction.
I initially hot-glued magnets on the inside fronts of the buildings with the thought that I could make swappable magnetized signs to clip onto the fronts. I later rethought having fixed positions for the magnets so I ended up ripping them all out in favor of gluing magnets to the signs themselves and just using floating ones on the insides of the buildings so I’d have more flexibility in sign positioning.
For the side and rear walls I considered texturing them by smearing on a thin coat of spackle, but a) that might interfere with butting them flush up against one another in their strip-mall configuration and b) I was feeling too lazy to bother. It’s an option for a little more realism, though.
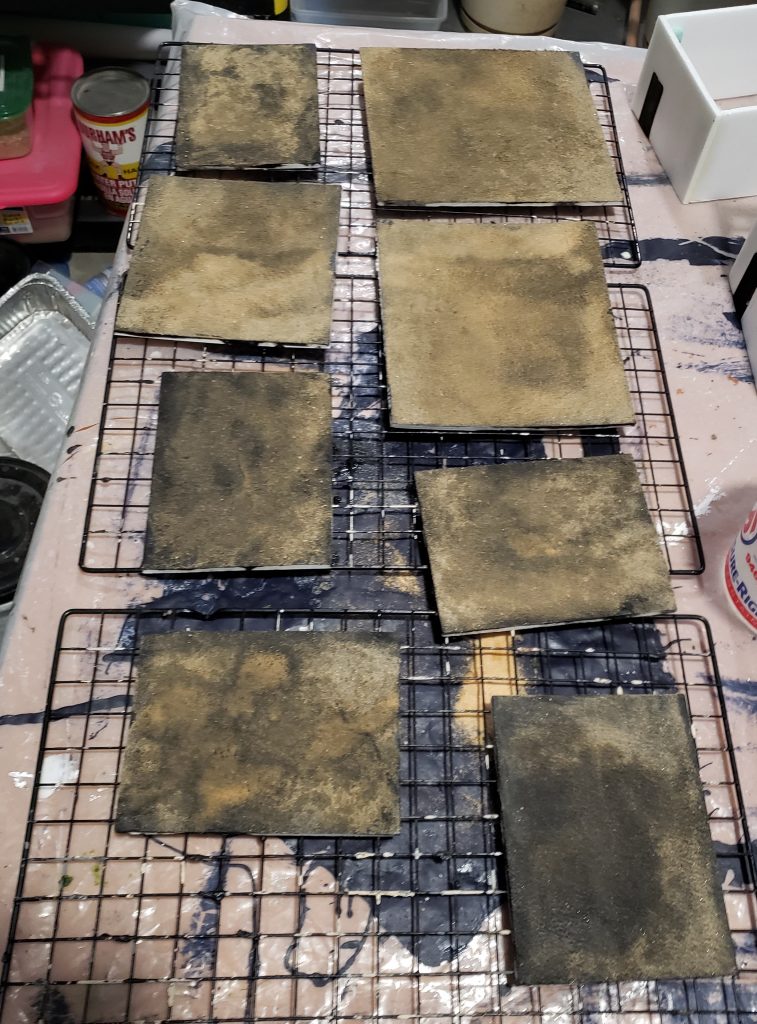
For the base coat on foam projects I usually use Mod Podge mixed with black paint, but this time I mixed in a light tan color instead and coated the whole four-walled assemblies with it inside and out. I added a second coat of the tan paint itself just achieve better coverage; I did this on the inside as well as the outside so onlookers would see typical off-white walls when looking in the windows.
To create the illusion of some texture I used a sponge to stipple some light gray all around the outside – even the brick front faces, where the tan and gray texture would hopefully show through as the mortar between bricks. For the bricks themselves, I definitely did not want to paint every individual tiny rectangle; instead, I used the sponging technique shown starting at around the 8:30 mark in this video. For a low-effort solution it did a reasonable job of creating the impression of a variety of brick colors with visible mortar lines in between.
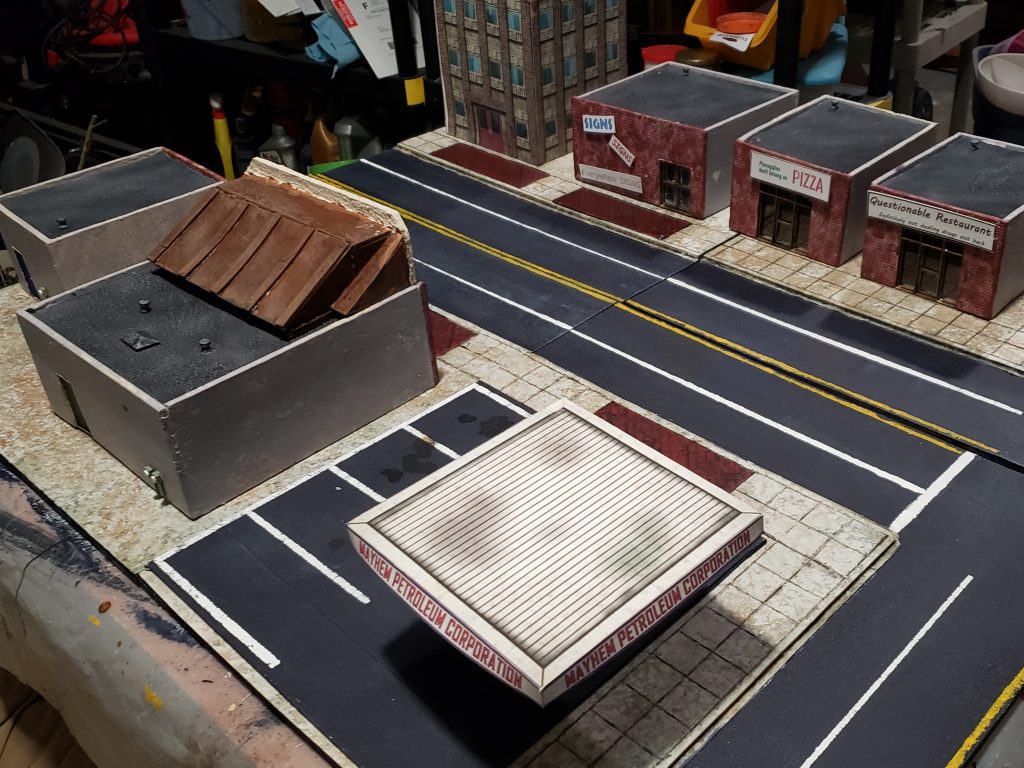
For the roofs I simply cut foam pieces to the appropriate size to be slid down to rest on top of the corner support bits I’d created. Rather than slathering them with a tarry glop like I used back in my oil refinery build, I simplified by just sprinkling sand over a still-wet black-and-Mod-Podge base coat. Another layer of paint and a light drybrush to bring out the texture, and all that was left was to glue a few 3d printed vents and skylights to them.
Lastly, I cut squares out of some clear product packaging and super glued them to the backs of the doors and windows. The gluing process left a little residue that made the windows look hazy in places; some of this I scraped off, and some I left in place in case I wanted a steamy or frosted look.
Me no speak building talk words
Next I wanted to make a few different styles of… rooftop… overhang… front… topper… things. These would allow me to give an assortment of looks across my boxy little stores without having to actually build lots of stores. I searched for pictures of a few local shopping centers and picked this one as the general feel I would go for with my first set of add-ons:
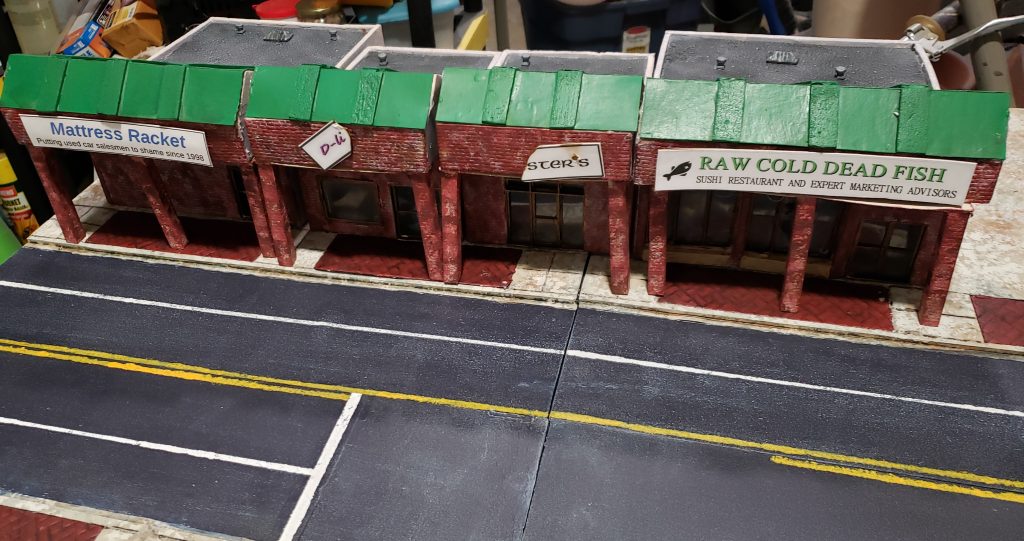
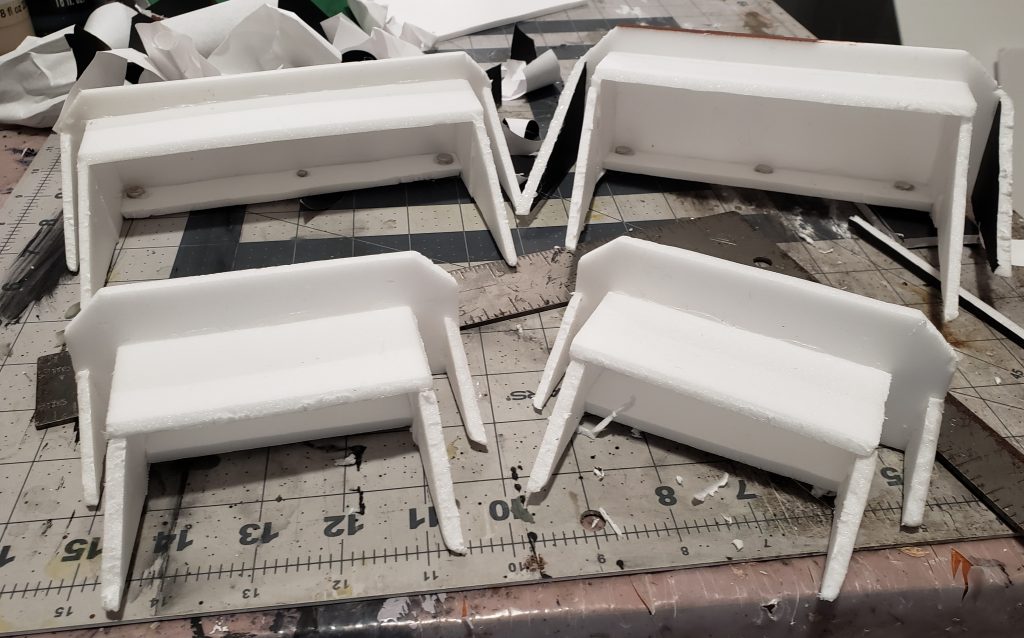
First I grabbed a ruler and some foam and cut out a triangle with a long slope on one side and a shorter one on the other. From the steeper side I cut off the corner so there would be a 1″ section perpendicular to the ground. Once satisfied with this piece I used it as a template to cut a bunch more. Armed with a pile of these triangle-ish shapes I cut 1″ tall strips to the width of my buildings, gave them the same brick texture as I’d applied to the storefronts, and glued them together as shown below. I added some horizontal bracing behind them… as well as some magnets for holding signs and connecting support pillars underneath, which, as before, I ended up removing.
The fronts got the same brick treatment as the existing buildings, and the sides got the same stippled concrete look.

For the roofs, I cut some cereal boxes up into rectangles long enough to cover both slopes on top of the roof pieces. I scored a line on each where the apex of the triangle would be, just to get clean bends there. The roofs on the example picture weren’t flat but had some slat things that added texture; I glued down a few thin strips of foam to simulate this in a very vague sense. Green paint and a darker green wash (which somehow dried so close to the original green that it’s hardly noticeable) finished off these pieces.
Something went wrong and I can’t put my finger on it
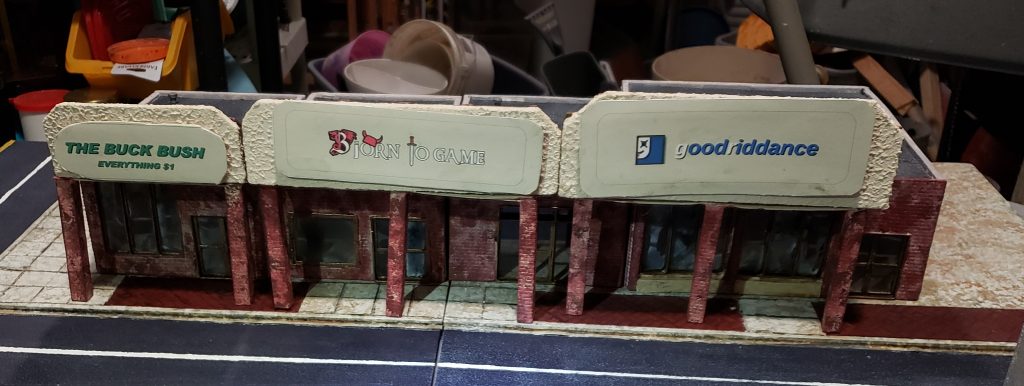
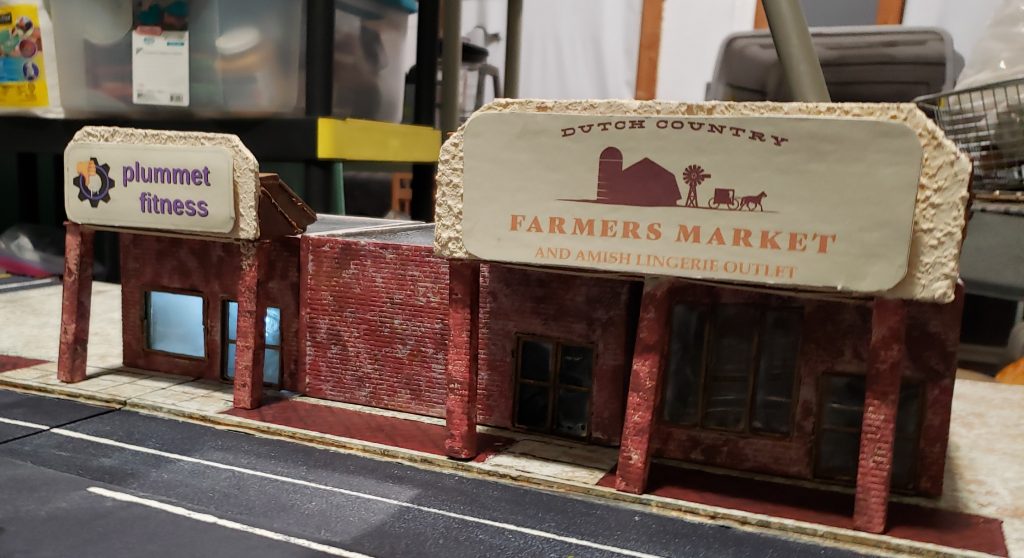
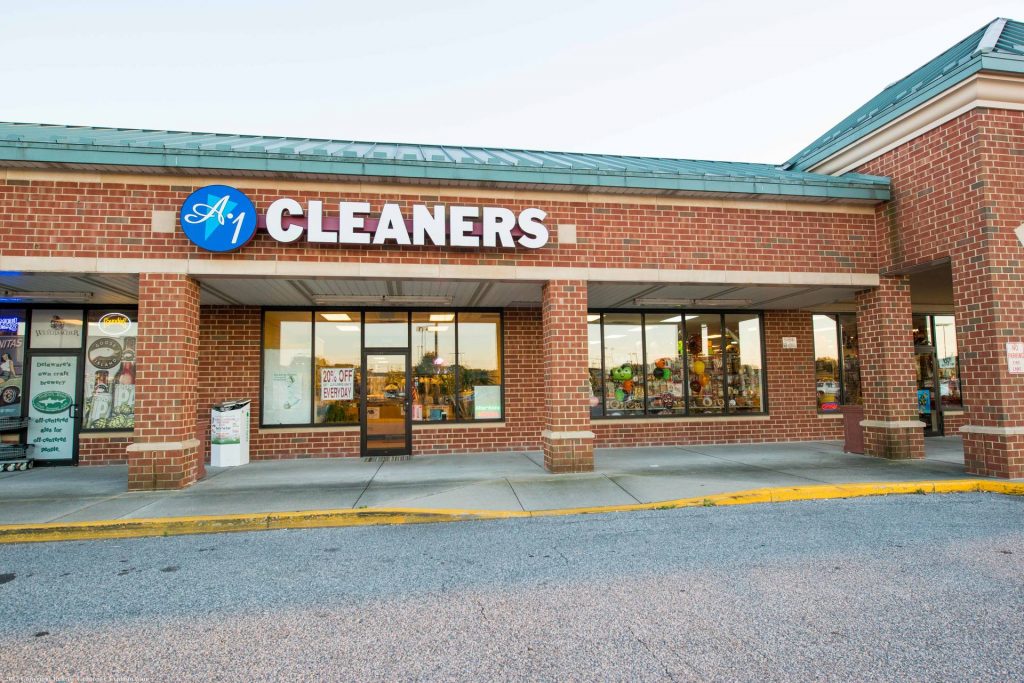
The next look I was going for was from the site of the aforementioned farmers’ market, along with my local gaming store.

The roof parts for this were built in a similar fashion to the first set, but with larger front sections. I also decided that the taller signage area on these would provide good places for heroes or villains to find cover, so I added horizontal platforms large enough to support 1 inch based minis.
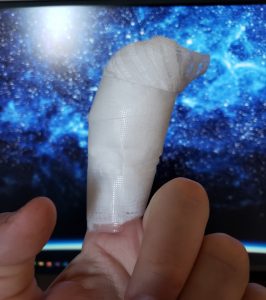
It was at this point in the process, while slicing some foam, that my fresh-bladed hobby knife caught on the metal of the square tool I was using and managed to kind of pop off the edge and head right for one of the fingers that was holding the square in place.
Now, the slice of nail and fingertip it took with it is hardly noticeable now after a few weeks of healing – you’d see a slight flattening on one side of my left forefinger when compared against the right – but wow did it bleed. Ended up having to go the ER to have a doctor do multiple applications of a styptic material to staunch it before bandaging it up, and after that I spent a week or so where trying to play games with WASD controls turned into WASDRESCFRD controls.
So anyway, for the fronts of these new sections, I mixed a runny goo of glue, paint, spackle, and sand, and stippled it on to add to the texture it left behind. Roofs were made of cardboard cut to fit the slopes, accented with foam strips as before, and painted brown.
Pillars of the community
I wanted my roof sections to be able to sit directly on top of the buildings or hang out over the sidewalk. For the overhang I would need to make some brick support pillars.
My initial plan for this was to use the magnets I’d installed in the downward facing sections of the roof pieces (later removed) to attach some 1/4″ brick-textured XPS columns just the right length to reach the ground. This proved unworkable – the foam was thin enough that it warped from the application of the texture, and even when I could get a few straight-enough pieces, it turned out to be very difficult to get them to hang straight down and actually do their job in supporting the roof above.
My backup plan was to make some slightly thicker pillars, but this time just attach them to chipboard strips which would be tucked away under the overhangs… and let gravity hold everything in place. I reinforced the chipboard with some wooden coffee stirrers to try to limit warping.
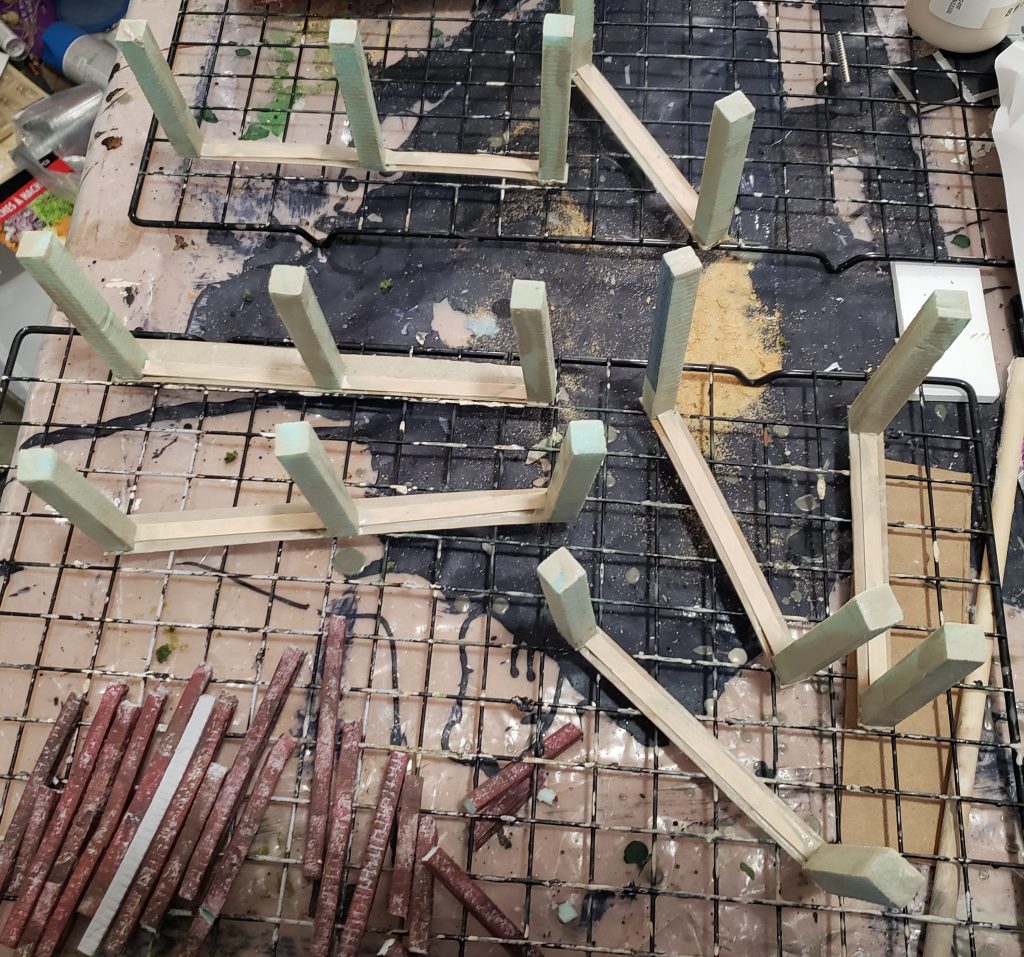
The result was, well, not perfect, as they still require a lot of fiddling at setup time to get them to look close to parallel… but at least it no longer looks like the battle has been raging since long before the heroes arrived.
Signs, signs… everywhere signs!
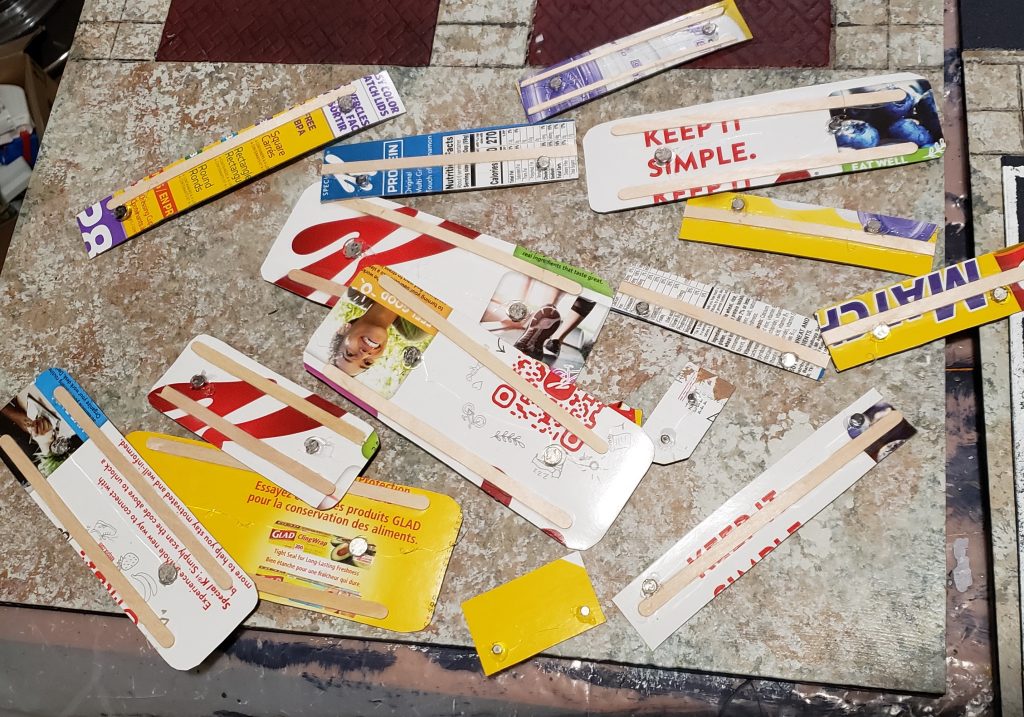
Lastly I just needed some signs to put up so the players can see which local business they’re about to explode. These would be simple as well: printed images stuck to cardboard, with coffee stirrers to suppress warping and magnets to stick ’em on the buildings.
I started by doing some measurements on the open spaces on the fronts of the various buildings and add-ons to get an inventory of the different sizes of sign I could make. I drew out templates for these in LibreOffice Draw, then started assembling logo images, etc. that could be edited in a paint program and pasted into Draw to be sized down to fit in whatever size sign I thought was appropriate.
Coming up with signs that parodied local businesses and chain stores – and just making up a few as well – was probably the most fun part of the build.
The templates and signs I put together are attached below as examples, though of course anyone embarking on a similar project would have to adapt these to fit their dimensions.
With these made I could attach a sign to a structure by simply holding it against the building and placing magnets inside from underneath, letting them snap into position to match the magnet locations on the signs. This scheme resulted in adjustable sign positions and the ability, for instance, to place a billboard on the side of a building.
A tour of the town