I previously built some menhirs and henges for encounters in ritual areas, but an upcoming adventure would benefit from another, simpler kind of ancient stone structures – cairns. Historically these can take many forms, from simple stacked rocks to mark a site to hills built up around stone mausoleums. I wanted mine to be old and rather simplistic – funereal mounds quickly built up to cover the fallen warriors of some forgotten battle on the field where they fell.
I also wanted to get them done quickly, because the scene where I wanted to use them was going to happen in just a few days unless the players chose another direction when the campaign resumed.
Hold the foam!
A dozen or so years ago I bought some foam insulation inserts for my garage doors – the kind you cut to fit into the backs of the panels of the cheap metal doors most houses are built with. In a move that was no doubt suggested by the same consultant who advised the hot dog and bun industries to make it mathematically impossible to buy the two products in matching numbers without buying more than you actually need, the two “fits one door” packages I bought came with one panel fewer than I actually needed.
So I had to buy a third pack and use only two panels of it. When the doors were done I packed the rest into one of the boxes, along with some of the leftover cut pieces from sizing the panels – because, dammit, if they’re making me buy all that extra, I’m going to figure out something to use it for!
Which I never really did.
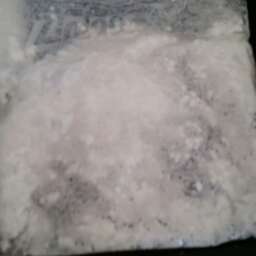
This stuff was that nasty, pill-y variety of styrofoam whose little beads break apart easily. Then the slightest bit of air movement sends them flying absolutely everywhere, at which point they static-cling to every object or surface within a square mile or so. Even after all these years I still find them now and then behind stuff on shelves, stuck under furniture, or hiding in dark corners.
For my cairns I wanted a lot of small, worn “stones” with slight variations in size and shape. I briefly considered chopping XPS, but it seemed like it could become a tedious and time-consuming process to break up enough small pieces and I wasn’t sure the stones-in-a-can texturing method would work well to make the edges less sharply defined for a bunch of tiny bits without breaking a lot of them apart.
Then I remembered that horrible, wonderful foam!

I started by breaking off a few scraps and, determined to keep the spread of little styro-eggs under control, I stuff them into locking plastic bags and began to break them up by hand through the plastic. In very little time I had my assortment of stones.

PVA plus foam pellets: Not a sculpting medium, apparently
For bases I cut some scrap ePVC into roughly 1″x2″ shapes and used a hobby knife to trim around the edges a bit.

My cunning plan to get these done quickly was to dump a bunch of white glue into the bag with the foam bits, mix it all up, then scoop it out and slop it onto the bases in perfect little cairn-shaped piles.
As it turned out, ePVC was the last thing the PVA wanted to stick to. I know it will bond because I’ve white-glued to it before, but while it was wet my mixture insisted on clinging to every finger, tool, or glove I tried to use to shape it. I managed to get some of my Instant Cairn Mix glopped onto each base, but these were far from finished. In fact, they were rough and misshapen, with little jagged bits jutting out all over. But they were on the bases and not on my fingers, so I left them to dry overnight.

When they were dry enough, I picked off the protrusions and thought about how to proceed from here. I needed to break up some more foam anyway as I’d underestimated the volume of little bits that would be necessary, so I abandoned the glue-mix idea and left the next batch dry.
I hit on the idea of hitting the pieces with a spray adhesive and then dipping them into the bag of “rocks” to add layers. Though there was still trimming that needed to be done after each dip, this worked much better, and I was able to place a few foam bits by hand where there were gaps.
Once I was satisfied with the shapes and the glue had set, I mod-podged them and left that to dry.
Not just a pile of rocks
At this point the session where I had planned to use these had already gone by… but luckily the players did, in fact, pursue a different goal. So I had another week!
The next step was to give my mutant mod-podged stone clusters some dry-brushing in a few shades of gray, followed by a dark brown wash. This left them… er, actually, still pretty jumbled looking. Luckily I wasn’t finished yet!
I took some of my grout-and-soil mix and sprinkled it all over the pieces without first having applied any glue – for now I wanted it dry. Using a soft brush I gently dusted the excess off the raised surfaces, leaving it in all the cracks and crevices – almost like a reverse dry-brush.
To activate the grout, I used an eye-dropper to very slowly trickle on a water and isopropyl alcohol mix. The idea was to have just enough flow to run any remaining grit down into the crevices, but not so much that the grout was washed away. I repeated the same process a few minutes later with a PVA and water mix applied the same way. Now my misshapen globs were wet, dirty misshapen globs.

When they dried, though, they were finally starting to look like something!

To finish them up I added a little bit of grass flock. Using an old paint brush I dabbed on some PVA around a lot of the edge area, as well as into some of the spots on the pieces where there were wide patches of grout with no stones showing.

A few sprinkles of color later, and my cairns were ready!
