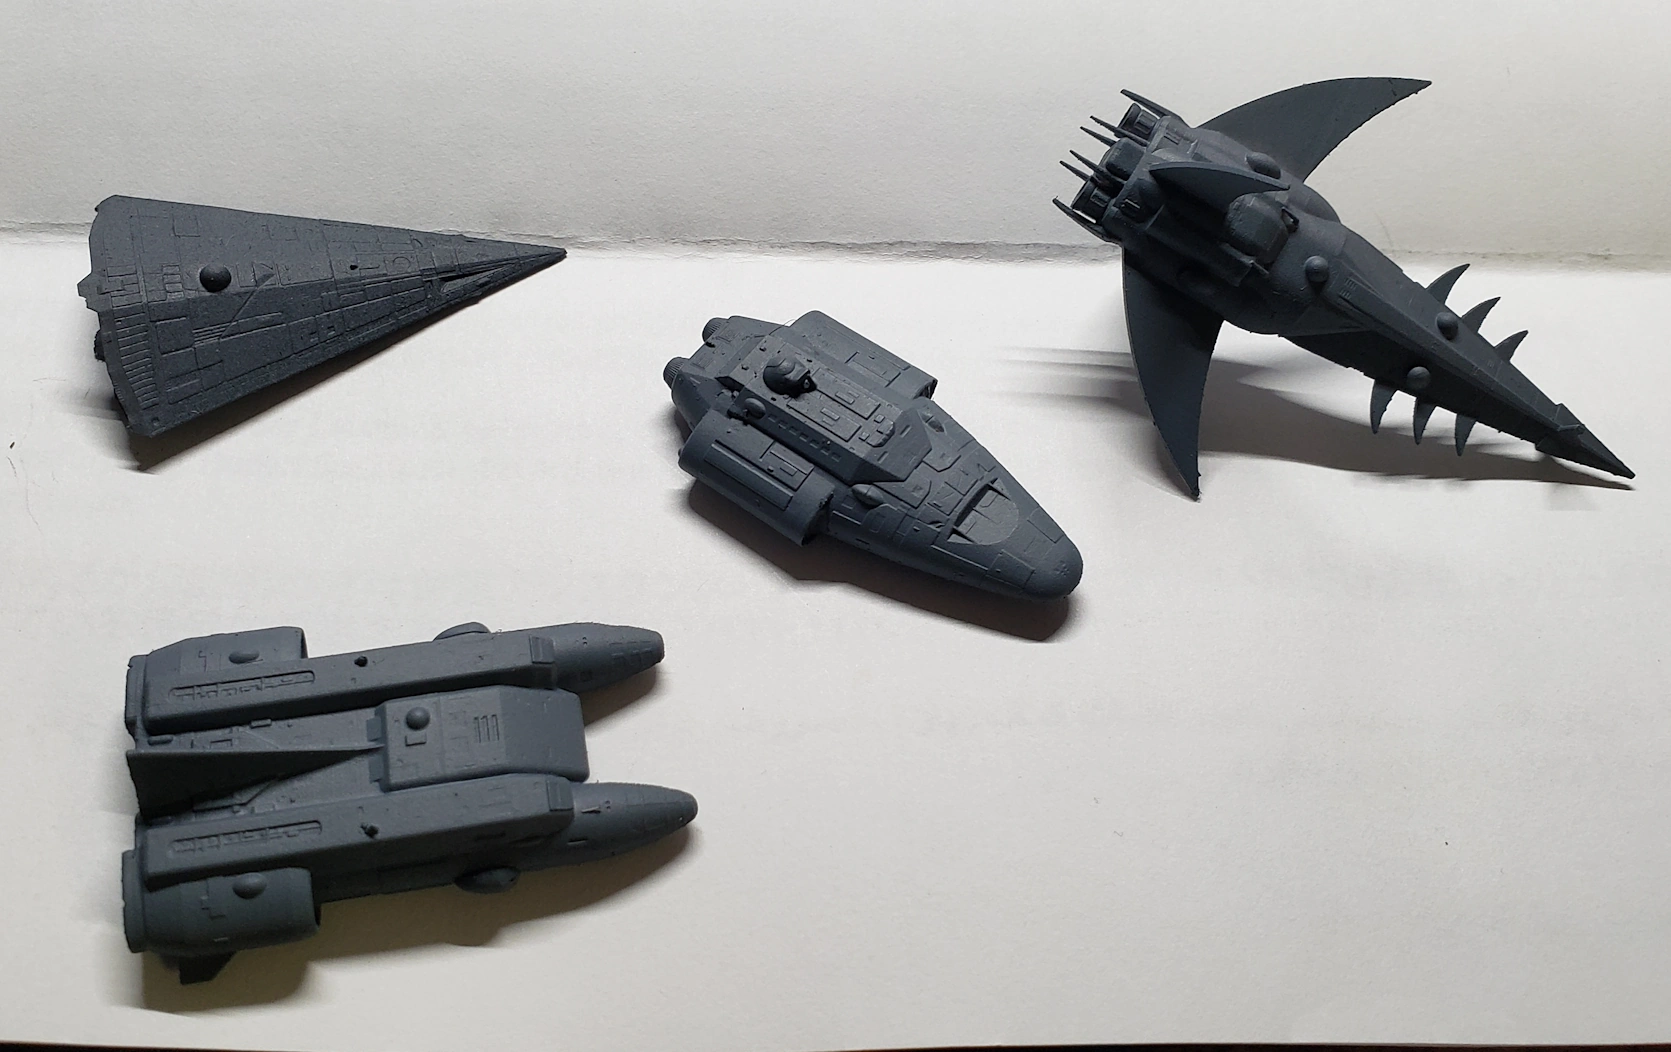
I participated in a Kickstarter a few years back for a giant. playable, 3D printable Scout vessel from Traveller. Sadly, I still don’t own a printer large enough to handle that particular monstrosity… but the Kickstarter also included a wide variety of vessels in a smaller scale. In spite of not really having a gaming-related use for them at the moment, I’d been wanting to print a few of them and try my hand at painting starships for some time now and finally got around to it this spring.
I decided on a Vargr Corsair, a Far Trader, a Free Trader, a Scout, and a Drinaxian Harrier – all ships which have featured in campaigns I’ve played in or am currently playing in. Four of the ships printed fine, but the Harrier came out missing part of a wing. I had used up the last dregs of my resin in printing these, so rather than trying the Harrier again immediately I ordered some resin and set the misprint aside.
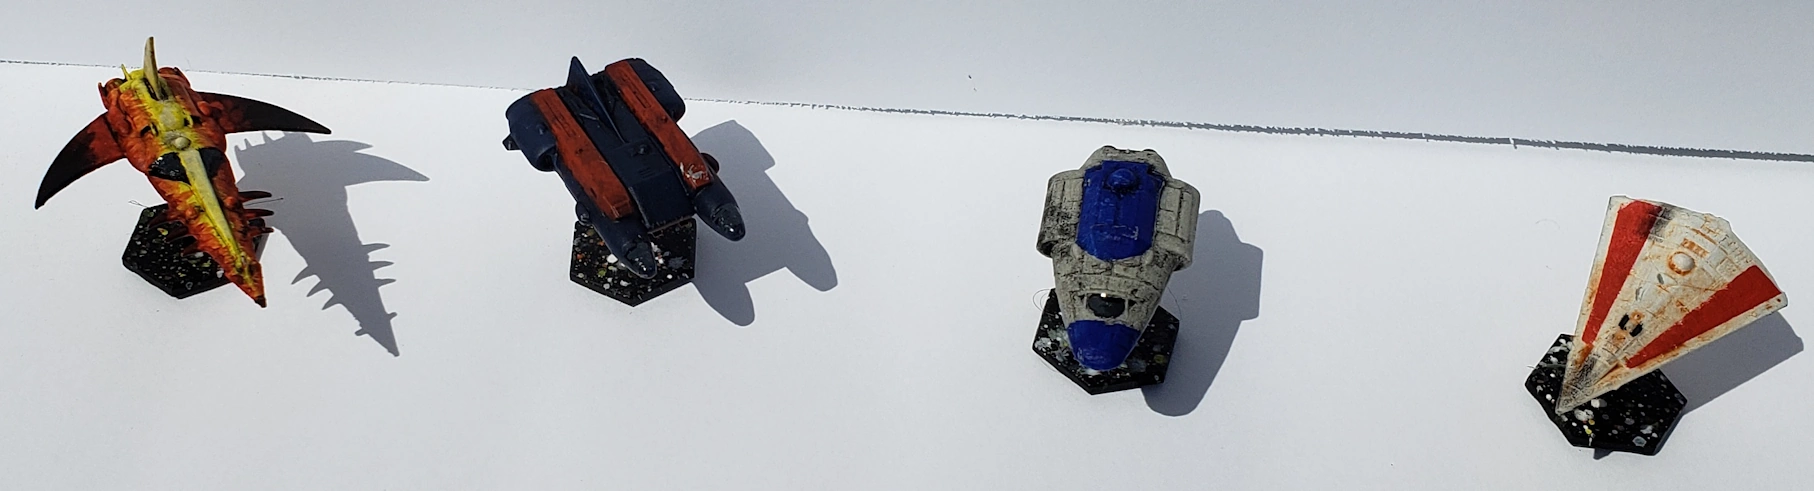
Starships in the Traveller universe are kept in service for a long, long time – sometimes hundreds of years! This meshed well with the “hide your lack of painting skill by making stuff look old and beaten up” strategy I apply to most projects. I started by spray priming the ships, then applied a different base color to each one. I used some Tamiya masking tape to mask off stripes and different colored sections on three of them and dabbed on the new colors with a sponge. I deliberately (I decided afterward) left some spots un-dabbed to help create the illusion of old paint that had been scraped, peeled, or faded over time. The Vargr ship was to be a little more colorful – I tried out a fire motif on that one, with not-entirely-horrible results.
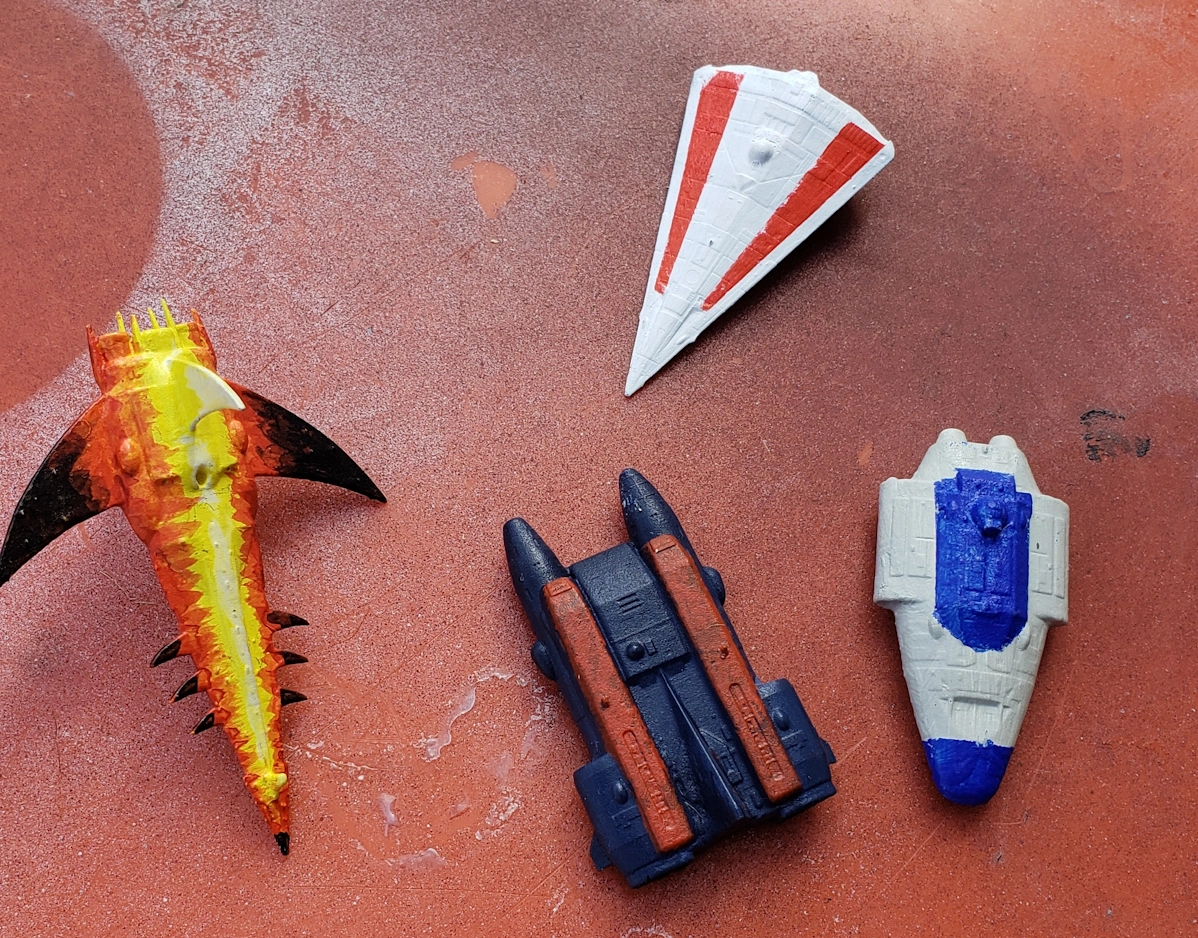
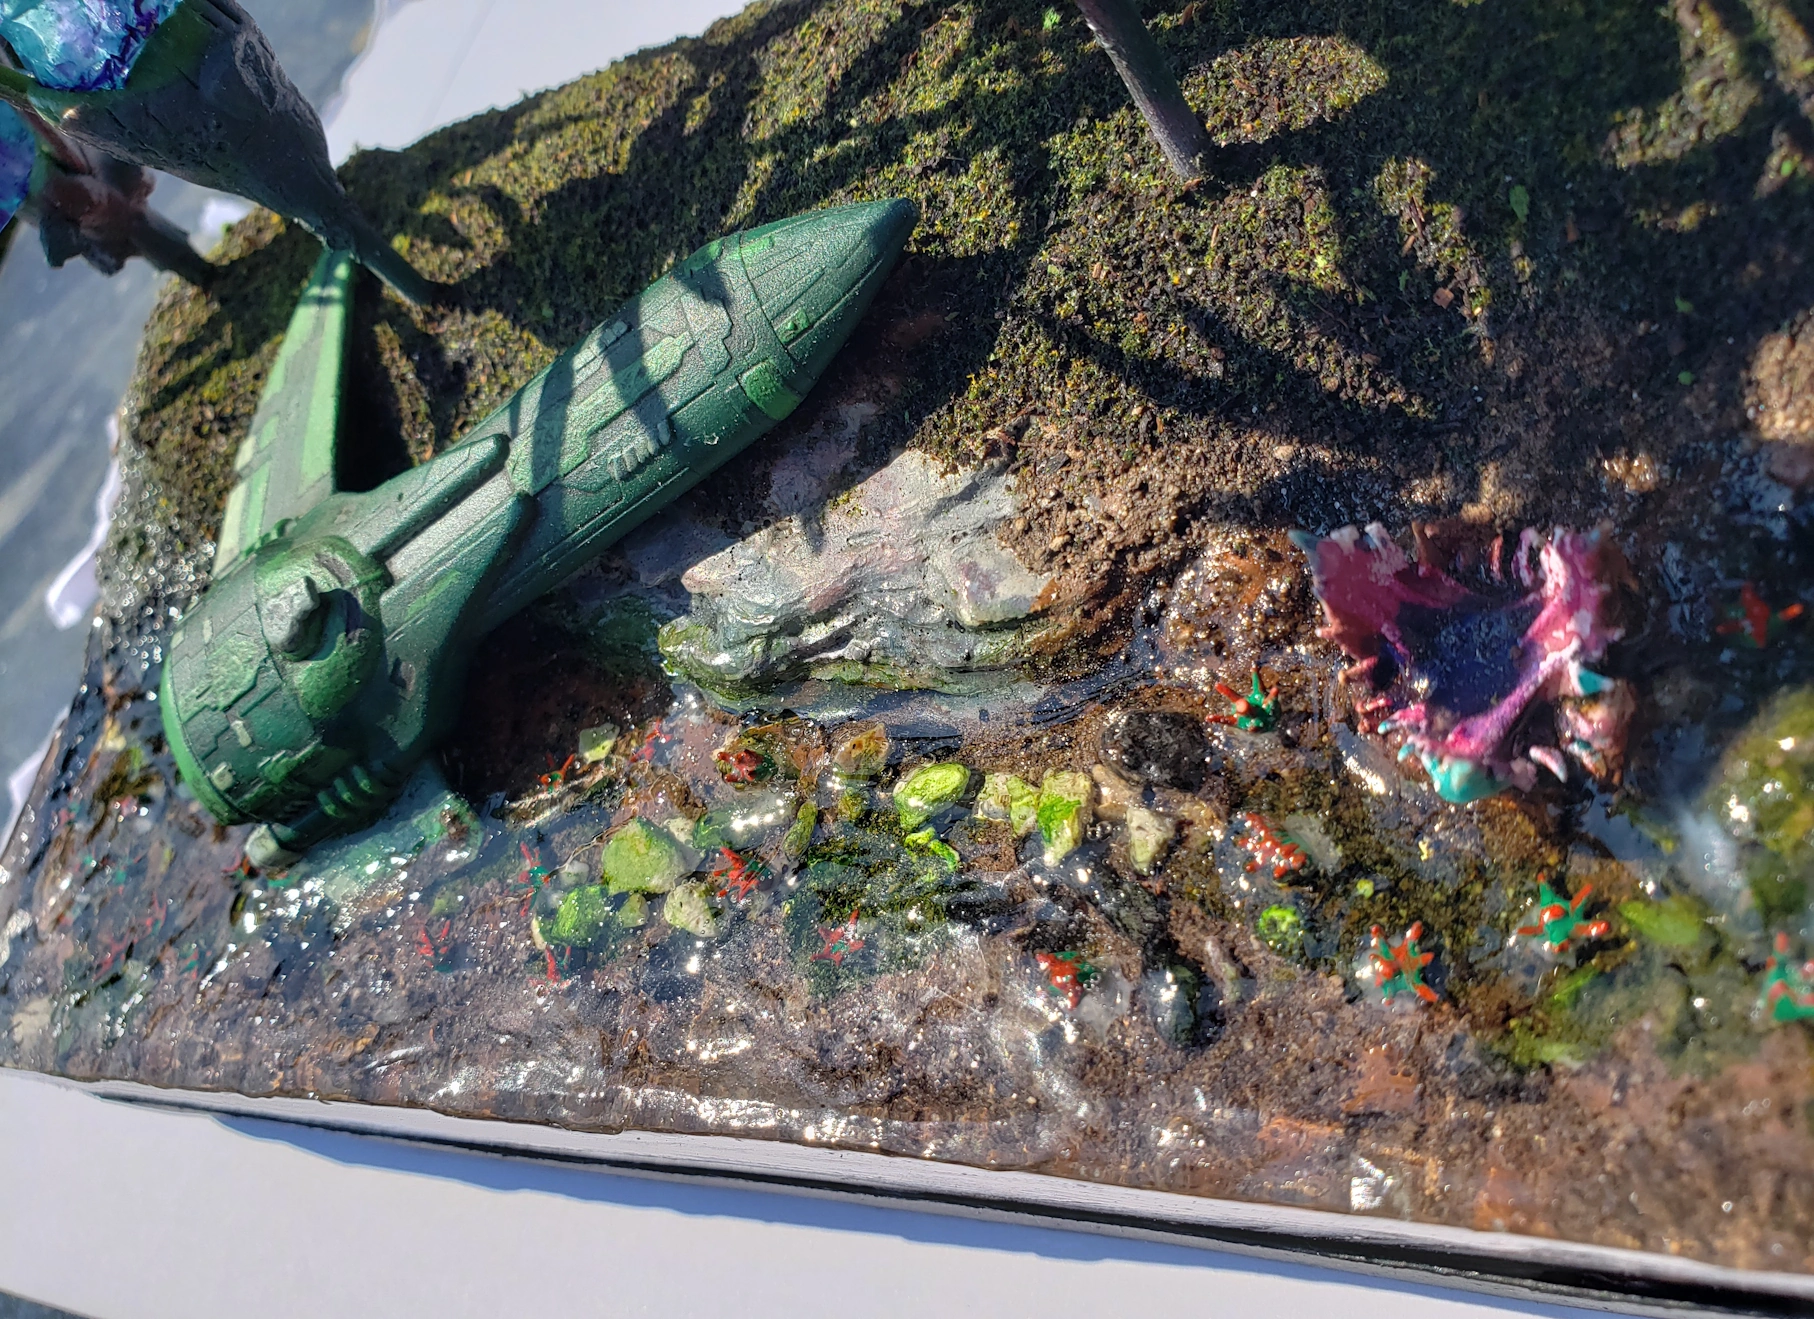
Then they were treated to oil washes to bring out the details and make them look grubby, and a few dabs of pigment powder added scorch marks, perhaps from encounters with hostile vessels. Some bases were painted black and spattered with a few colors of paint to simulate a colorful starry background.
Sometimes a Diorama Just Happens
While painting the other ships, my gaze kept drifting back to the lonely, damaged Harrier sitting nearby. I’d noticed that the supports from the bases I’d printed looked an awful lot like some kind of little alien plant life. That reminded me that I had STLs for some other alien-looking plants that I’d been meaning to find a use for. Before I knew it, there was glued-together stack of XPS foam and I was test-fitting objects onto it.
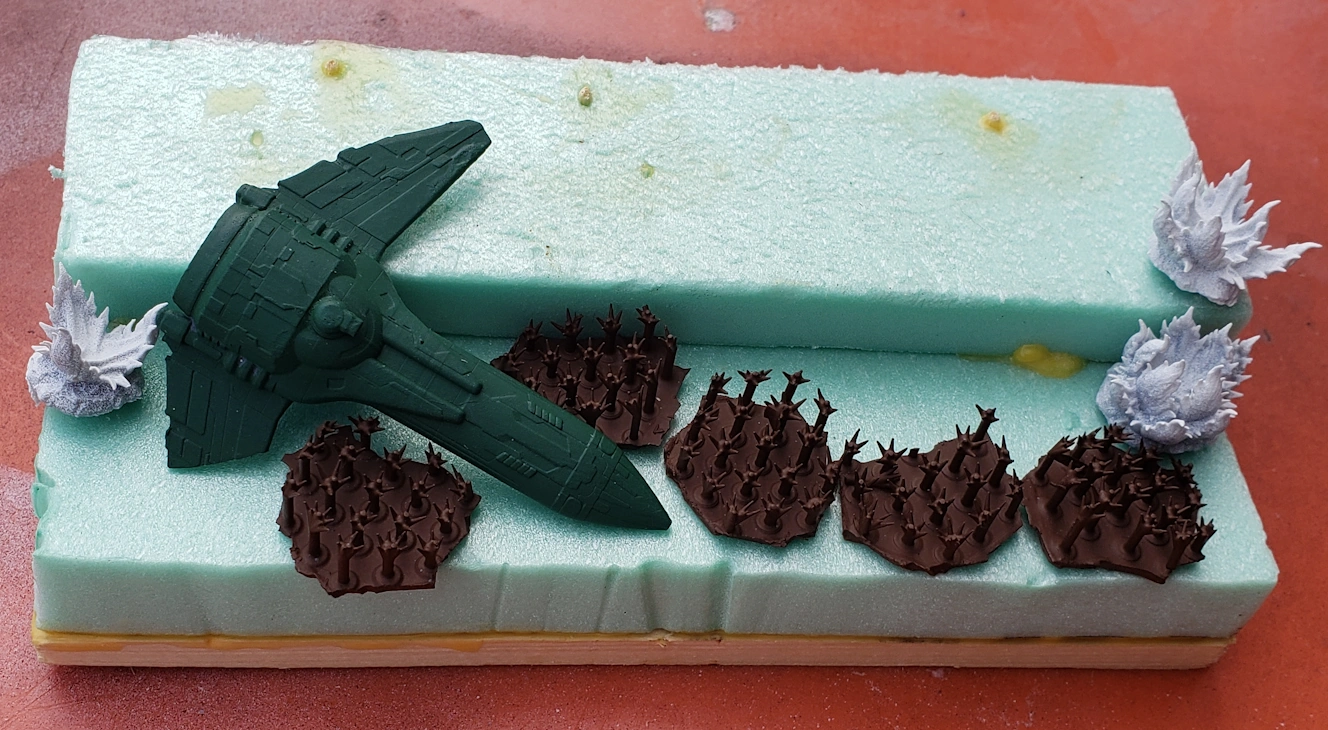

With some initial layout decisions made, the larger of the low-lying plants were glued in place and a plaster-and-paper mix was applied to shape the landscape a bit. It dried a little chunky, but I didn’t worry too much about that because there would be more layers of “stuff” applied that would help mask it. This base was coated with brown craft paint.
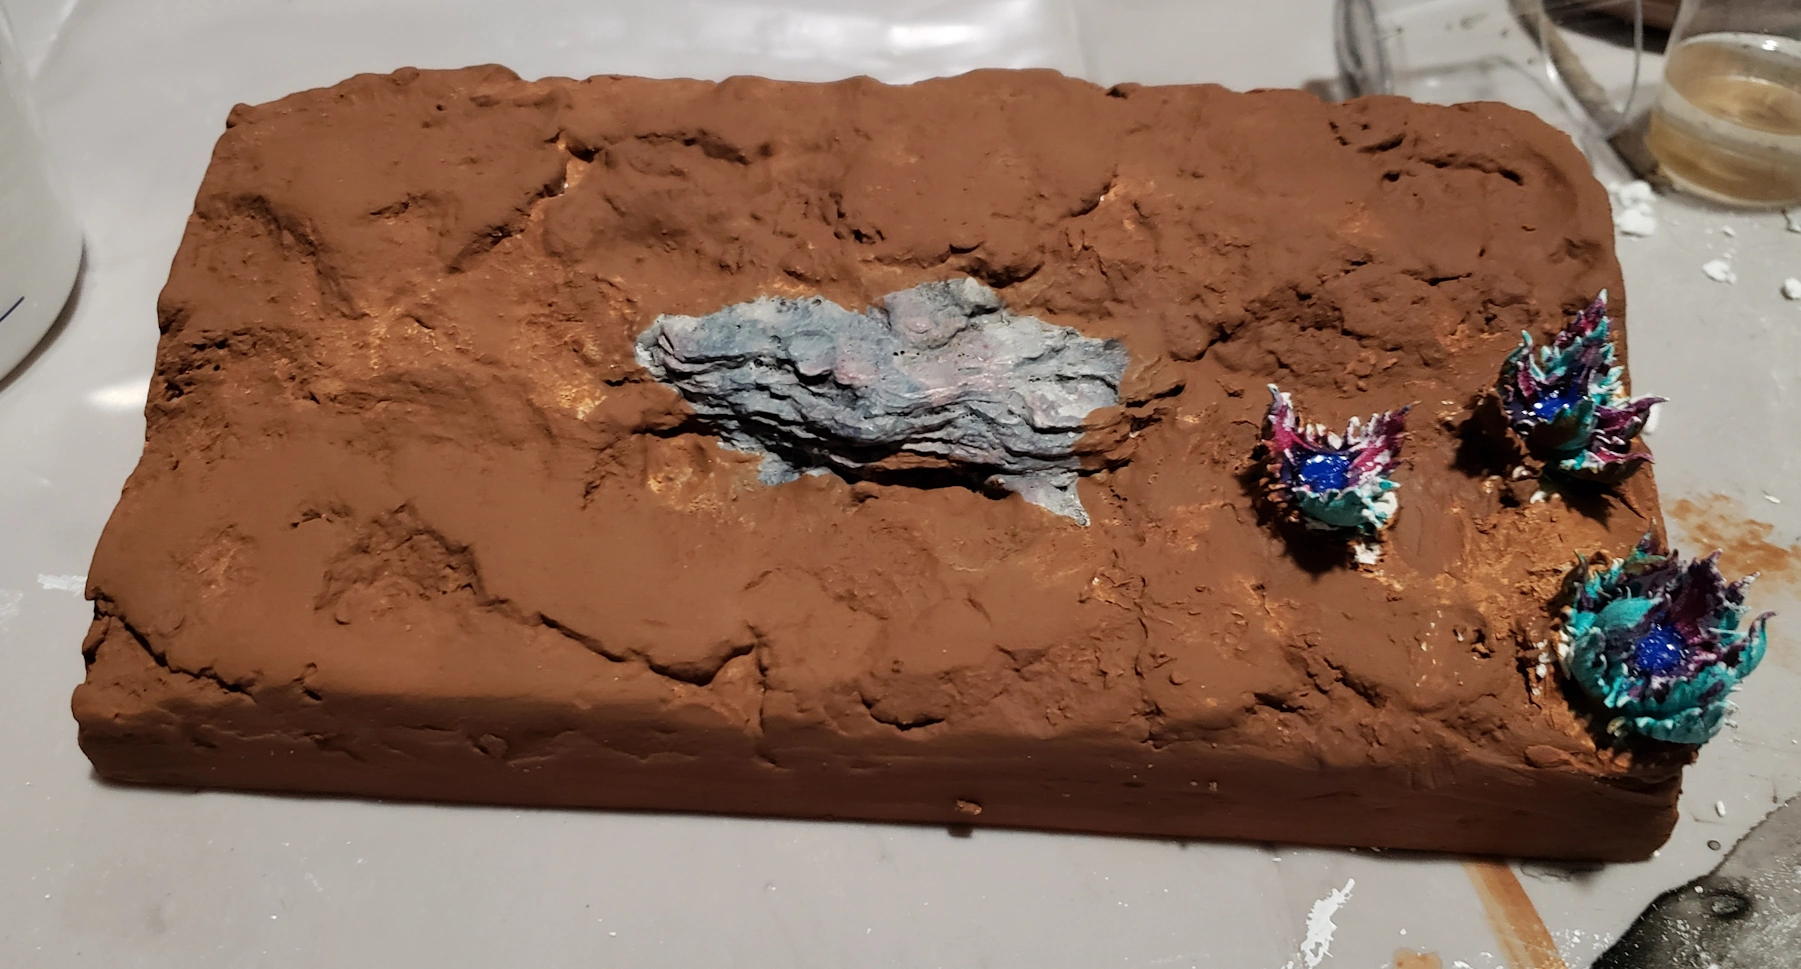
The upper tier was covered with a mix of dried coffee grinds, tea leaves, and green flocking material, the lower area with a mix of grout and soil. A scattering of stones was glued over the grout section, and a bit of green wash was dabbed on the lower area to create an algae effect.
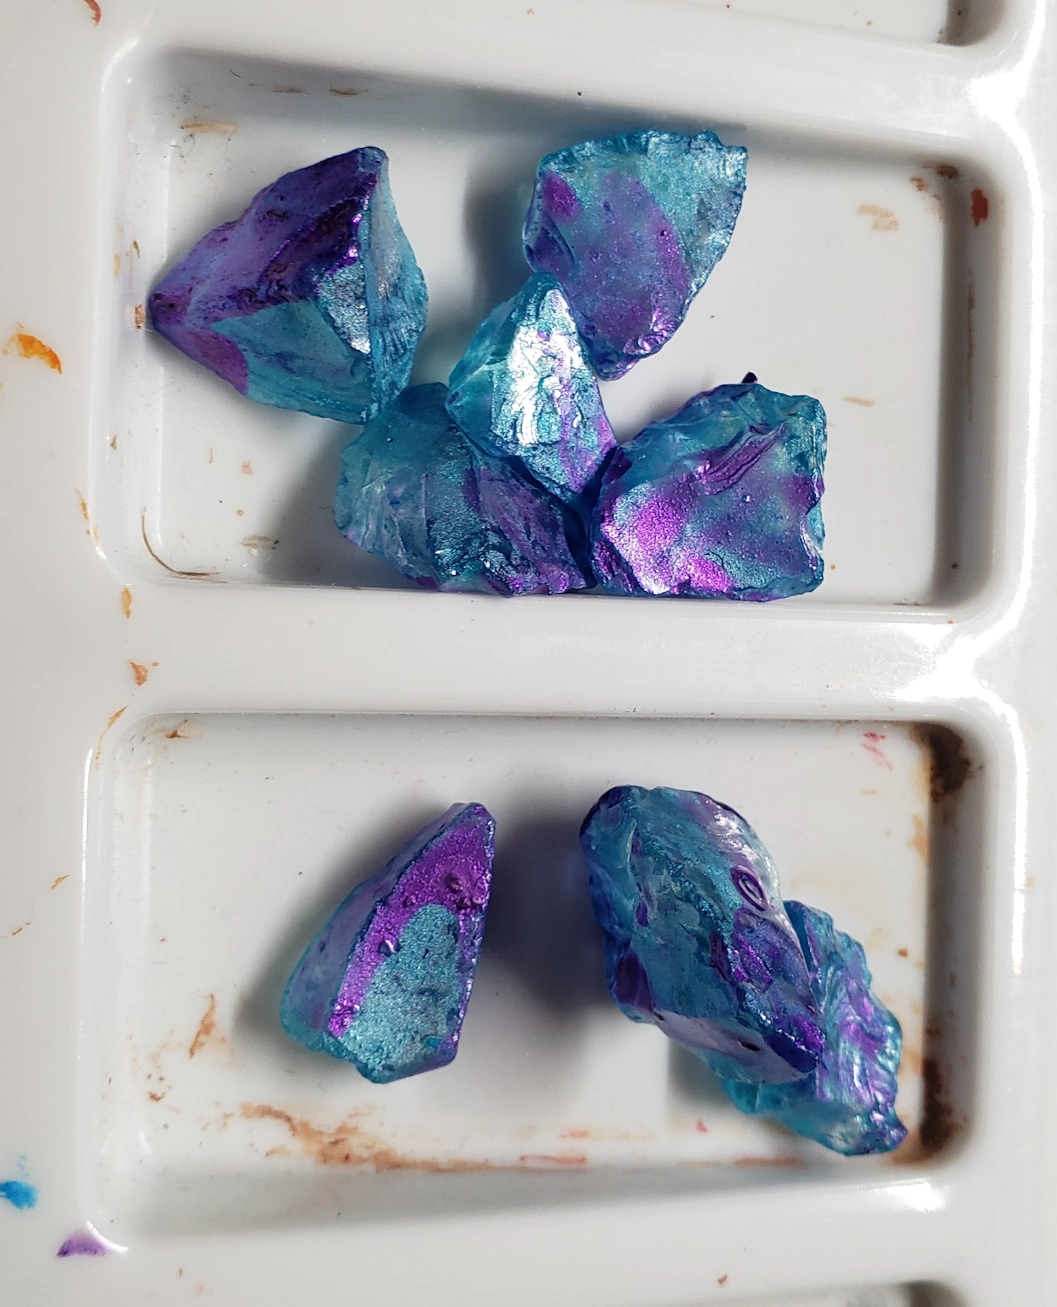
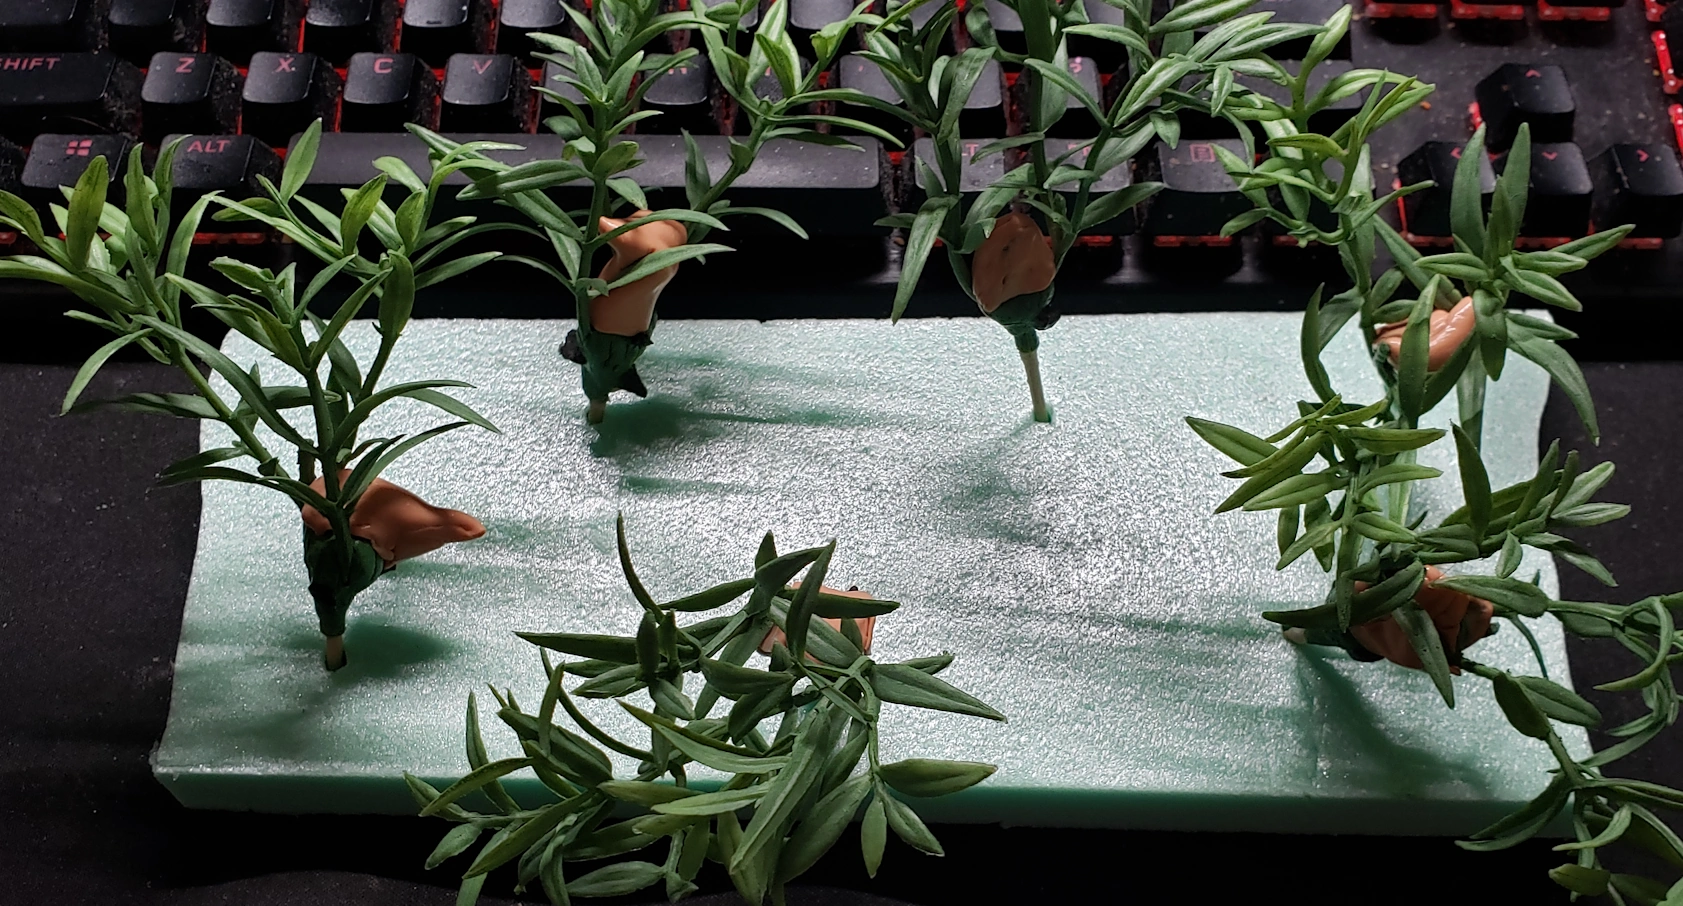
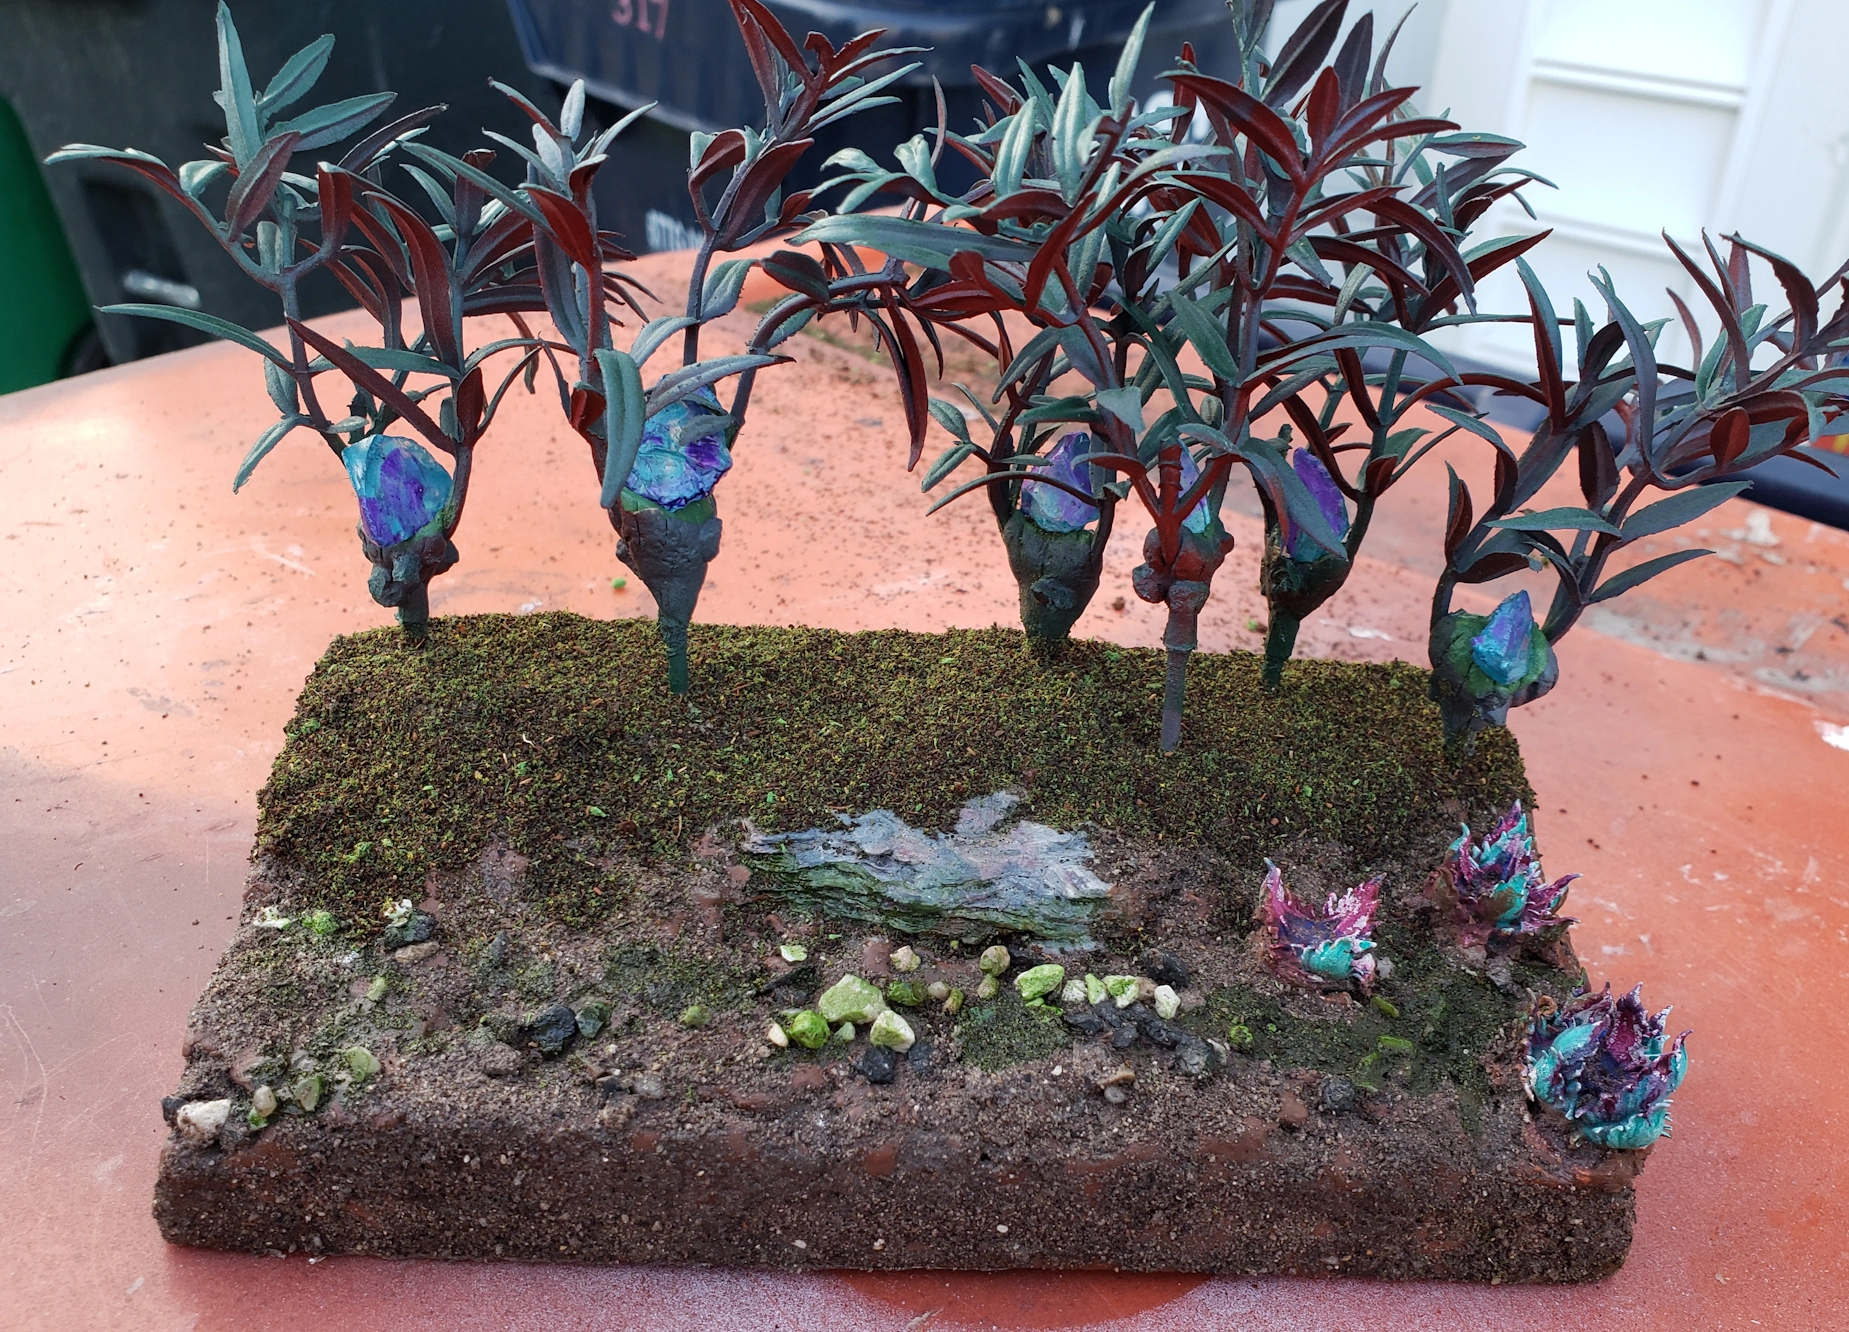
Next I wanted to make some trees with a decidedly non-Terran look. I wanted them to have some sort of pods growing from them, and I had some dollar-store translucent blue glass things around which looked pretty cool with a little bit of purple ink dribbled over them. The main structures of the trees would be bits broken off of some clearance-sale fake plant bits I’d picked up at a local Michaels store at some point, with thin wooden dowel glued into the opening at the base to provide a pointy end to jam into the diorama base. Green Stuff was added at the intersection of branches on each stalk and wrapped around glass bits to hold them in place. Once that had dried, I covered the exposed glass areas with Silly Putty to protect them from sprayed paint. I didn’t want the glossy and uniformly medium green look of the plants as they’d come from the store, so after a white primer I sprayed on a dark red from below and then green from above.
Holes were poked in the base and trees were glued in place, leaving me with something that looked like this:
Remember those little stalks I mentioned, from the supports on the bases? Those were painted in place on the flat sections they were attached to, then clipped off individually and pressed into place. Then it was time to paint the ship itself, missing wing or no. With everything glued in place and thoroughly dried… it was resin time!
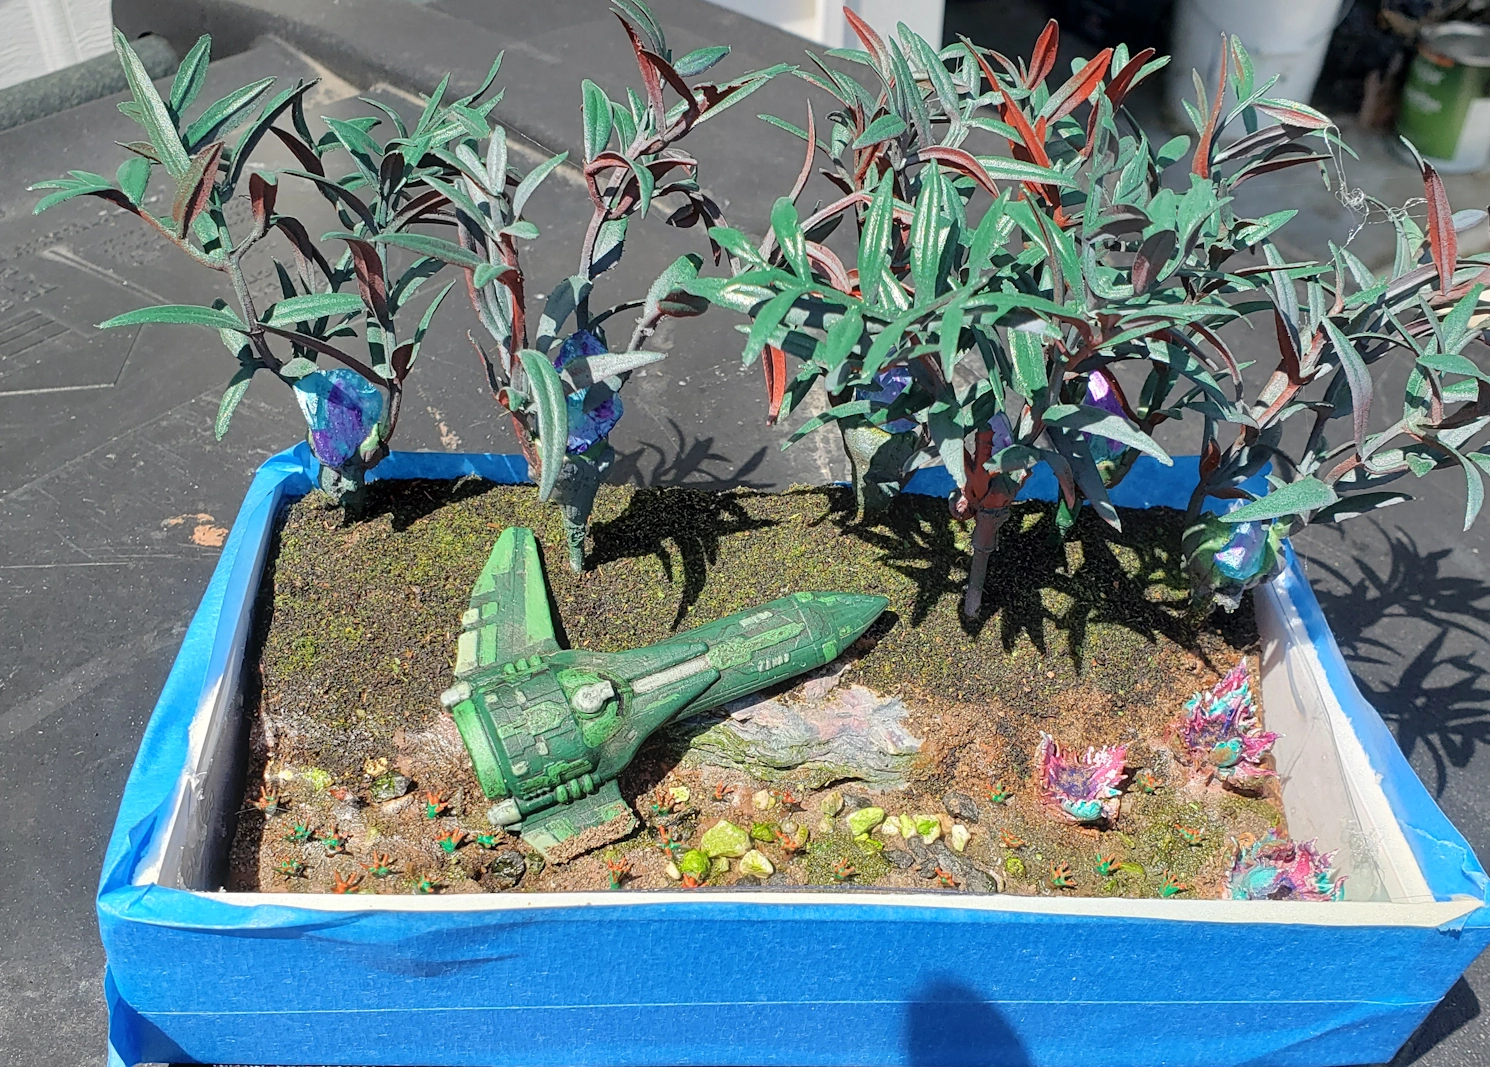
This was only my second attempt at resin, but the walls I built around the base managed to hold it in place with minimal leakage. After giving the resin a full (and probably overkill) 48 hours to set, I created some surface texture by dribbling some gloss Mod Podge on the surface and blowing it around a bit with a straw.
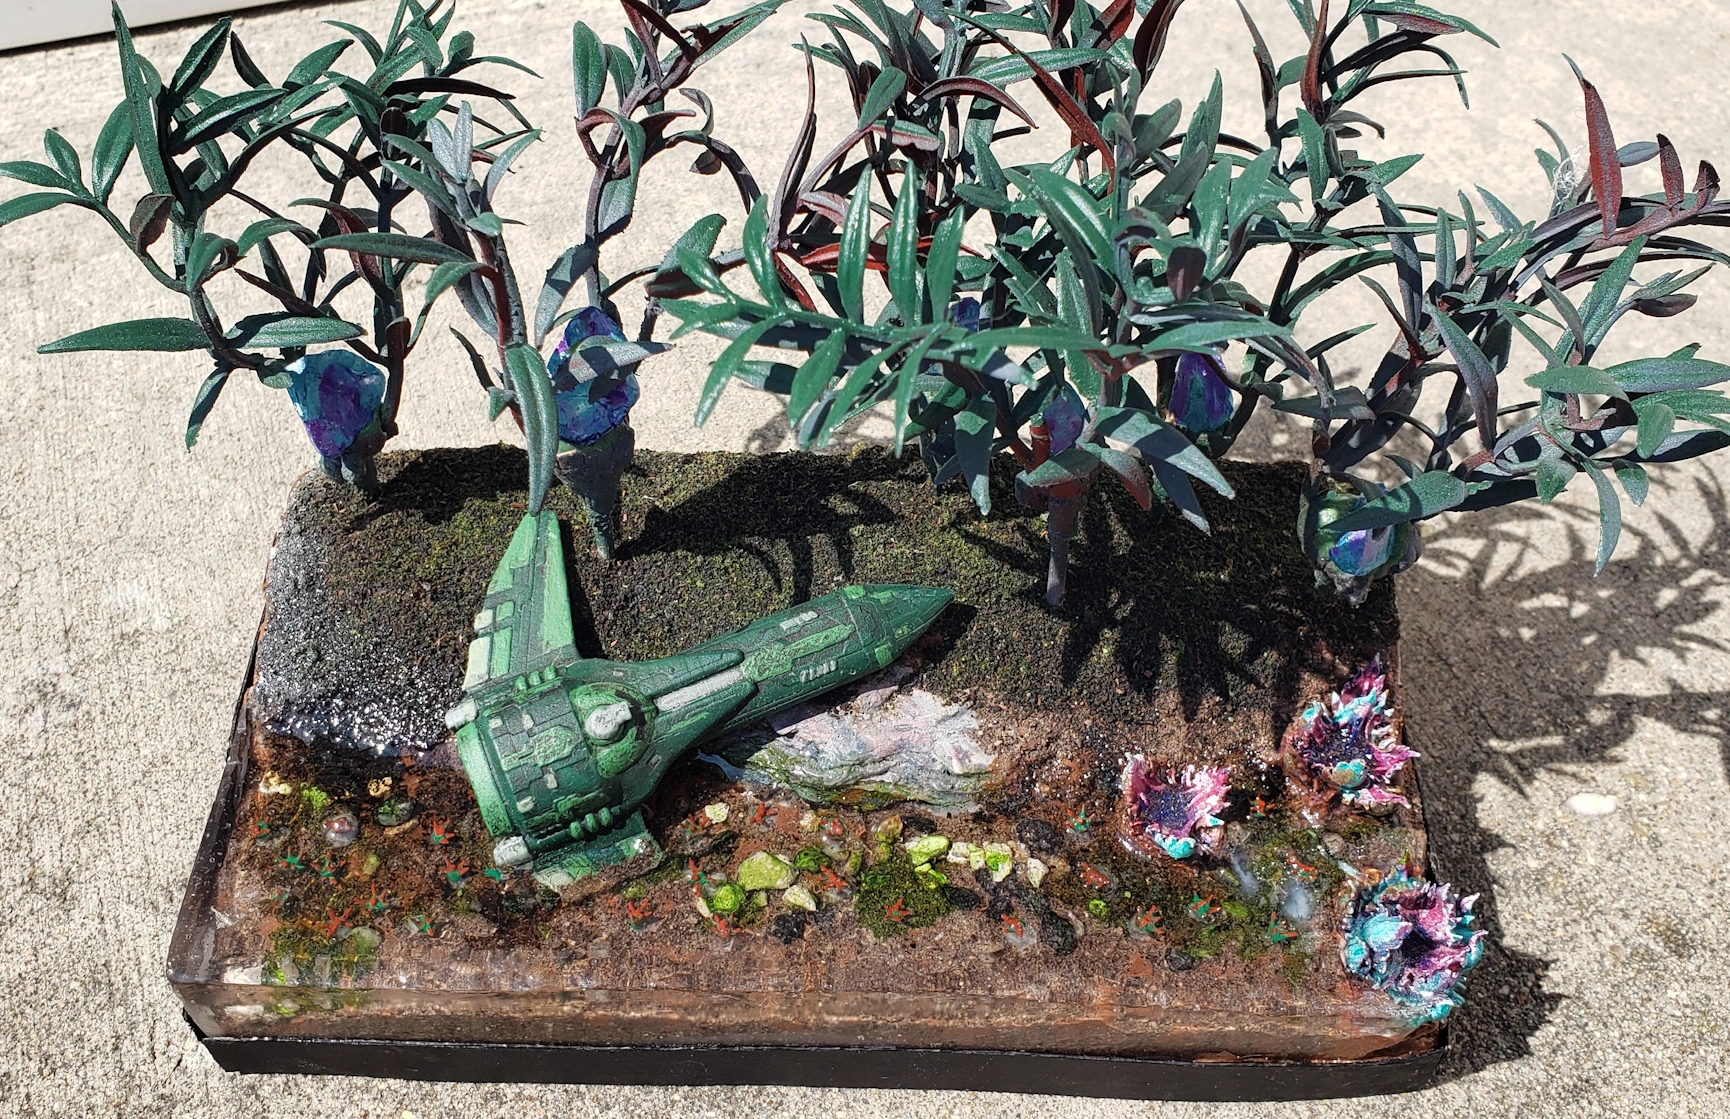
The Final Result
Pingback: Blog updates and Too Many Projects Syndrome – (Re) Turning (to) the Tables