The Homebrewery is a tool that’s been around for a while that’s geared primarily toward helping users making home-brewed rules, items, creatures, etc. for D&D to create nicely formatted documents in the styles of some of the official manuals. Rather than presenting a feature-rich graphical user interface, it relies on a simplistic text formatting language called Markdown, which involved While it’s far from a full-blown publishing platform, it’s very useful for small projects. It also allows those with the knowledge and inclination to customize the styling.
I used HB to format the encounter I wrote for the Write Your First Encounter course last year. When I decided to expand it to cover other systems, I discovered that someone had already created a close-enough template for a Pathfinder 2e version, but the only existing option for EZD6 publishing was to learn a publishing package called Scribus with templates someone had designed for that system. Rather than take that approach, I decided to tinker with customizing a Homebrewery page.
The first step was to make sure this was okay to do under the OpenEZD6 license! From my reading of it, I thought what I was doing was permissible, but I wanted to be sure. I checked with DM Scotty and he said it was fine so long the OpenEZD6 logo was displayed on any items created with it for commercial use. (While I couldn’t force the logo onto a document, I could provide a shortcut to include it.) I copied a collection of the graphics out of the PDF copy of the manual and got to work on a layout with heavily modified CSS styling to create a look similar to the original source material.
What resulted is a three-page document that describes how to use the template, while being itself the actual template!

A Very Brief How-To
I’m not going to attempt a Markdown tutorial here – lots of others have done that already. Rather, I’ll attempt a short overview of how to create a copy of the document to serve as a starting point for editing your own creation.
If you don’t have an account in Homebrewery, you’ll need to create one and will have to be logged in to copy and edit the document.

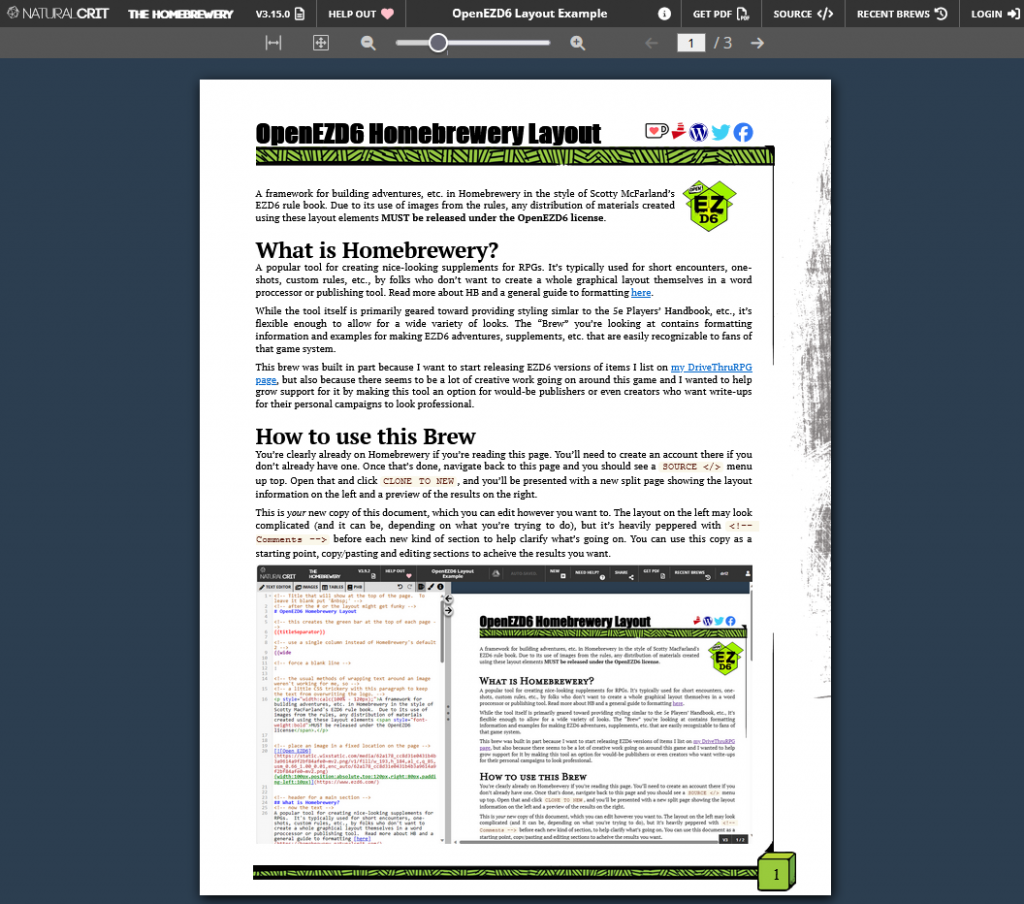
Start by going to this link, where you should see a page like the image above. In the upper right, you’ll see a menu item labeled “Source </>”. Expand that and click “Clone to New”. Now you’ll have a copy of the document you can save to your account – which I recommend doing right away before you change anything.
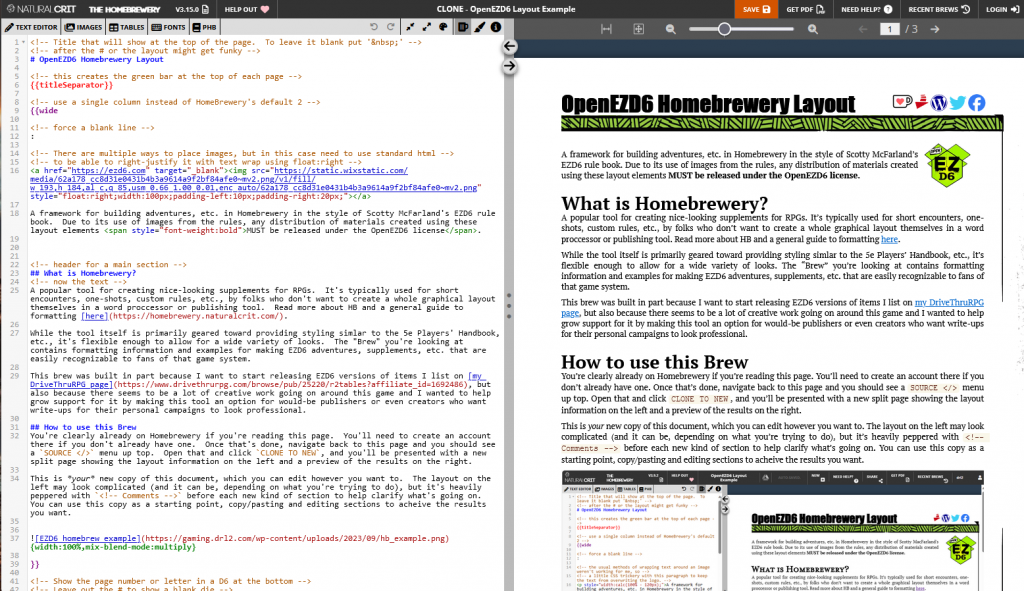
Your new view of the document will show a wall of text on the left and the layout it creates on the right. You’ll see lots of comments (denoted in the format “<!– comment –>”) that will describe each section and any seemingly weird stuff that’s going on. For the rest… well, this is where you’ll need to look into those Markdown tutorials!

From here you can start editing, copy/pasting stuff around, and using the provided examples to create your own document!
Pingback: Blog Updates and Too Many Projects Syndrome – (Re) Turning (to) the Tables