With the basics in hand, it was time to plan our first gaming session. Characters were created, NPCs were rolled up, and some henchmen were hired (or, in this case, brainwashed) to participate in the first adventure of a series that I’d decided to organize in chapter form.
Now we needed a way to represent all those moving participants on the gaming surface as they interacted with each other. We looked at a lot of the scale figurines available thinking that we’d find a few that were close enough to the looks envisioned for the player characters, but it seemed nobody could find something close enough to the look they wanted. We thought about buying a set of those flat colored glass blobs that can be found at a lot of craft stores and using those, but a) I’d have to end up taping notations to all of them to be able to track who was who, and b) I didn’t want my game surface to look like a cheap Etsy jewelry store.
So I went out to the garage and dug into the Magical Semi-Organized Junk Drawer of Miscellaneous Leftover Stuff and dug out what ended up being our solution: washers! I had a handful of 1″ washers left out there from some project or another, which were a perfect fit for the 1″ square grid we’d be playing on. When I found I needed more, I grabbed a 30-pack from the local hardware megastore for $7-something – I’m sure they can be found online for less. I also grabbed a cheap organizer box (similar to this) with adjustable sized compartments to store everything in.
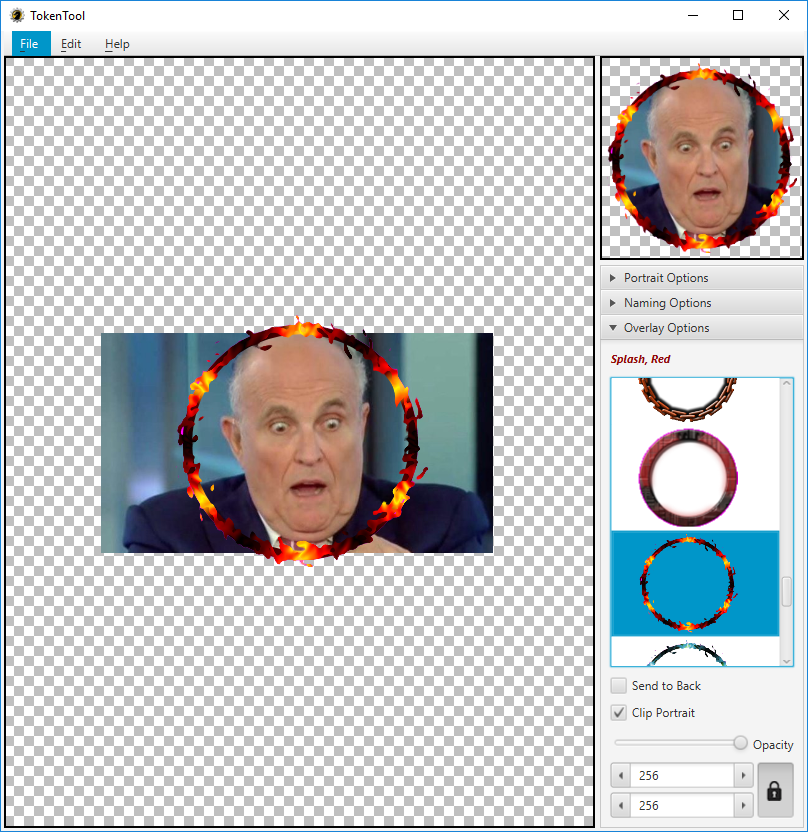
So my plan was to print a sheet of little 1″ tokens, cut them out, and glue them to my washers. The discovery of a piece of software called TokenTool greatly simplified this effort, as it allowed me to select from a list of pre-defined borders (with many others to be found online), paste in any picture and resize it to fit, and output a round token with everything outside the border trimmed off.
For images to fill the tokens I drew from Google Images (mostly simplistic images, by searching for “<some subject> icon”), a few simple logos created with big decorative fonts, and a bunch of bits copied from the Adventure Counters files at the Monkey House Games download page.
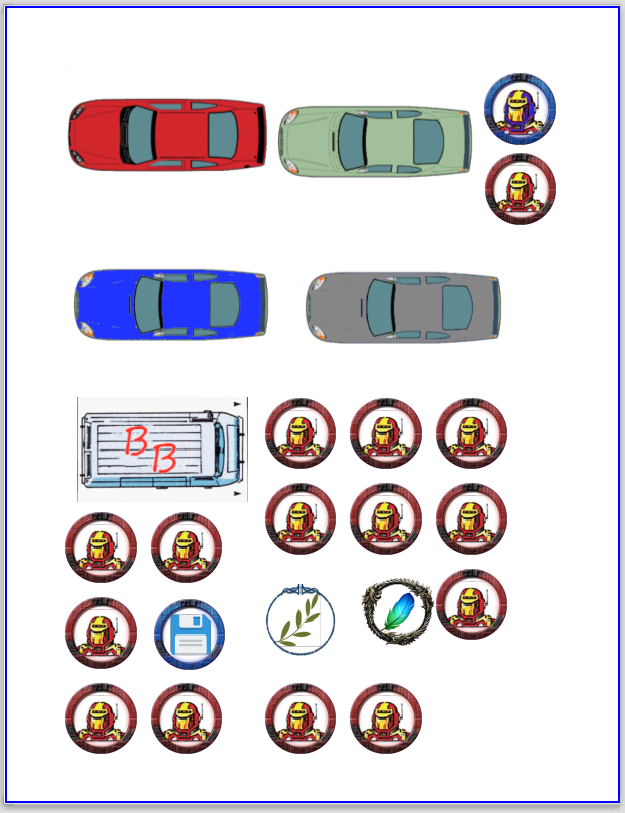
Once I’d created a bitmap for each token I would need one or more of, I pasted each one into my word processor (LibreOffice, if it matters), set the size of the image to 1″, and, if I needed multiples of that token, simply copy-paste as many of the resized version into the document as needed. Since my planning for future adventures was well ahead of my token production, I was able to make all the tokens needed for the first several sessions, which ended up in documents looking like this:
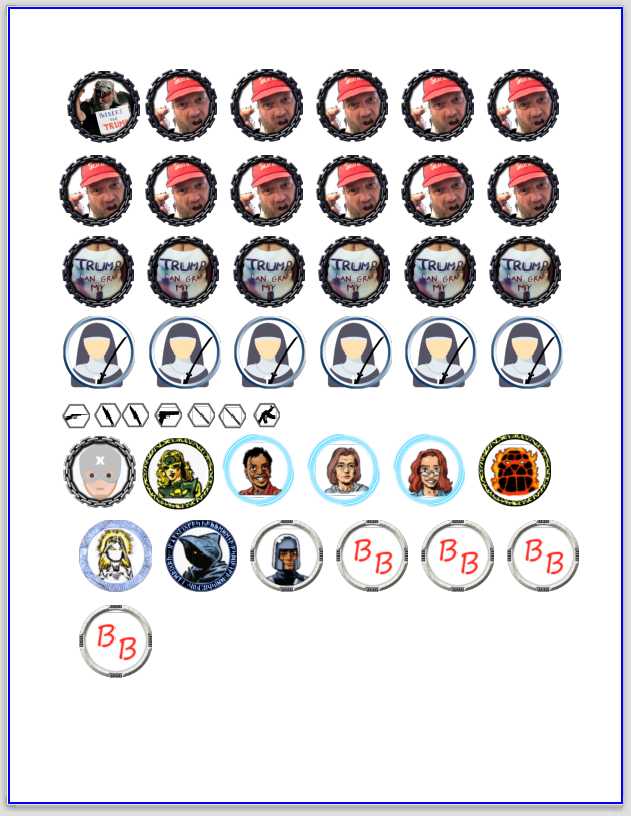
(Sharp-eyed observers will note a row of tiny weapony-looking icons above… I’ll go into more detail on that in a future post.)
Of course at this point my color printer – because it is in fact a demon from hell like all its brethren – decided that although its ink cartridges were new, it was entirely out of yellow ink and would not print even in black-and-white until I remedied the problem. Fortunately I had an old laser printer as a backup, so my first round of tokens were printed without color on some old card stock I had lying around.

Cutting out the little round circles proved an annoyance, so I looked for a 1″ hole punch. Local craft stores carried a bunch of different sizes and patterns of punches in their scrapbooking sections, but nobody had the 1″ circle I needed so I had to grab one online.
With a few glue sticks in hand (not the ones labeled “washable” at the back-to-school sale at Walmart, but the crafters’ glue sticks back in the hobby supply section – a cheap 4-pack) and my hole punch I was able to create all the tokens we would need for our first few adventures. The car tokens were cut out by hand and usually had 2-3 spare smaller washers glued under them to save the 1″ ones for characters. Punch out the picture and glue it to a washer; lather, rinse, and repeat; and after the glue had dried I hand-wrote numbers in bright colors onto the ones for which I’d created multiples, so during game play it would be easy to reference which was which.
Four sessions in as of this writing and they’ve worked out well. We’ve even developed a system for identifying status effects on them – more on that later.